Master the Boiler Replacement Process with Ease
Boiler replacement is often seen as a daunting project, and with good reason. A poorly performing system can waste a surprising amount of money each year, with older boilers running at just 60% efficiency compared to over 90% for modern models. Most people focus on choosing a shiny new unit, but few realise that the secret to a smooth, cost-effective switch lies in the careful steps you take before the installer even arrives.
Table of Contents
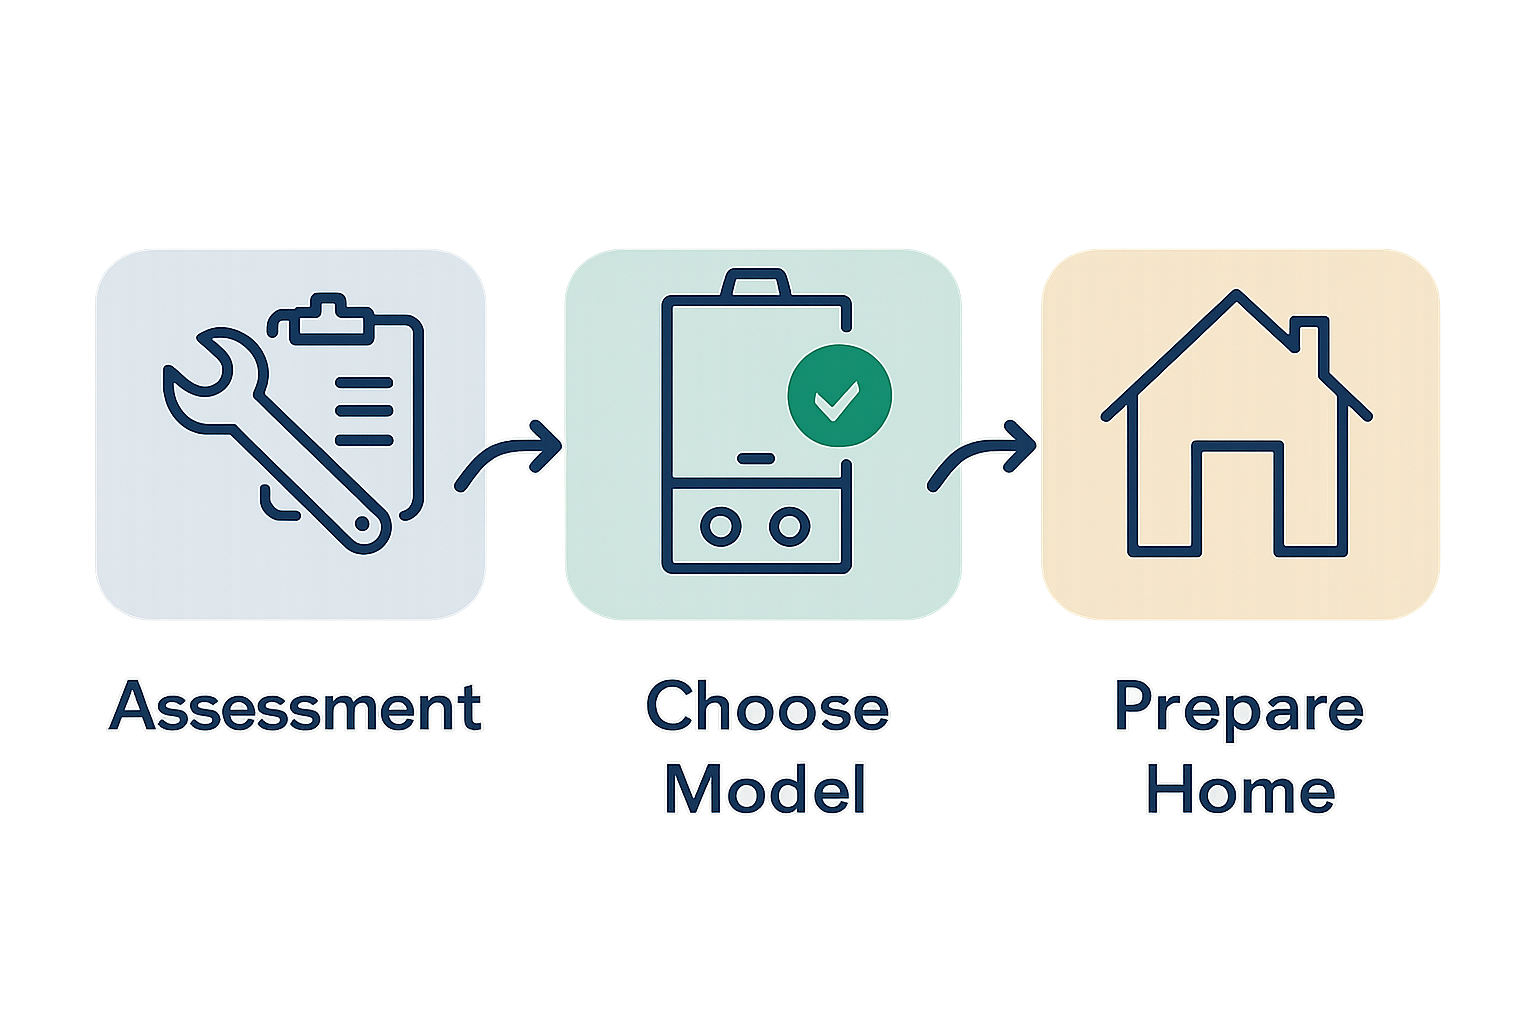
- Step 1: Assess Your Current Boiler And Heating Needs
- Step 2: Choose The Right Replacement Boiler Model
- Step 3: Prepare Your Home For Installation
- Step 4: Remove The Old Boiler Safely
- Step 5: Install The New Boiler And Connect Utilities
- Step 6: Test And Verify Boiler Functionality
Quick Summary
| Key Point | Explanation |
|---|---|
| 1. Assess your current boiler’s condition | Evaluate age, efficiency, and performance indicators to determine if replacement is necessary. |
| 2. Choose the right boiler model | Select a boiler type that fits your household’s heating needs and space requirements while considering efficiency ratings. |
| 3. Prepare your home for installation | Clear the installation area, check existing pipework, and protect your home’s interior to ensure smooth installation. |
| 4. Ensure safe removal of the old boiler | Follow proper disconnection procedures and professional guidelines to safely remove the old boiler without hazards. |
| 5. Test the new boiler comprehensively | Conduct thorough testing to verify proper functionality, safety, and efficiency of the newly installed boiler. |
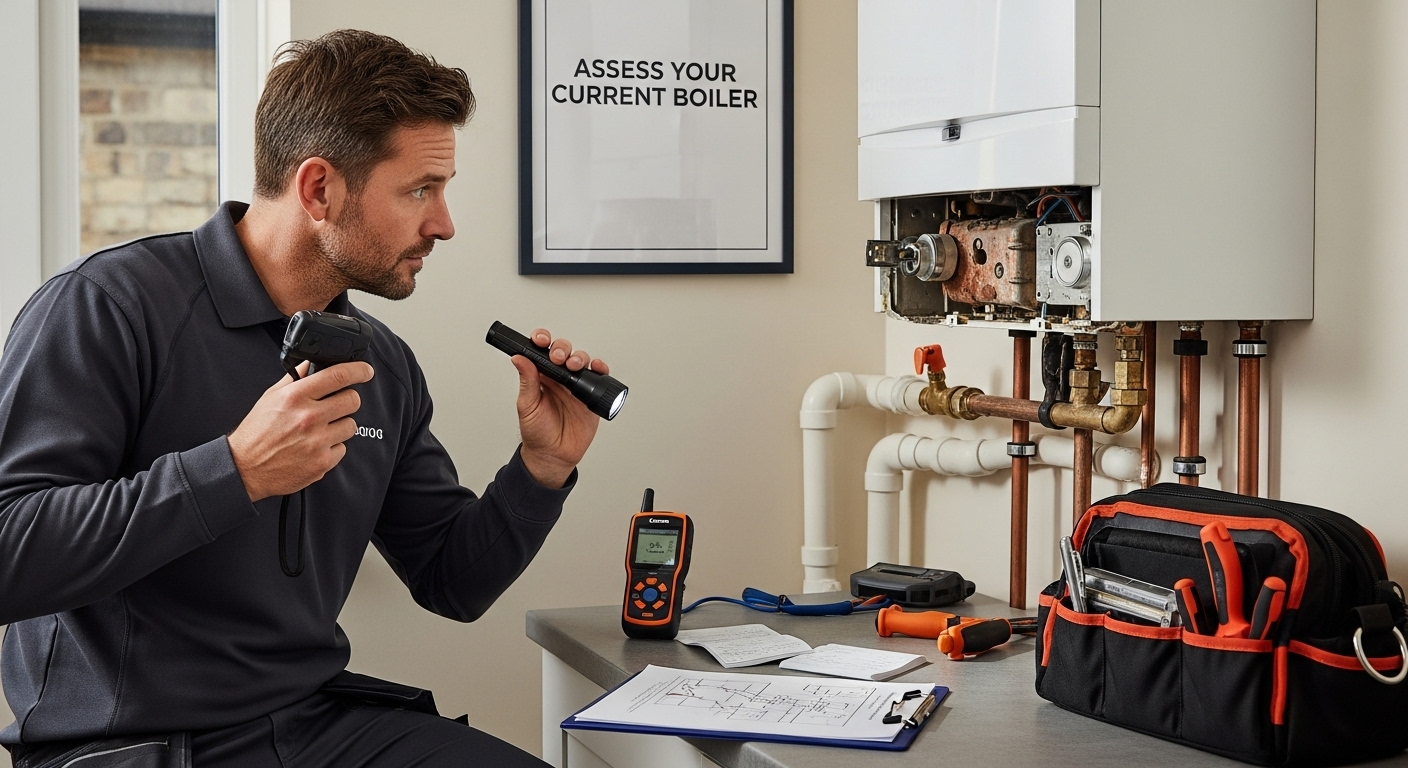
Step 1: Assess Your Current Boiler and Heating Needs
The first critical phase of the boiler replacement process involves a comprehensive assessment of your current heating system. Understanding the precise condition and performance of your existing boiler will determine whether replacement is necessary and help you make informed decisions about future heating solutions.
Begin by examining your current boiler’s age, efficiency, and operational history. Most boilers have a typical lifespan of 10 to 15 years. If your system is approaching or has exceeded this range, it likely operates at reduced efficiency and consumes more energy than modern alternatives. Pay close attention to warning signs such as inconsistent heating, unusual noises, frequent breakdowns, or rising energy bills.
Carefully inspect your boiler for visible signs of wear or damage. Look for rust, corrosion, water leaks, or carbon scoring around the combustion area. These indicators suggest potential internal degradation that could compromise system safety and performance. A professional assessment from a Gas Safe Registered engineer provides the most accurate evaluation of your boiler’s condition.
Your home’s specific heating requirements also play a crucial role in determining the appropriate replacement. Consider factors like property size, insulation quality, number of radiators, and your household’s hot water consumption. These elements directly influence the type and capacity of boiler most suitable for your needs. For instance, a large family home will require a different system compared to a compact apartment.
Our comprehensive guide on boiler installation can help you understand the nuanced considerations involved in selecting the right heating solution. Modern condensing boilers offer significantly improved energy efficiency, potentially reducing your annual heating costs and carbon footprint.
Documenting your current system’s specifications becomes essential. Gather information about your existing boiler’s make, model, output rating, and fuel type. This data will prove invaluable when consulting with heating professionals and obtaining replacement quotes. Take photographs of your current installation and note down any specific installation constraints or unique requirements in your property.
Successful completion of this assessment phase means you have a clear understanding of your current heating system’s limitations, your household’s specific requirements, and the potential benefits of a new boiler installation.
Step 2: Choose the Right Replacement Boiler Model
Selecting the appropriate boiler model represents a pivotal decision in your replacement journey, directly impacting your home’s comfort, energy efficiency, and long term running costs. The right choice requires carefully balancing your household’s specific heating and hot water requirements with technological capabilities and budget constraints.
Modern boiler technology offers three primary configurations: combi boilers, system boilers, and regular boilers. Combi boilers provide instant hot water without requiring a separate cylinder, making them ideal for smaller properties with limited space. System boilers integrate the heating and hot water components within the unit, connecting directly to a storage cylinder. Regular boilers work best in larger homes with multiple bathrooms, featuring separate hot water cylinders and cold water storage tanks.
Consider your household’s specific characteristics when making this selection. Single occupants or couples in compact apartments might find combi boilers most suitable, while larger families with simultaneous hot water demands could benefit from system or regular boiler configurations. Pay close attention to factors like available installation space, existing pipework, and potential future changes in household composition.
To help you decide which type of boiler best suits your home, the table below compares the three main options discussed in the article.
| Boiler Type | Suitable For | Key Features | Efficiency |
|---|---|---|---|
| Combi Boiler | Small homes, flats, couples | Instant hot water, no separate cylinder required | 90–95% |
| System Boiler | Medium homes, families | Requires hot water cylinder, good for simultaneous use | 90–95% |
| Regular Boiler | Large homes, multiple bathrooms | Needs both hot and cold water tanks, best for high demands | 90–95% |
Energy efficiency ratings play a crucial role in your selection process. Modern condensing boilers typically achieve efficiency ratings between 90% and 95%, significantly reducing energy consumption compared to older models. Look for boilers with high seasonal efficiency ratings, which indicate performance across varying temperature conditions. The higher the rating, the lower your potential energy bills and carbon emissions.
Our boiler installation quote service can help you navigate the complexities of selecting the most appropriate model for your specific requirements. Professional heating engineers can provide tailored recommendations based on an in depth assessment of your property.
Budget considerations extend beyond the initial purchase price. Factor in installation costs, potential system modifications, and projected long term running expenses. While high efficiency models might present higher upfront investments, they frequently deliver substantial savings through reduced energy consumption. Warranty coverage and manufacturer reputation should also influence your decision, ensuring reliability and comprehensive support throughout your boiler’s operational lifespan.
Successful completion of this step means you have a clear, informed understanding of the boiler model best suited to your home’s unique heating requirements, setting the foundation for an efficient and cost effective heating solution.
Step 3: Prepare Your Home for Installation
Preparing your home for boiler installation represents a crucial phase that ensures a smooth, efficient replacement process. This preparatory stage involves multiple important considerations that can significantly impact the overall success of your heating system upgrade.
Begin by clearing substantial workspace around your existing boiler location. Professional installers require unobstructed access to remove the old unit and position the new boiler. Measure and create a clear zone of at least two metres surrounding the installation area, removing furniture, decorative items, and any potential obstacles. If your boiler is located in a cupboard or tight space, consider temporarily relocating stored items to facilitate easy equipment movement.
Carefully review your property’s current pipework and radiator configuration. Some boiler replacements might necessitate modifications to existing plumbing systems. Inspect visible pipework for signs of wear, corrosion, or potential leakage. Old pipework may require upgrading to ensure compatibility with your new heating system. Professional installers will conduct a comprehensive assessment, but identifying potential issues beforehand can streamline the installation process.
Protect your home’s interior surfaces by laying down protective coverings such as dust sheets or cardboard. Installation work can generate debris, dust, and potential minor scratches. Cover flooring, nearby furniture, and create a clear path for installers to move equipment through your property. This preparation minimises potential damage and demonstrates consideration for the installation team.
Use this checklist before installation day to ensure your home is fully prepared for a smooth boiler replacement.
| Preparation Task | Details/Guidance | Completed (Yes/No) |
|---|---|---|
| Clear installation area | Remove obstacles and create at least two metres of workspace | |
| Review pipework and radiators | Inspect for corrosion or leaks; identify if upgrades are needed | |
| Protect surfaces and create clear pathways | Use dust sheets or cardboard to cover floors and furniture | |
| Gather documentation | Collect warranties, service records, and technical specifications | |
| Arrange for attendance and pet safety | Ensure someone is present and pets are kept clear of the area | |
| Check and ensure good ventilation | Open windows and provide airflow during and after installation |
Our annual boiler servicing experts recommend gathering all relevant documentation related to your current and new heating systems. This includes manufacturer warranties, previous service records, and technical specifications. Having these documents readily available helps installers understand your property’s specific heating history and requirements.
Consider practical logistics surrounding the installation day. Arrange for someone to be present throughout the entire process, typically requiring a full working day. Ensure pets are safely contained or removed from the installation area to prevent disruption and potential safety risks. If you have specific scheduling constraints or access requirements, communicate these with your installation team in advance.
Ensure your home has adequate ventilation during and after installation. New boiler systems might produce dust and temporary odours during setup. Open windows in the installation area to maintain air circulation and create a comfortable working environment for the installation professionals.
Successful completion of this preparation phase means your home is fully ready for a professional, efficient boiler replacement, minimising potential complications and ensuring a smooth transition to your new heating system.
Step 4: Remove the Old Boiler Safely
Removing an old boiler requires meticulous planning, professional expertise, and strict adherence to safety protocols. This critical stage of the boiler replacement process demands careful execution to prevent potential hazards, property damage, and legal complications.
Before initiating the removal, completely disconnect the power supply to your existing boiler. This involves switching off electrical connections at the main circuit breaker and isolating gas supplies. Only a Gas Safe Registered engineer should handle gas disconnections, as improper separation can create significant safety risks. Attempting to disconnect gas connections without professional qualifications is not only dangerous but potentially illegal.
Professional engineers will systematically drain the existing heating system, removing water from radiators and pipework. This process prevents potential water damage during boiler removal and allows for comprehensive system assessment. The drainage procedure requires specialized equipment and expertise to ensure minimal disruption and complete water extraction.
Physical removal of the old boiler involves carefully disconnecting all associated pipework, electrical connections, and mounting fixtures. Experienced professionals will methodically label and document existing connections, facilitating smoother installation of the new system. They will also assess the condition of surrounding infrastructure, identifying any additional repairs or modifications required before new boiler installation.
Our boiler repair specialists recommend comprehensive documentation of the removal process. Photograph the existing installation location, note any observable wear or damage, and retain records of the old system’s specifications. These details can prove invaluable for future maintenance or potential insurance claims.
Responsible disposal of the old boiler is crucial. Professional removal services will ensure environmentally compliant disposal, recycling applicable components and managing potentially hazardous materials according to current regulations. Some metal components can be recycled, reducing environmental impact and potentially offsetting disposal costs.
Careful consideration must be given to the removal site’s condition. Professional engineers will clean the installation area, repair any minor damages, and prepare the space for new boiler mounting. This might involve repairing wall surfaces, checking structural integrity, or addressing any legacy installation issues discovered during the removal process.
Successful completion of this step means your old boiler has been safely, professionally, and systematically removed, creating a clean, prepared environment for your new heating system installation.
Step 5: Install the New Boiler and Connect Utilities
The installation of your new boiler represents a critical moment in the replacement process, requiring precision, expertise, and meticulous attention to technical details. Professional Gas Safe Registered engineers will systematically mount the new unit, ensuring optimal positioning and secure integration with your home’s existing heating infrastructure.
Initial positioning involves precise mounting of the boiler, taking into account ventilation requirements, accessibility for future maintenance, and compliance with current building regulations. Proper wall mounting is crucial, with engineers selecting appropriate fixings that can support the boiler’s weight and withstand vibration during operational cycles. The mounting location must provide adequate clearance for ventilation, access panels, and potential future servicing requirements.
Connecting utility services demands exceptional technical skill. Gas connections require absolute precision, with engineers using specialized tools to create leak-free junctions that meet stringent safety standards. Electrical connections must be carefully integrated, ensuring compatible voltage and amperage specifications. Water connections involve precise pipework modifications, potentially including updates to existing plumbing to accommodate the new boiler’s specific configuration.
Flue installation represents another critical component of the process. Modern condensing boilers typically require specific flue positioning to ensure optimal performance and emissions management. Engineers will carefully assess external wall or roof locations, ensuring proper angle, length, and positioning to facilitate efficient gas expulsion and prevent potential moisture accumulation.
Our boiler installation quote service recommends comprehensive system testing immediately following utility connections. This involves pressurizing the heating system, checking for potential leaks, verifying electrical connections, and conducting initial operational tests to confirm proper functionality across various performance parameters.
Insulation and pipe connections demand particular attention. Any exposed pipework will be carefully insulated to minimize heat loss and improve overall system efficiency. Engineers will ensure all connections are correctly sealed, preventing potential water leakage and maintaining the integrity of your newly installed heating system.
The final stage involves comprehensive system calibration. Professional installers will configure temperature settings, pressure levels, and operational parameters to match your specific household requirements. This precise calibration ensures optimal performance, energy efficiency, and longevity of your new boiler installation.
Successful completion of this step means your new boiler is professionally installed, fully connected, and ready for comprehensive testing and final commissioning.

Step 6: Test and Verify Boiler Functionality
Testing and verifying your new boiler’s functionality represents the culmination of the replacement process, ensuring that your investment delivers optimal performance, safety, and efficiency. This critical stage involves comprehensive diagnostic procedures that go far beyond simple operational checks.
Professional engineers will initiate a systematic testing protocol, beginning with pressure system verification. They will carefully monitor system pressure levels, checking for consistent stability across different operational temperatures. Unexpected pressure fluctuations could indicate potential installation issues or underlying system complications that require immediate attention.
The combustion analysis forms a crucial component of functionality testing. Specialized diagnostic equipment measures exhaust gas composition, ensuring the boiler burns fuel with maximum efficiency and minimal environmental impact. Engineers will assess oxygen levels, carbon monoxide concentrations, and overall combustion quality, making precise adjustments to optimize performance and safety.
Heat distribution testing involves monitoring radiator temperatures, checking for consistent warmth across all connected heating zones. Engineers will systematically verify that each radiator heats uniformly, identifying and addressing any potential circulation issues. This process ensures your entire heating system operates at peak efficiency, delivering comfortable and consistent temperatures throughout your property.
Our annual boiler servicing experts recommend comprehensive electrical system checks. This involves verifying control panel functionality, testing safety switches, and confirming that all digital interfaces and temperature management systems operate correctly. Precise calibration of thermostatic controls ensures accurate temperature regulation and energy-efficient performance.
Leak detection represents another critical testing phase. Engineers will conduct pressurized system checks, carefully examining all connection points, pipework, and potential stress areas for even the most minute potential leakage. Identifying and addressing these issues immediately prevents potential long-term damage and ensures system integrity.
Final verification involves a complete operational cycle test, running the boiler through various performance scenarios. This includes assessing hot water production, central heating performance, and overall system responsiveness. Engineers will document all test results, providing you with a comprehensive report detailing the boiler’s initial performance metrics.
Successful completion of this step means your new boiler has undergone rigorous professional testing, confirming its safety, efficiency, and readiness to provide reliable heating and hot water for your home.
Take the Stress Out of Boiler Replacement – Let Local Experts Handle It
Are you feeling overwhelmed by the complexity of the boiler replacement process? If the thought of system assessments, correct model selection, technical installation and rigorous testing feels daunting, you are not alone. Many homeowners and landlords worry about choosing the right boiler or making costly mistakes that disrupt their daily comfort and safety. The article highlights the importance of safe removal, efficient installation and ensuring complete functionality through every step. That is why trusting a team of Gas Safe Registered engineers with proven expertise offers real peace of mind from start to finish.
Why risk a poorly fitted or inefficient heating system? Get a free personalised quote and arrange your next professional boiler replacement with Thermatek. Take advantage of our end-to-end support, from obligation-free installation quotes to long-term servicing. Join thousands across Edinburgh and Midlothian who rely on Thermatek for reliable advice and excellent outcomes. Act now to secure a safer, warmer and more energy-efficient home. Visit our main site to get started today.
Frequently Asked Questions
What are the signs that my boiler needs to be replaced?
Common signs indicating a boiler replacement may be necessary include an age over 10-15 years, inconsistent heating, unusual noises, frequent breakdowns, and rising energy bills.
How do I choose the right type of boiler for my home?
Selecting the right boiler involves considering your home size, insulation quality, number of radiators, and hot water demand. Options include combi boilers for smaller spaces, system boilers for moderate needs, and regular boilers for larger households.
What should I prepare before the new boiler installation?
To prepare, clear the area around your existing boiler, review pipework for potential upgrades, protect surfaces with coverings, and gather relevant documentation. Ensure good ventilation and plan for someone to be present on installation day.
How is the old boiler removed safely?
The old boiler must be disconnected from the power and gas supply by a Gas Safe Registered engineer. They will drain the heating system, disconnect pipework, and dispose of the boiler responsibly, following safety protocols and environmental regulations.