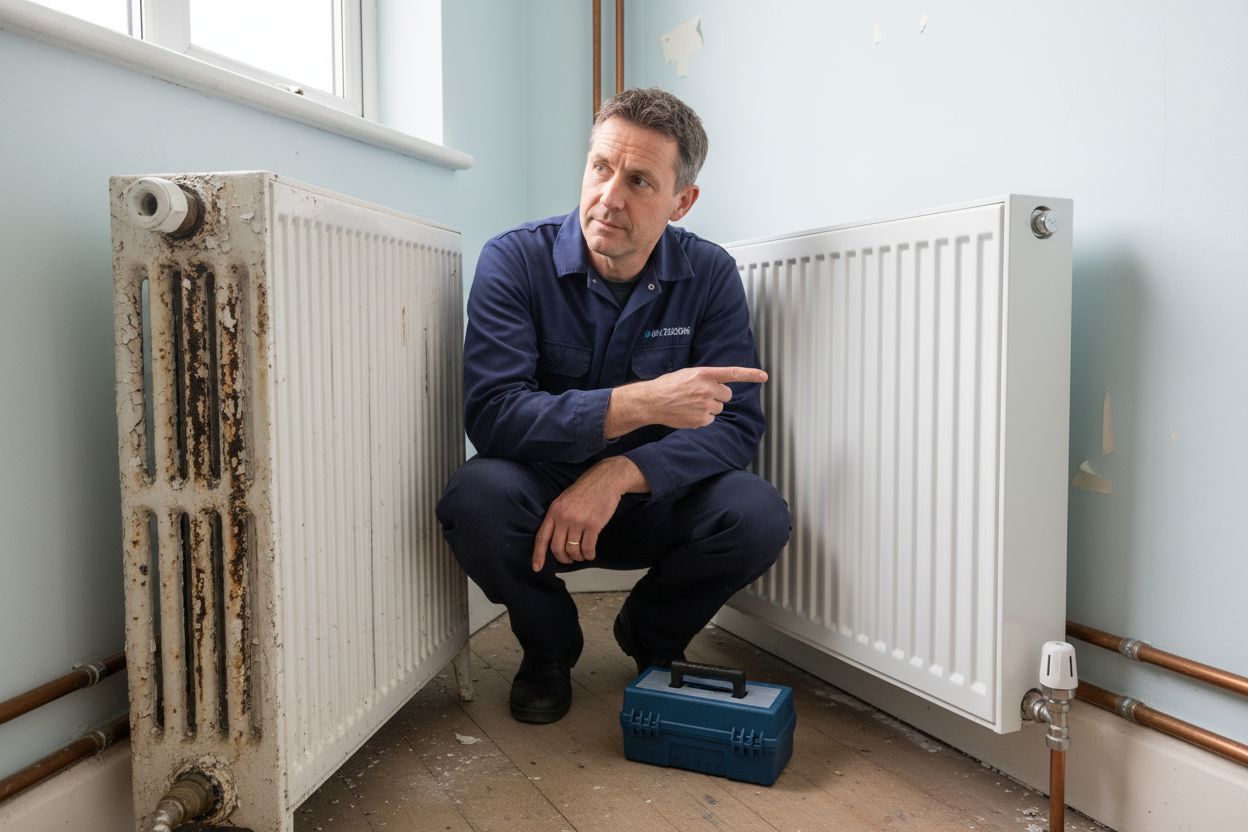
How Long Do Boilers Last: Complete Guide for 2025
Did you know that a well-maintained boiler can last up to 30 years in some homes? For many households, heating is one of the largest regular expenses, so understanding how long your boiler will serve you matters. By looking at the real factors behind boiler lifespan, you can make smarter choices about maintenance and replacement to save money and stay comfortable throughout the year.
Key Takeaways
| Point | Details |
|---|---|
| Boiler Lifespan | Modern boilers typically last 10-15 years, but can exceed this with proper maintenance and care. |
| Maintenance Importance | Regular professional servicing and timely repairs significantly extend operational life and efficiency. |
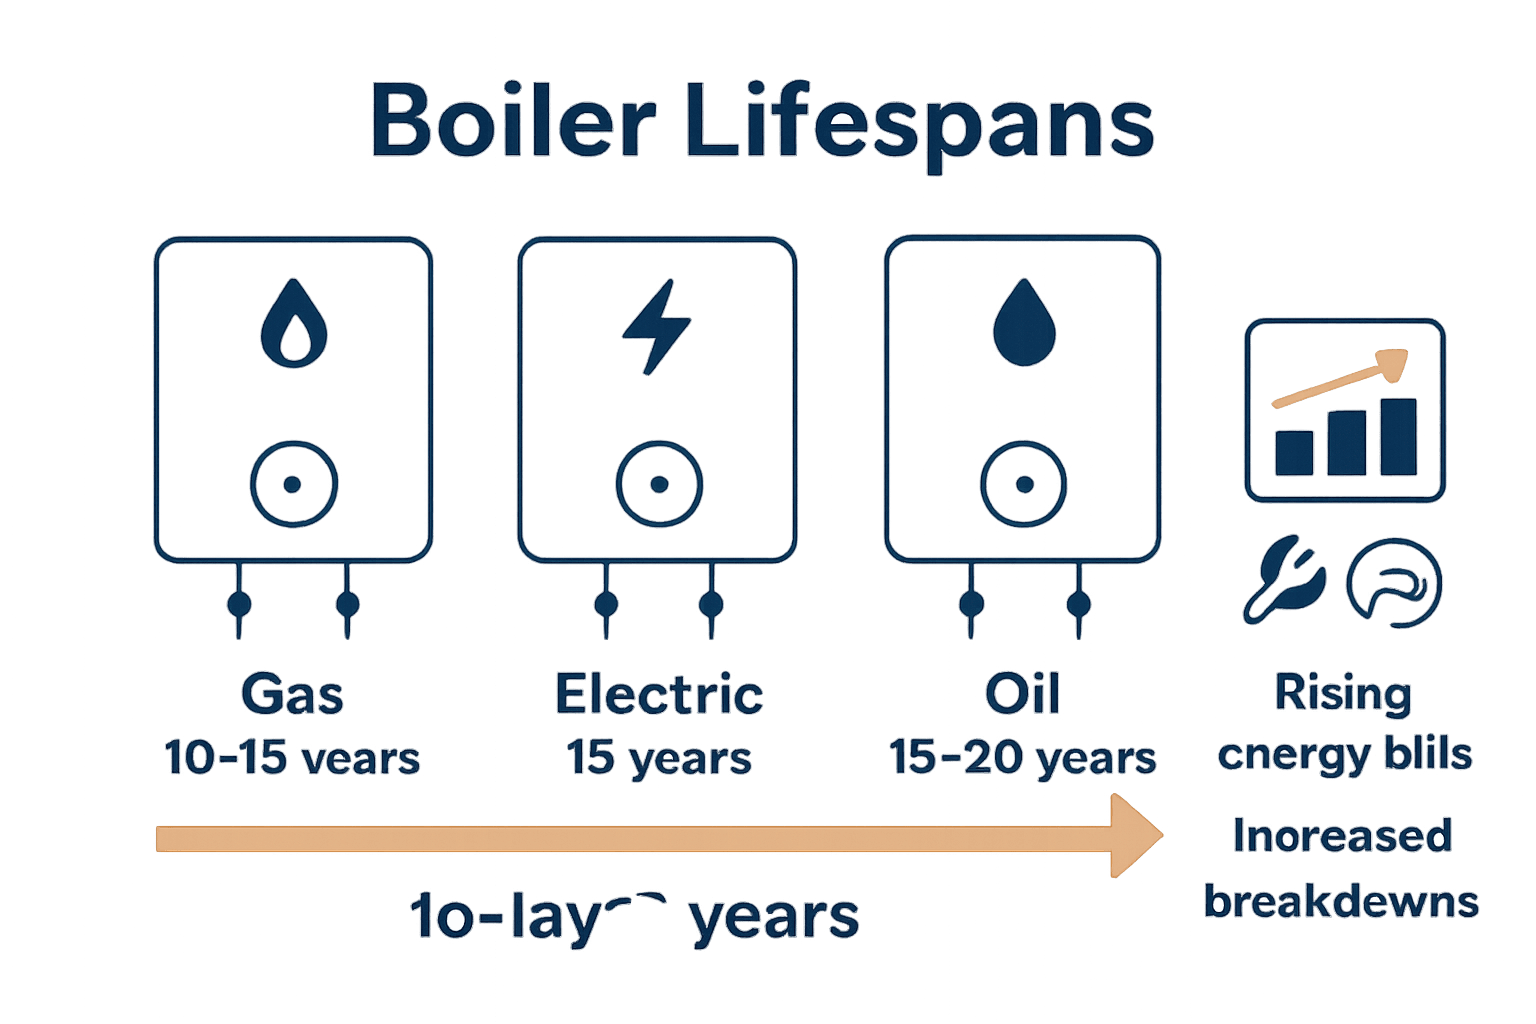
| Type Variance | Different boiler types have distinct lifespans: gas (10-15 years), electric (15-25 years), and oil (20-30 years). |
| Replacement Indicators | Warning signs include rising energy bills, frequent breakdowns, and inconsistent heating, suggesting it may be time for replacement. |
Table of Contents
- Boiler Lifespan Explained: Key Fundamentals
- Main Types of Boilers and Longevity Differences
- Major Factors Impacting Boiler Lifespan
- Warning Signs Your Boiler Needs Replacement
- Maintaining Boilers for Maximum Service Life
Boiler Lifespan Explained: Key Fundamentals
Understanding how long your boiler will last isn’t just about numbers—it’s about smart maintenance and strategic planning. Discover how boiler systems work to better appreciate their longevity and performance. According to leading heating research, boiler lifespan varies significantly based on several critical factors.
Most modern boilers have an average operational life ranging from 10 to 15 years, though this can fluctuate dramatically depending on maintenance quality, usage patterns, and initial system design. Different boiler types demonstrate remarkable variance in durability:
- Gas boilers: Typically last 10-15 years
- Electric boilers: Extended lifespan of 15-25 years
- Oil boilers: Potentially lasting 20-30 years
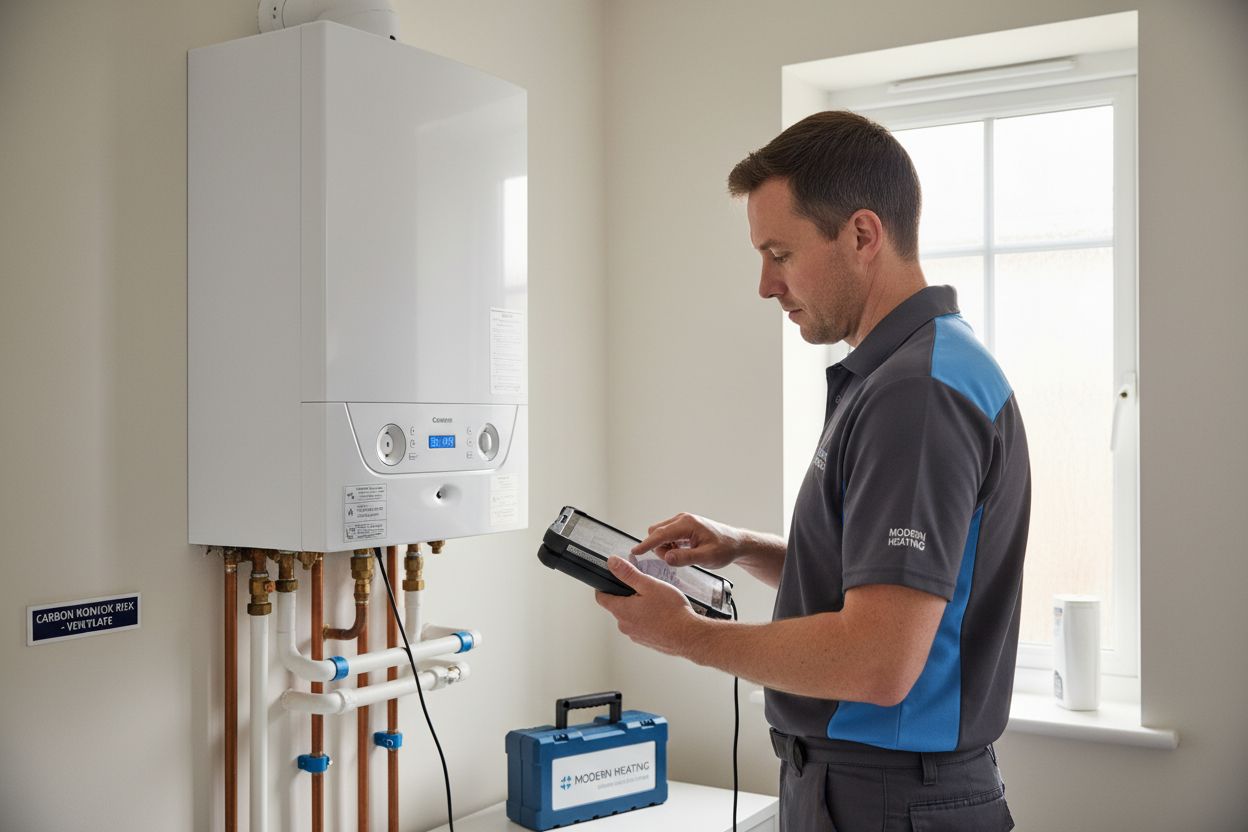
The key to maximising your boiler’s longevity lies in proactive maintenance. Regular professional servicing, annual inspections, and addressing minor issues promptly can significantly extend your system’s operational life. Think of your boiler like a high-performance vehicle—consistent care prevents premature breakdown and ensures optimal performance throughout its lifecycle. Professional engineers recommend annual check-ups to identify potential problems before they escalate, helping you avoid costly emergency replacements and unexpected heating interruptions.
Main Types of Boilers and Longevity Differences
Boiler types significantly influence heating system performance and longevity. Learn more about heating system differences to make informed decisions about your home’s heating infrastructure. According to detailed UK research, different boiler configurations offer unique advantages and operational lifespans.
The primary boiler categories demonstrate distinct characteristics:
- Combi Boilers: 10-15 years lifespan
- System Boilers: 10-15 years operational duration
- Conventional Boilers: 12-20 years potential service life
- Electric Boilers: 10-15 years typical performance period
Conventional boilers with separate tanks present an interesting scenario, potentially extending beyond 20 years—though efficiency declines with age. This variance highlights why professional assessment matters. The boiler’s environment, maintenance frequency, water quality, and installation precision dramatically impact its operational longevity. Homeowners should prioritise regular servicing, invest in quality initial installations, and monitor system performance to maximise their heating infrastructure’s potential lifespan.
Understanding these nuanced differences empowers you to make strategic decisions about replacement, maintenance, and investment in your home’s heating system. Each boiler type offers unique benefits, and recognising their individual characteristics helps you select the most appropriate solution for your specific residential requirements.

Here’s a summary comparing the main boiler types and their typical lifespans:
| Boiler Type | Typical Lifespan | Key Features |
|---|---|---|
| Combi Boiler | 10-15 years | Compact Instant hot water |
| System Boiler | 10-15 years | Separate cylinder Good for larger homes |
| Conventional Boiler | 12-20 years | Separate tank Older properties |
| Electric Boiler | 10-15 years | Efficient No gas required |
Major Factors Impacting Boiler Lifespan
Boiler longevity isn’t just about luck—it’s a direct result of multiple interconnected factors. Learn more about boiler heating systems to understand the complex dynamics affecting your home’s heating performance. System maintenance plays a critical role in determining how long your boiler will reliably serve your household.
Several key elements dramatically influence boiler performance and lifespan:
- Water Quality: Hard water areas cause faster mineral buildup
- Installation Quality: Professional fitting prevents early system failures
- Usage Patterns: Consistent, moderate heating extends boiler life
- Maintenance Frequency: Regular servicing prevents catastrophic breakdowns
- Environmental Conditions: Humidity, temperature, and dust impact component wear
According to home heating experts, sludge, rust, and limescale buildup represent significant threats to boiler efficiency. Critically, research recommends power-flushing every 5-6 years (sometimes up to 9 years) to remove internal debris, protect system warranties, and extend overall operational life. This preventative measure is especially crucial in regions with hard water, where mineral deposits can rapidly degrade heating components.
Ultimately, treating your boiler like a precision instrument—with regular professional care, thoughtful usage, and proactive maintenance—transforms it from a simple appliance into a long-lasting, reliable home heating solution. The small investments you make in systematic care can translate into years of additional service and substantial long-term savings.
Warning Signs Your Boiler Needs Replacement
Recognising when your boiler is approaching its end of life can save you from unexpected breakdowns and costly emergency replacements. Check out our comprehensive guide on boiler replacement to understand the full process. According to heating system research, performance degradation becomes increasingly apparent as boilers age, with significant implications for home comfort and energy efficiency.
Key warning signs that indicate your boiler might need replacement include:
- Increasing Energy Bills: Unexplained spike in heating costs
- Frequent Repairs: More frequent callouts and component replacements
- Unusual Noises: Banging, whistling, or persistent rumbling sounds
- Inconsistent Heating: Uneven warmth or struggling to reach desired temperatures
- Visible Corrosion: Rust, leaks, or physical damage to the system
Research suggests that by the 10th year, boiler performance can drop by around 30%. If your boiler is between 10-15 years old and experiencing frequent breakdowns, rising energy bills, or strange operational sounds, replacing it with a more energy-efficient model is often the most economical choice.
 Modern boilers offer significantly improved efficiency, potentially reducing your energy consumption and providing more reliable heating.
Ultimately, proactive replacement prevents unexpected system failures and can lead to substantial long-term savings. Consulting with a professional heating engineer can help you make an informed decision about whether repair or replacement is the most cost-effective solution for your specific heating system.
Maintaining Boilers for Maximum Service Life
Boiler maintenance represents your most powerful strategy for extending system longevity and protecting your heating investment. Learn about professional boiler servicing requirements to ensure optimal performance. According to leading heating technology experts, correct care can dramatically extend your boiler’s operational life well beyond its standard expected duration.
Key maintenance strategies that preserve boiler health include:
- Annual Professional Servicing: Maintains manufacturer warranty
- Corrosion Prevention: Using quality chemical inhibitors
- Debris Management: Installing magnetic filters to trap sludge
- System Cleaning: Periodic power-flushing to remove internal buildup
- Quality Installation: Choosing reputable professionals for initial setup
Research confirms that well-maintained boilers from reliable manufacturers like Vaillant and Worcester Bosch can consistently reach or exceed 15 years of service. The critical factors involve not just occasional maintenance, but systematic, proactive care. Regular professional inspections help identify potential issues before they escalate, allowing for targeted interventions that prevent catastrophic failures and maintain system efficiency.
Think of boiler maintenance like regular health check-ups—small, consistent investments in professional care can prevent expensive emergency replacements and ensure your heating system operates at peak performance throughout its lifecycle. By implementing these strategic maintenance practices, homeowners can transform their boilers from temporary appliances into long-term, reliable heating solutions.
Ready to Secure a Reliable Heating Future for Your Home?
Struggling with the uncertainty of your boiler’s remaining life and rising concerns about unexpected breakdowns or growing energy costs? The article highlighted how age, maintenance and warning signs like strange noises or climbing bills can all point to a boiler nearing its end. At Thermatek, we understand these challenges and specialise in expert solutions to extend boiler lifespan and boost efficiency. Our Gas Safe Registered engineers offer thorough boiler servicing options and fast, hassle-free repairs, supporting you in every step from proactive maintenance to full boiler replacement.
If your boiler is showing signs of ageing or you simply want peace of mind for the colder months ahead, act today for a safer and more cost-effective home. Visit Thermatek Heating to request a free quote or schedule a visit with our trusted local experts. Do not wait for an emergency – let us help you protect your comfort and investment before problems escalate.
Frequently Asked Questions
How long do different types of boilers typically last?
Most modern boilers last between 10 to 15 years. However, gas boilers typically last 10-15 years, electric boilers can last 15-25 years, and oil boilers may last 20-30 years.
What maintenance is essential for prolonging a boiler’s lifespan?
Regular professional servicing, annual inspections, and addressing minor issues promptly are crucial for extending your boiler’s lifespan. It’s also recommended to perform power-flushing every 5-6 years to remove internal debris and protect the system.
What are the warning signs that indicate my boiler needs replacement?
Key warning signs include increasing energy bills, frequent repairs, unusual noises, inconsistent heating, and visible corrosion. If your boiler is around 10-15 years old and showing these signs, it may be time to consider a replacement.
How does water quality impact boiler longevity?
Poor water quality, especially in hard water areas, can lead to faster mineral buildup inside the boiler. This buildup can significantly decrease efficiency and shorten the boiler’s lifespan, highlighting the importance of maintaining good water quality and regular maintenance.
Recommended
- Understanding How Long Does It Take To Replace A Boiler - Thermatek Heating
- Understanding How Does A Boiler Work For Heating - Thermatek Heating
- Understanding The Boiler Heating System For House - Thermatek Heating
- Understanding How Often To Service Your Boiler - Thermatek Heating
Complete Guide to When to Replace Radiators
Did you know that neglected radiators can increase heating bills by up to 30 percent each year? Many households overlook how much their heating system impacts comfort and costs. From misunderstood radiator myths to the latest efficiency upgrades, learning the truth about these essential devices can help you avoid unnecessary expenses, fix common problems, and create a warmer, more cost-effective home.
Key Takeaways
| Point | Details |
|---|---|
| Radiator Functionality | Modern radiators provide efficient heating with advanced features like thermostatic control, improving comfort and energy efficiency. |
| Signs for Replacement | Key indicators such as cold spots, leaks, and unusual noises suggest it’s time to replace your radiator to avoid higher energy costs. |
| Types and Lifespan | Different radiator types vary significantly in lifespan and performance, emphasizing the importance of matching the type to your heating needs. |
| Upgrading Benefits | Upgrading radiators enhances energy efficiency and home value, ultimately leading to lower utility bills and improved comfort. |
Table of Contents
- What Radiators Do And Common Myths
- Warning Signs Your Radiator Needs Replacing
- Typical Lifespan And Types Of Radiators
- Benefits Of Upgrading Old Radiators
- Costs, Timing, And Uk Safety Regulations
What Radiators Do and Common Myths
Radiators are more than just metal panels mounted on walls - they’re sophisticated heating systems designed to distribute warmth efficiently throughout your home. Thermostatic radiator valves (TRVs) play a crucial role in this process, allowing precise temperature control by automatically adjusting hot water flow as rooms warm up. Discover how radiator systems work and you’ll appreciate the engineering behind home heating.
Contrary to popular belief, radiators aren’t simply passive heat emitters. According to research from heating technology experts, modern radiators - including electric models - have evolved significantly. The myth that electric radiators are slow to heat or environmentally unfriendly is rapidly being debunked by advanced designs featuring:
- Rapid convection technology
- Smart temperature regulation
- Energy-efficient heating mechanisms
- Compatibility with renewable energy sources
Understanding radiator functionality helps homeowners make informed decisions about heating. Whether you have traditional water-based radiators or newer electric models, each system has unique advantages. The key is matching your specific home requirements with the right heating technology, ensuring optimal comfort, efficiency, and environmental responsibility.
Warning Signs Your Radiator Needs Replacing
Radiator deterioration isn’t always obvious, but certain warning signs can indicate it’s time for a replacement. Cold spots, unusual noises, and inconsistent heating are red flags that shouldn’t be ignored. Learn about common radiator problems before they escalate into more expensive repairs.
Some critical signs that suggest your radiator might be nearing the end of its functional life include:
- Persistent cold spots preventing even heat distribution
- Frequent leaks around radiator connections or body
- Unusual gurgling or banging sounds during heating cycles
- Excessive rust or corrosion on radiator surfaces
- Rising energy bills indicating reduced heating efficiency
Age is another crucial factor in radiator replacement. Most radiators have a serviceable lifespan of 10-15 years. Beyond this point, they become increasingly inefficient and prone to performance issues. Proactive replacement can save you money on energy costs and prevent unexpected heating system failures. Modern radiators offer improved heat distribution, better energy efficiency, and more sophisticated temperature control mechanisms.
Typical Lifespan and Types of Radiators
Radiators come in various types, each with unique characteristics and expected lifespans. Traditional cast iron radiators can last up to 50 years, while modern steel panel radiators typically serve efficiently for 10-15 years. Learn how to maintain your radiators to maximize their longevity and performance.
The main types of radiators homeowners encounter include:
- Steel panel radiators: Most common, affordable, lightweight
- Cast iron radiators: Extremely durable, excellent heat retention
- Aluminium radiators: Rapid heat transfer, energy efficient
- Electric radiators: Flexible installation, no plumbing required
- Horizontal radiators: Standard wall-mounted design
- Vertical radiators: Modern aesthetic, space-saving option
Factors influencing radiator lifespan extend beyond material. Water quality, maintenance frequency, installation precision, and overall heating system design significantly impact how long a radiator will function effectively. Regular servicing, annual power flushing, and addressing minor issues promptly can extend a radiator’s useful life by several years, preventing premature replacement and reducing long-term heating costs.
Here’s a comparison of popular radiator types and their key attributes:
| Radiator Type | Typical Lifespan | Main Advantages |
|---|---|---|
| Steel Panel | 10-15 years | Affordable Lightweight Commonplace |
| Cast Iron | Up to 50 years | Extremely durable Excellent heat retention |
| Aluminium | 15-20 years | Rapid heat transfer Energy efficient |
| Electric | 15-20 years | Flexible install No plumbing required |
| Horizontal | 10-20 years | Standard design Wall-mounted |
| Vertical | 10-20 years | Space-saving Modern aesthetic |
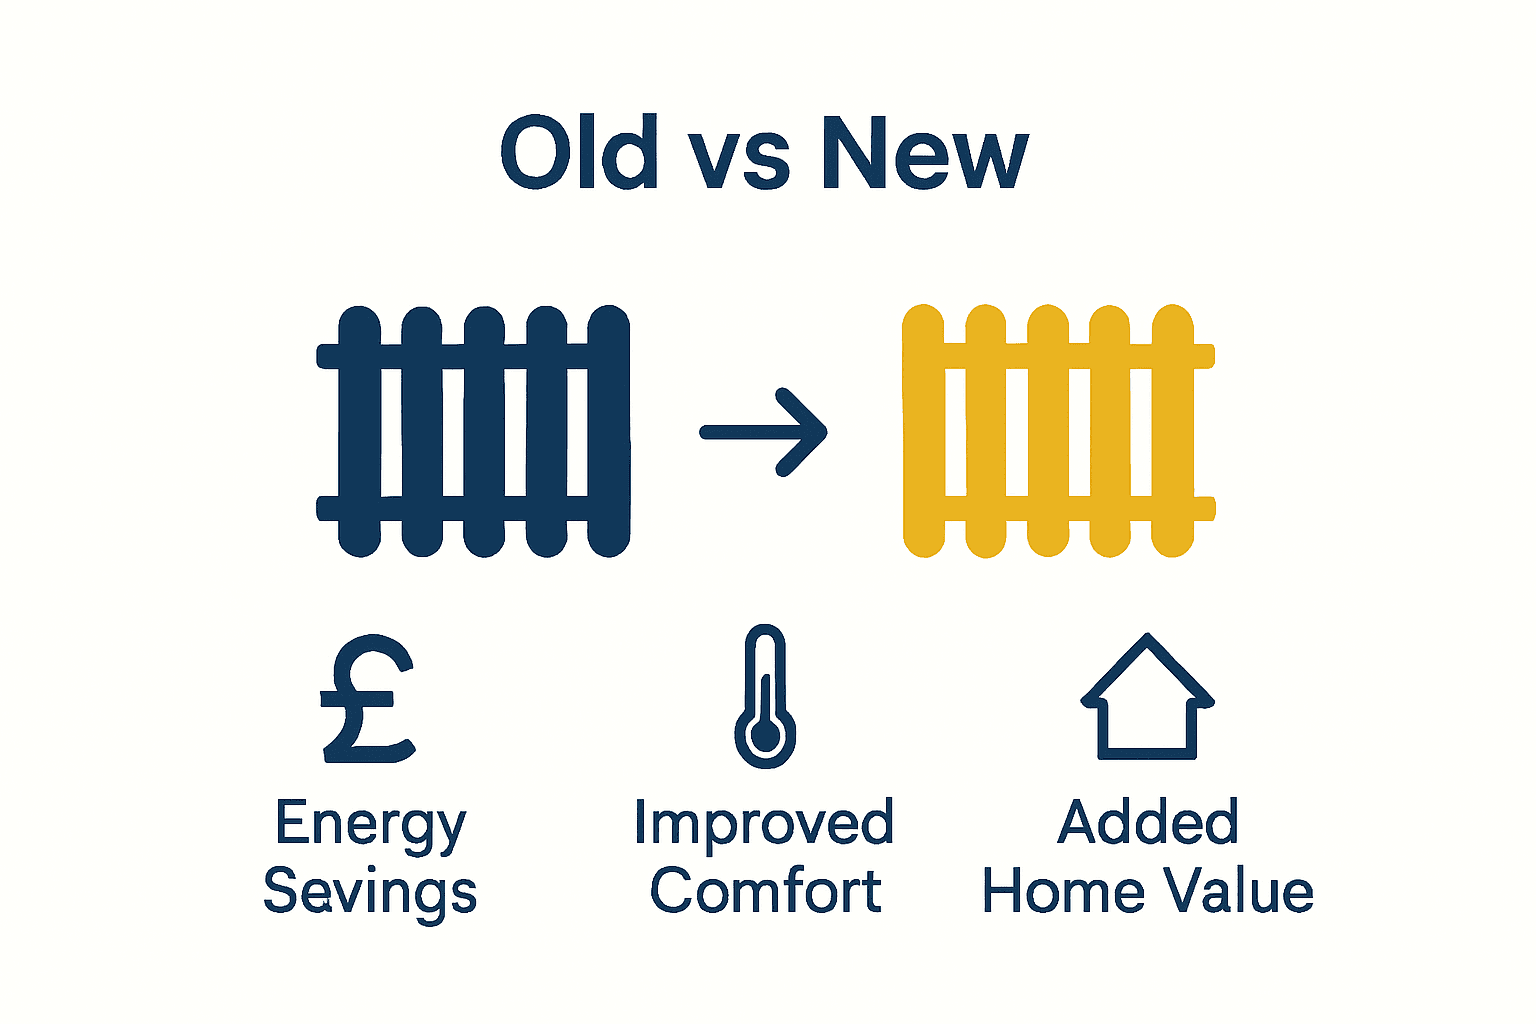
Benefits of Upgrading Old Radiators
Radiator upgrades represent more than just a cosmetic change - they’re a strategic investment in your home’s comfort and efficiency. Learn about central heating upgrades to understand the full potential of modern heating systems. Modern radiators offer substantial improvements over older models, delivering tangible benefits across multiple dimensions.
The key advantages of upgrading your radiators include:
- Enhanced energy efficiency: Reducing monthly heating costs
- Improved heat distribution: More consistent room temperatures
- Advanced temperature control: Smart thermostatic features
- Reduced carbon footprint: Lower energy consumption
- Sleeker design options: Contemporary aesthetic choices
- Improved home value: Modern heating systems attract potential buyers
Beyond immediate comfort, radiator upgrades contribute to long-term household economics. Newer models use advanced materials like aluminium and incorporate sophisticated heat transfer technologies, which can decrease energy consumption by up to 30%. This means lower utility bills, reduced environmental impact, and a more comfortable living environment. The initial investment in upgraded radiators pays dividends through improved performance, reliability, and potential increases in property value.
Costs, Timing, and UK Safety Regulations
Radiator replacement involves careful consideration of financial investment, optimal timing, and compliance with stringent UK safety regulations. Understand boiler installation regulations to ensure your heating system meets all legal requirements. The total cost of replacement can vary significantly depending on several critical factors.
Typical cost considerations for radiator replacement include:
- Material costs: £100-£500 per radiator
- Labour charges: £150-£250 per day
- Additional system modifications: £200-£800
- Removal and disposal of old radiators: £50-£150
- Potential plumbing adjustments: £100-£300
UK safety regulations mandate that all radiator installations must be performed by Gas Safe Registered engineers. This ensures proper installation, system compatibility, and adherence to Building Regulations Part L, which governs domestic heating efficiency. Homeowners should plan replacements during moderate weather seasons - typically late spring or early autumn - to minimize disruption and allow for comprehensive system testing. While upfront costs might seem substantial, professional installation guarantees long-term performance, energy efficiency, and compliance with national safety standards.
Ready to Upgrade Your Heating? Choose Proven Comfort and Efficiency
If your home is plagued by cold spots, strange noises, or rising energy bills, these are signs your radiator system is letting you down. Ageing radiators often mean inconsistent warmth and wasted energy. Delaying a replacement can lead to even bigger problems when you need your heating most. The article explains how modern radiator systems and smart controls can help you enjoy reliability and lower costs, giving you peace of mind every winter.
Let our Gas Safe Registered engineers at Thermatek Heating replace your old radiators and upgrade your comfort. We specialise in safe, energy-efficient solutions that fit your home perfectly. Discover how easy it is to make your system more efficient, compliant, and ready for future savings. Request your free quote today and take the first step towards a warmer, safer, and more cost-effective home.
Frequently Asked Questions
When should I consider replacing my radiators?
If you notice persistent cold spots, unusual noises, leaks, or excessive rust on your radiators, it’s time to consider replacement. Additionally, if your radiators are over 10-15 years old, upgrading may improve efficiency and comfort.
How can I tell if my radiator is inefficient?
Signs of inefficiency include cold spots that indicate uneven heat distribution, rising energy bills, and unusual sounds like gurgling or banging during operation. These may suggest your radiator isn’t performing as it should.
What are the benefits of upgrading to modern radiators?
Upgrading to modern radiators offers enhanced energy efficiency, improved heat distribution, advanced temperature control, and potential increases in home value. New models can also reduce your carbon footprint by consuming less energy.
How long do different types of radiators typically last?
Steel panel radiators usually last 10-15 years, while cast iron models can endure up to 50 years. Aluminium and electric radiators typically have a lifespan of 15-20 years, depending on maintenance and installation quality.
Recommended
- Understanding How Radiators Work For Your Home - Thermatek Heating
- How To Maintain Radiators For Efficient Heating In 2025 - Thermatek Heating
- Understanding Why Your Radiator Is Not Heating Up - Thermatek Heating
- 7 Common Radiator Problems And How To Fix Them - Thermatek Heating

Complete Guide to Heat Pump Running Costs UK
Did you know that a heat pump can generate warmth for almost the same price as a high-efficiency gas boiler, with the cost starting at just 6.5 pence per kilowatt hour? As more homeowners look for better ways to cut heating bills and carbon emissions, understanding these numbers becomes vital. Clarity on running costs and system efficiency can help you weigh if a heat pump is the smart move for comfortable, sustainable living.
Key Takeaways
| Point | Details |
|---|---|
| Competitiveness of Costs | Heat pumps can achieve comparable running costs to gas boilers, especially with high seasonal performance factors (SPF). |
| Installation Variability | Different types of heat pumps (air-source and ground-source) vary significantly in installation costs and efficiency, influencing long-term savings. |
| Energy Efficiency Advantages | Heat pumps offer lower energy consumption and reduced carbon emissions compared to traditional heating methods, making them an environmentally friendly choice. |
| Maintenance Importance | Regular maintenance is essential for optimal performance and longevity, impacting overall efficiency and running costs. |
Table of Contents
- Understanding Heat Pump Running Costs
- Types of Heat Pumps And Efficiency
- How Heat Pumps Work In UK Homes
- Factors Affecting Running Costs
- Comparing Heat Pumps To Other Heating Options
- Typical Running Costs And Maintenance
Understanding Heat Pump Running Costs
When considering renewable heating solutions, understanding heat pump running costs is crucial for homeowners exploring energy-efficient alternatives. According to research from the Centre for Alternative Technology, heat pumps can deliver remarkably competitive operational expenses compared to traditional heating systems.
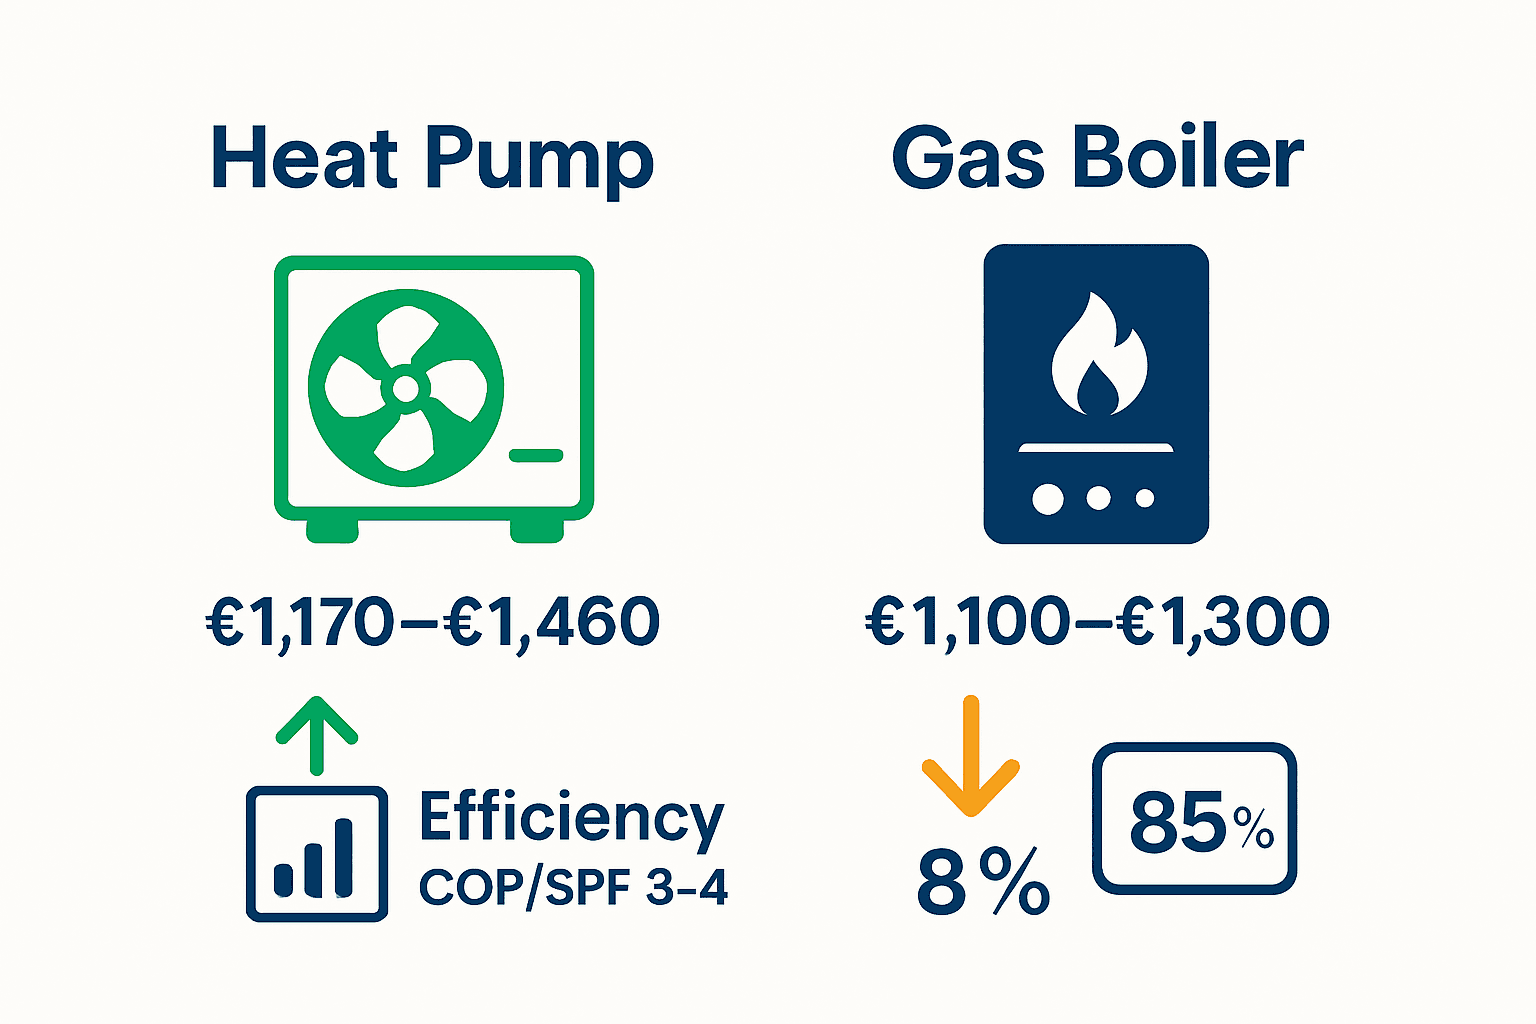
The economics of heat pumps are fascinating. With current electricity prices around 22.5 p/kWh and gas prices at 5.5 p/kWh, a heat pump operating at a seasonal performance factor (SPF) of 3.5 can generate heat at approximately 6.5 p/kWh. This cost is remarkably similar to a modern gas boiler running at 85% efficiency. Moreover, improvements in system efficiency can drive these costs even lower - for instance, an SPF of 4 can reduce heating costs to around 5.5 p/kWh.
Monthly running costs provide another perspective on heat pump economics. The Eco Experts highlight that under the Ofgem price cap in 2025, while a gas boiler might cost around £70 per month, an air-source heat pump is estimated at approximately £80 monthly. However, this slight increase is offset by significant energy efficiency advantages:
- Heat pumps use substantially less energy to produce equivalent heat
- Lower carbon emissions compared to fossil fuel systems
- Potential for further cost reduction through smart energy tariffs
- Long-term savings through reduced energy consumption
For Edinburgh and Midlothian homeowners considering renewable heating solutions, understanding these nuanced running costs can help make an informed decision about transitioning to more sustainable home heating technologies.
Types of Heat Pumps and Efficiency
When exploring renewable heating solutions, understanding the different types of heat pumps can help homeowners make informed decisions. According to research from the Centre for Alternative Technology, three primary heat pump technologies exist: air-source, ground-source, and water-source, each with unique characteristics and efficiency levels.
Air Source Heat Pumps
Air-source heat pumps (ASHPs) are the most accessible option for many homeowners. They remain effective even in temperatures below zero and offer a more affordable installation pathway. Our guide on understanding air source heat pumps reveals installation costs typically range from £7,000 for a two-bedroom home to £15,000 for larger properties. Key advantages include:
- Lower upfront installation costs
- Effective performance across various temperature ranges
- Easier retrofitting for existing properties
- Relatively simple maintenance requirements
Ground Source Heat Pumps
Ground-source heat pumps (GSHPs) represent the pinnacle of heat pump efficiency. These systems leverage consistent underground temperatures around 10°C at approximately 2 metres depth, providing remarkable energy performance. However, they come with higher initial investment, with installation costs ranging from £17,000 to over £35,000 depending on property size.
The primary trade-offs between different heat pump technologies essentially balance installation complexity, upfront costs, and long-term energy efficiency. While air-source systems offer more straightforward implementation, ground-source solutions provide superior thermal stability and potentially lower ongoing operational expenses.

Here’s a comparison of the main heat pump types and their characteristics:
| Feature | Air Source Heat Pump | Ground Source Heat Pump |
|---|---|---|
| Typical Installation Cost | £7,000–£15,000 | £17,000–£35,000+ |
| Efficiency (COP/SPF) | 3 to 3.5 (SPF) | 3.5 to 4+ (SPF) |
| Installation Complexity | Low Easier retrofit | High Requires excavation |
| Ideal Conditions | Most UK homes Wide temperature range | Large gardens Consistent ground temperature |
| Maintenance Needs | Moderate Accessible | Low to Moderate Specialist checks |
How Heat Pumps Work in UK Homes
Heat pumps represent a sophisticated yet ingenious approach to home heating, fundamentally different from traditional fossil fuel systems. According to experts at The Eco Experts, these systems operate by extracting heat using electricity-driven compressors and transferring that heat into water or air, rather than generating heat directly through combustion.
Heating Mechanism
The core principle of heat pump technology involves moving thermal energy from one location to another. This means they can extract heat from external sources like air, ground, or water, even at relatively low temperatures. Two primary system configurations exist:
- Air-to-Water Systems: Heat radiators and provide domestic hot water
- Air-to-Air Systems: Distribute warmth through vents or ducted systems
Efficiency Considerations
Efficiency in heat pumps is closely tied to temperature differentials. Research from the Centre for Alternative Technology highlights that these systems perform optimally when the temperature gap between heat source and heating demand remains minimal. Ground-source heat pumps benefit from stable underground temperatures, while air-source models might experience slight efficiency reductions during cold spells that require defrost cycles.
Installation and Performance
For homeowners considering heat pump installation, understanding these operational nuances is crucial. The electricity-driven compressor acts like a reverse refrigerator, moving thermal energy where it’s needed most. This approach not only provides efficient heating but also supports the transition towards more sustainable home energy solutions.
Factors Affecting Running Costs
Understanding the variables that influence heat pump running costs is crucial for homeowners considering this renewable heating technology. According to research from Eco Energy Services, multiple factors can significantly impact the annual operational expenses of a heat pump system.
Key Cost Determinants
The primary factors affecting heat pump running costs include:
- Electricity Tariffs: Specialized heat pump electricity rates can dramatically reduce expenses
- Home Insulation: Better insulation means less energy required to maintain temperature
- Heating System Setup: Radiator or underfloor heating configurations influence efficiency
- System Quality: Higher-grade installations deliver more consistent performance
Performance and Cost Variations
Coefficient of Performance (COP) plays a critical role in determining running expenses. Research from Neater Heat indicates that typical daily running costs range between £3.20 and £4.00, translating to annual costs of approximately £1,170–£1,460. Remarkably, good insulation and smart energy tariffs can reduce bills by up to 40% compared to traditional oil or LPG systems.
Efficiency Optimization
Homeowners can explore heat pump installation strategies to maximize efficiency. Seasonal variations in COP—ranging from 3 to 3.5—can cause annual cost fluctuations between £1,316 and £1,476 for an 18,000 kWh heat demand. Strategic choices in system design, energy management, and tariff selection can significantly mitigate these running costs.
Comparing Heat Pumps to Other Heating Options
When evaluating home heating technologies, heat pumps represent a significant leap forward in energy efficiency and environmental sustainability. Unlike traditional fossil fuel heating systems, heat pumps offer a more nuanced approach to thermal management that balances economic and ecological considerations.
Traditional Heating Systems
Gas and oil boilers have long been the standard for home heating in the UK. However, heat pumps provide several compelling advantages:
- Lower carbon emissions compared to fossil fuel systems
- Reduced dependency on fluctuating fuel prices
- Potential for integration with renewable electricity sources
- Lower long-term environmental impact
Economic and Environmental Perspectives
The transition from conventional heating to heat pump technology isn’t just an environmental choice—it’s an increasingly smart economic decision. Our comprehensive guide to air source heat pump benefits highlights how these systems can deliver substantial long-term savings and enhanced home comfort.
Performance Considerations
While initial installation costs for heat pumps may be higher than traditional systems, their operational efficiency tells a different story. Heat pumps can extract renewable thermal energy from air, ground, or water sources, converting electricity into heat with remarkable efficiency. This means lower ongoing energy expenses and a reduced carbon footprint for homeowners willing to invest in modern heating technology.
Typical Running Costs and Maintenance
Maintaining a heat pump system requires a strategic approach that balances proactive care with professional servicing. Homeowners investing in these advanced heating technologies need to understand both the operational expenses and maintenance requirements to ensure long-term efficiency and performance.
Annual Maintenance Requirements
Regular maintenance is crucial for keeping your heat pump operating at peak performance. Recommended maintenance tasks include:
- Annual professional system inspection
- Cleaning or replacing air filters every 3-4 months
- Checking refrigerant levels
- Inspecting external unit for debris or vegetation growth
- Ensuring clear airflow around outdoor components
Cost Considerations
While maintenance costs can vary, most homeowners can expect:
- Annual professional service: £100-£250
- Filter replacements: £20-£50 per year
- Minor repairs: £150-£300 depending on complexity
Long-Term Performance
For detailed heat pump installation guidance, understanding ongoing maintenance is key. Professional servicing not only prevents unexpected breakdowns but can extend the system’s operational life by 25-30%. Proactive maintenance helps maintain the system’s efficiency, ensuring you continue to benefit from lower energy consumption and reduced carbon emissions throughout the heat pump’s lifecycle.
Ready to Take Control of Your Heat Pump Running Costs?
Lowering your energy bills and ensuring consistent warmth should not be a guessing game. The article above outlines how real running costs, system performance, and smart installation choices make a world of difference. If you are wondering how to maximise the efficiency of your air source heat pump or want practical support with maintenance, know that working with a reliable local expert is key to protecting your investment.
Let Thermatek Heating help you unlock the full savings potential of your home. Our air source heat pump installation and renewable heating solutions are professionally tailored for Edinburgh and Midlothian properties. From free guidance to Gas Safe Registered installation and expert maintenance, we are the trusted team for energy-efficient home heating. Visit Thermatek Heating now to arrange a free quote and take the next step towards reliable, cost-effective warmth all year round.
Frequently Asked Questions
What are the average running costs of heat pumps?
The average running costs of heat pumps can vary, but typically they range between £1,170 and £1,460 annually, depending on factors like system efficiency and energy tariffs.
How do heat pump running costs compare to traditional heating systems?
Heat pumps generally have similar operational costs to modern gas boilers, especially when considering their higher energy efficiency and lower carbon emissions over time.
What factors influence the running costs of heat pumps?
Key factors affecting heat pump running costs include electricity tariffs, home insulation quality, heating system setup, and the overall quality of the installation.
Do heat pumps require much maintenance, and what are the associated costs?
Yes, heat pumps require regular maintenance, including annual professional inspections and periodic filter replacements. Maintenance costs typically range from £100 to £250 per year for professional services, with additional costs for minor repairs and filter replacements.
Recommended
- Essential Air Source Heat Pump Installation Guide - Thermatek Heating
- Understanding Air Source Heat Pump Benefits For Homes - Thermatek Heating
- Essential Air Source Heat Pump Maintenance For Efficiency - Thermatek Heating
- Understanding Air Source Heat Pumps For Your Home - Thermatek Heating
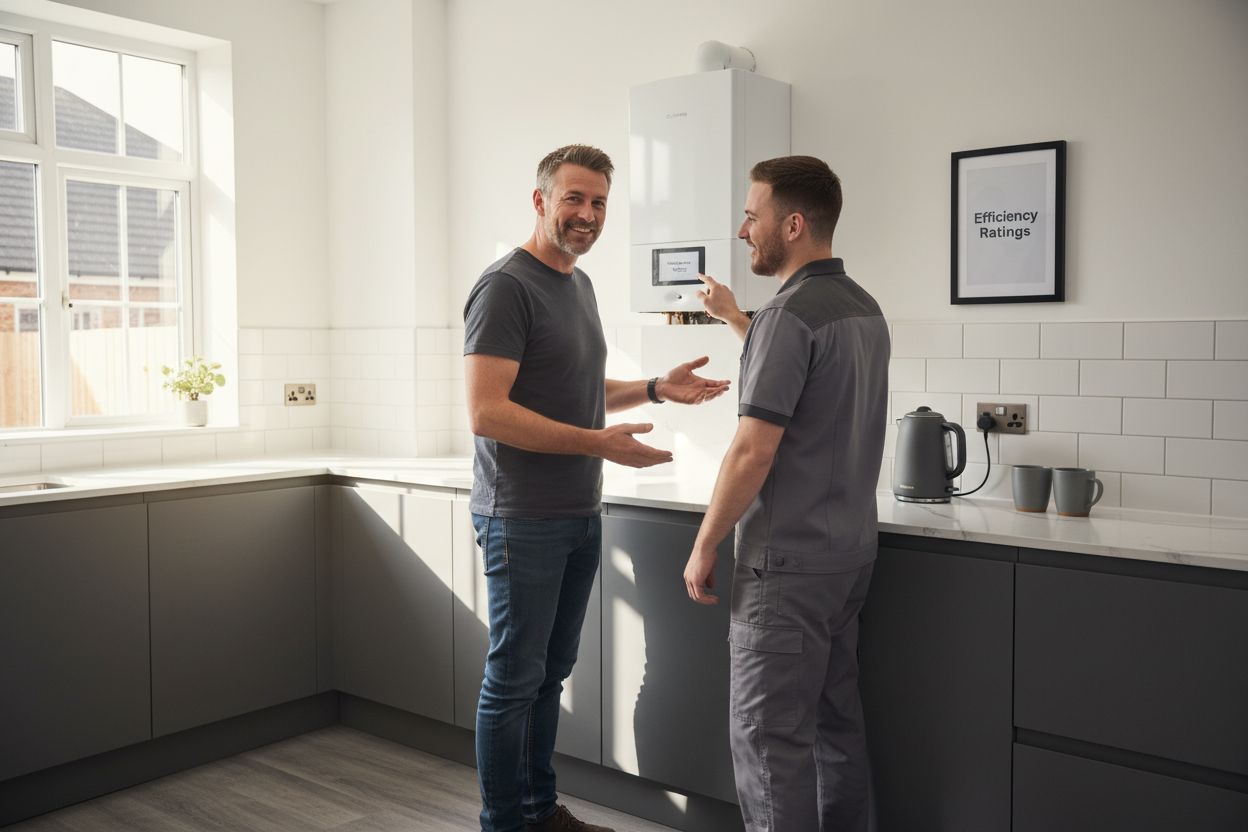
Understanding Boiler Efficiency Ratings for Homeowners
Boiler efficiency ratings are on every homeowner’s mind when tackling energy bills and winter chills. Yet most people have no idea that an A-rated condensing boiler can convert up to 95 percent of fuel into heat, leaving only a tiny amount wasted. This sounds impressive, but the bigger shock is how these ratings can impact both your wallet and your carbon footprint in ways most never consider.
Table of Contents
- What Are Boiler Efficiency Ratings?
- Why Do Boiler Efficiency Ratings Matter?
- How Boiler Efficiency Ratings Are Calculated
- Key Concepts Related to Boiler Efficiency Ratings
Quick Summary
| Takeaway | Explanation |
|---|---|
| Higher efficiency saves money | High-efficiency boilers reduce fuel consumption and lower monthly energy bills, providing significant financial benefits over time. |
| Understanding grading helps decision-making | Familiarity with efficiency ratings and grading systems enables homeowners to evaluate their options and choose the most economical heating systems. |
| Environmental impact is significant | Efficient boilers decrease fuel usage and carbon emissions, contributing positively to environmental sustainability and climate responsibility. |
| Condensing technology maximizes efficiency | Condensing boilers capture waste heat and improve overall efficiency, achieving ratings above 90%, making them the best option for energy savings. |
| Seasonal factors influence performance | Recognising that boiler efficiency can fluctuate with outdoor temperatures helps in planning heating requirements for maximum efficiency throughout the year. |
What Are Boiler Efficiency Ratings?
Boiler efficiency ratings represent a critical metric that measures how effectively a heating system converts fuel energy into usable heat for your home. These ratings provide homeowners with a clear understanding of their boiler’s performance, energy consumption, and potential cost savings.
The Science Behind Efficiency Ratings
At its core, a boiler efficiency rating quantifies the percentage of fuel energy successfully transformed into heat. Modern boilers in the United Kingdom are evaluated under the Energy-related Products (ErP) directive, which standardizes measurement and helps consumers make informed decisions.
For instance, a boiler with an 90% efficiency rating means that 90 pence of every pound spent on fuel is directly converted into heat, while 10 pence is lost through various thermal transfer processes. This metric becomes crucial when considering long-term energy expenses and environmental impact.
Understanding Efficiency Grading Systems
Boiler efficiency is typically represented through two primary grading methods:
- Percentage Efficiency: A direct measurement showing the proportion of fuel energy converted to heat
- Letter Grades (A-G): A simplified visual representation where A represents the most efficient boilers
A modern high-efficiency condensing boiler might achieve an A-rating, indicating it operates at 90% efficiency or higher. These advanced systems capture and reuse heat that traditional boilers would typically lose, making them significantly more economical.
For homeowners in Edinburgh and Midlothian seeking comprehensive insights, read more about how boiler systems work to appreciate the intricate mechanics behind these efficiency ratings.
Why Do Boiler Efficiency Ratings Matter?
Boiler efficiency ratings are far more than abstract technical measurements. They represent a direct connection between your home’s heating system, financial expenditure, and environmental responsibility. Understanding these ratings empowers homeowners to make informed decisions about their energy consumption and long-term household expenses.
Financial Implications of Efficiency
The most immediate impact of boiler efficiency ratings is on your household budget. According to the Energy Saving Trust, inefficient boilers can significantly increase annual energy costs. A low-efficiency boiler might waste substantial energy and money, whereas a high-efficiency system can generate remarkable savings.
Consider these potential financial benefits:
- Reduced monthly energy bills
- Lower fuel consumption
- Decreased long-term maintenance expenses
- Potential government incentives for energy-efficient installations
Environmental Considerations
Beyond personal finances, boiler efficiency ratings play a crucial role in reducing carbon emissions. Higher-efficiency boilers consume less fuel to generate the same amount of heat, directly contributing to reduced greenhouse gas production. This makes efficiency ratings a critical factor for environmentally conscious homeowners.
Long-Term Home Performance
Modern boiler systems with high-efficiency ratings offer more than immediate financial savings. Learn more about condensing boiler technology which represents the pinnacle of heating system efficiency. These advanced systems not only reduce energy consumption but also provide more consistent and reliable heating, enhancing overall home comfort and performance.
How Boiler Efficiency Ratings Are Calculated
Calculating boiler efficiency ratings involves complex thermal engineering principles that measure how effectively a heating system transforms fuel energy into usable heat. This scientific process provides homeowners with a standardised method to understand their boiler’s performance and energy conversion capabilities.
Technical Measurement Principles
According to the Building Research Establishment (BRE), boiler efficiency ratings are determined through precise thermal performance testing. Engineers measure the ratio between heat output and total energy input, considering multiple critical factors:
- Amount of fuel consumed
- Total heat generated
- Heat loss during energy transfer
- Combustion chamber performance
For example, if a boiler consumes 100 kilowatts of energy and produces 90 kilowatts of usable heat, its efficiency rating would be 90%. Modern testing protocols ensure these measurements reflect real-world performance conditions.
Standardised Evaluation Methods
The United Kingdom follows the Energy-related Products (ErP) directive, which establishes standardised calculation methodologies. These methods account for seasonal variations, ensuring efficiency ratings represent comprehensive performance across different operating conditions.
Key evaluation parameters include:
- Seasonal space heating efficiency
- Water heating efficiency
- Part-load and full-load performance metrics
Practical Implications of Calculation Methods
Understanding how these ratings are calculated helps homeowners make informed decisions. Learn more about heating system regulations that govern these technical assessments. By comprehending the scientific principles behind efficiency measurements, you can better appreciate the technological sophistication of modern heating systems and their potential energy-saving capabilities.
Key Concepts Related to Boiler Efficiency Ratings
Boiler efficiency ratings encompass a range of technical and practical concepts that go beyond simple numerical measurements. Understanding these key principles helps homeowners make informed decisions about their heating systems and energy consumption strategies.
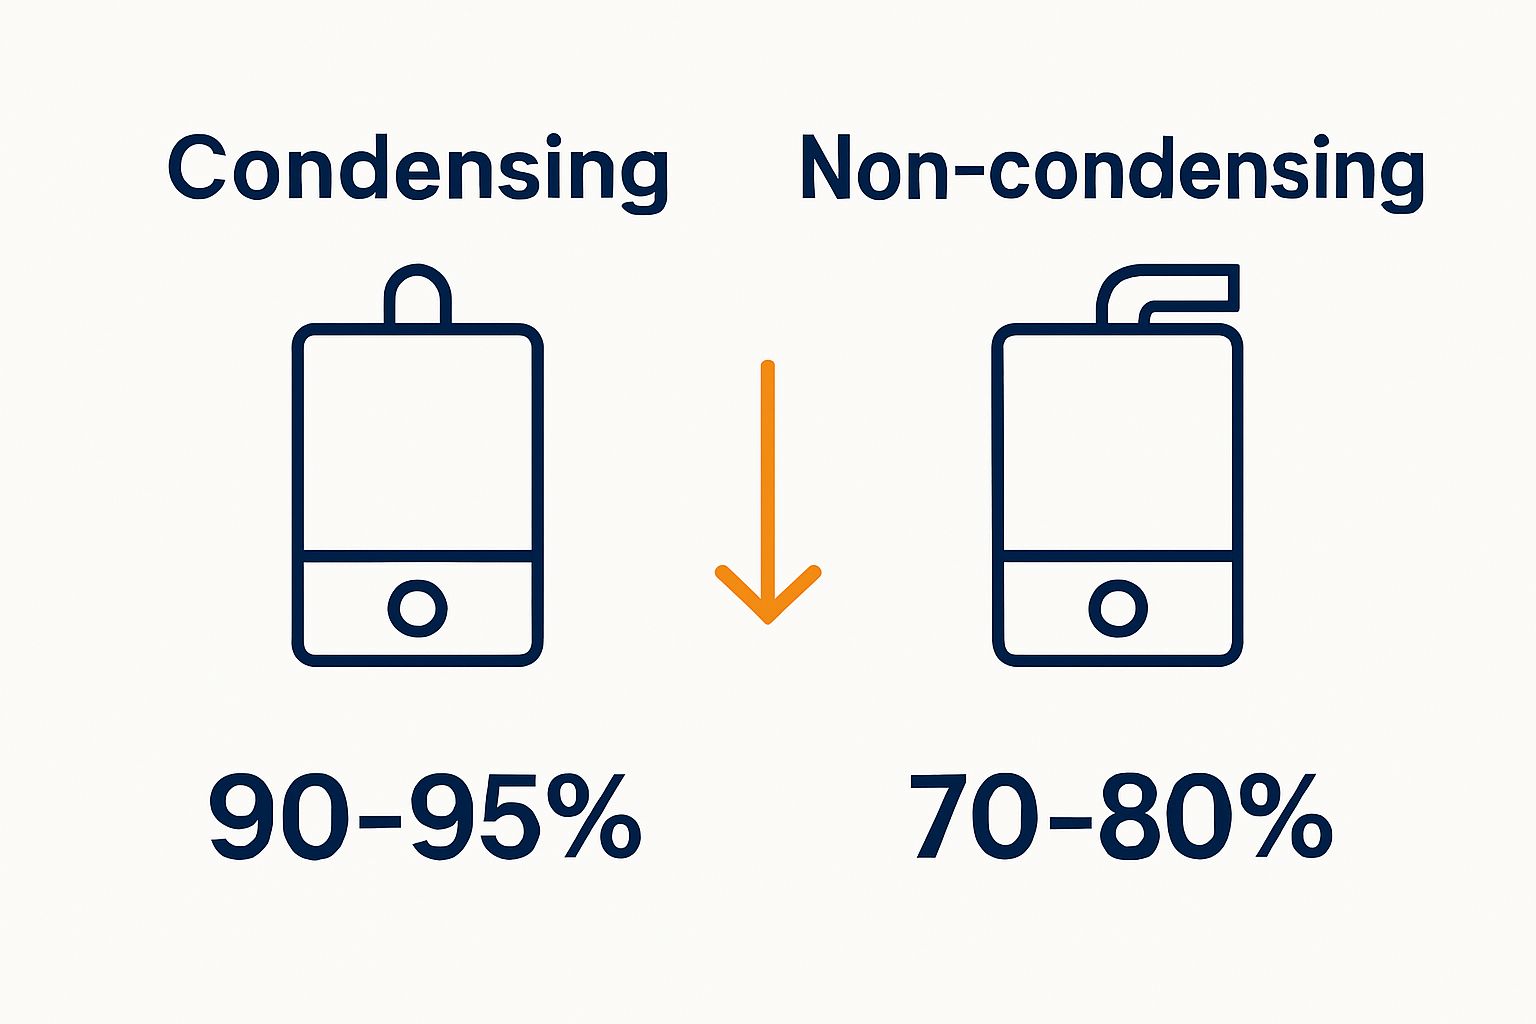
Types of Boiler Efficiency Technologies
According to the Energy Saving Trust, different boiler technologies significantly impact overall efficiency. The two primary categories homeowners should understand are:
- Condensing Boilers: Advanced systems that capture and reuse heat from exhaust gases
- Non-Condensing Boilers: Traditional systems that release heat through exhaust, resulting in lower efficiency
Condensing boilers represent the pinnacle of heating technology, typically achieving efficiency ratings between 90-95%. By capturing latent heat that would otherwise be wasted, these systems transform potential energy losses into additional heating capacity.
The table below compares key features and characteristics of condensing and non-condensing boilers as outlined in the article, helping homeowners identify differences at a glance.
| Boiler Type | Heat Recovery Mechanism | Typical Efficiency (%) | Carbon Emissions | Notes |
|---|---|---|---|---|
| Condensing Boiler | Captures and reuses exhaust heat | 90-95 | Lower | More efficient, modern technology |
| Non-Condensing Boiler | Releases exhaust heat without reuse | Below 85 | Higher | Traditional, less efficient systems |
Seasonal Performance Factors
Boiler efficiency is not a static measurement but a dynamic concept influenced by multiple environmental and operational factors. Seasonal performance factors consider how boilers operate under varying temperature conditions, recognising that efficiency can fluctuate throughout the year.
Key seasonal performance considerations include:
This table summarises the main factors that influence a boiler’s seasonal performance as discussed in the article, allowing homeowners to see the dynamic elements affecting efficiency throughout the year.
| Factor | Influence on Boiler Efficiency |
|---|---|
| Outdoor temperature variation | Efficiency can fluctuate based on external temperature |
| Heating system load requirements | Higher or lower demand impacts operational efficiency |
| Property insulation quality | Better insulation helps retain heat and improve efficiency |
| Heating cycle frequency/duration | Frequent cycles or longer use may affect real-world performance |
- Variation in outdoor temperatures
- Heating system load requirements
- Insulation quality of the property
- Frequency and duration of heating cycles
Practical Efficiency Evaluation
Beyond technical specifications, efficiency ratings translate into tangible home heating experiences. Explore our comprehensive guide to home heating systems to understand how these efficiency concepts directly impact your household’s comfort and energy consumption. By comprehending these nuanced factors, homeowners can make more strategic decisions about their heating infrastructure.

Turn Boiler Efficiency Knowledge Into Real Savings for Your Home
You have just discovered how critical boiler efficiency ratings are when it comes to reducing your energy bills and keeping your home warm and comfortable. Understanding concepts such as condensing technology and percentage efficiency is only the first step. The real challenge is translating this knowledge into action, so you stop losing money to old, inefficient systems and start enjoying reliable warmth and lower costs.
Now is the perfect moment to act. At Thermatek Heating, our Gas Safe Registered engineers use advanced efficiency assessments and the latest installation skills to help Edinburgh and Midlothian homeowners experience the full benefits of modern heating. Unsure which boiler suits your needs, or want a free, expert quote? Contact us today to get personal advice on replacements, servicing or efficiency upgrades. Upgrade your heating system soon and see immediate improvements in comfort, reliability and energy savings. Do not let hidden energy waste linger—make your home work efficiently for you.
Frequently Asked Questions
What does a boiler efficiency rating indicate?
A boiler efficiency rating indicates how effectively a heating system converts fuel into usable heat for your home. A higher rating means more fuel is used to produce heat, which can lead to lower energy bills. Check the efficiency rating when choosing or upgrading your boiler to ensure cost-effective heating.
How can I improve my boiler’s efficiency?
To improve your boiler’s efficiency, consider regular maintenance, such as an annual service. Cleaning components and checking for leaks can enhance performance, potentially increasing efficiency by around 5-10%.
What is the difference between condensing and non-condensing boilers?
Condensing boilers capture and reuse heat from exhaust gases, achieving higher efficiency ratings of 90-95%. In contrast, non-condensing boilers release heat through the exhaust, resulting in lower efficiency. Evaluate these options when selecting a boiler type to optimise your heating system.
How can boiler efficiency ratings affect my energy bills?
Boiler efficiency ratings directly impact your energy bills; a higher efficiency rating can lead to significant savings. For instance, upgrading from a low-efficiency boiler to a high-efficiency model can reduce your heating costs by up to 20% per year.
What factors influence my boiler’s seasonal performance?
Seasonal performance is influenced by outdoor temperatures, your property’s insulation quality, and the heating load requirements. Assess these factors to better understand how your boiler performs during different seasons.
How do I find out my current boiler’s efficiency rating?
You can find your current boiler’s efficiency rating by checking the manufacturer’s manual or the data plate on the boiler itself. If you are unsure, consider having an HVAC professional assess your boiler to provide accurate efficiency details.
Recommended
- Understanding How Does A Boiler Work For Heating - Thermatek Heating
- Understanding The Boiler Heating System For House - Thermatek Heating
- Understanding Condensing Boiler Advantages For Homeowners - Thermatek Heating
- Understanding Building Regulations For Boilers - Thermatek Heating
- Why Timely Boiler Repair Matters for Plymouth, MA, Homeowners - 8th Bend Plumbing Heating and Cooling
Master Simple Plumbing Repairs for Homeowners in Edinburgh
Simple plumbing repairs can save Edinburgh homeowners hundreds of pounds every year and yet they’re often ignored until a tap erupts or a drain refuses to clear. Most people think plumbing is best left to the professionals. But even the experts agree that over 60 percent of basic leaks and clogs can be fixed safely with a few household tools. That means with the right checklist, you could prevent costly disasters before they ever take hold.
Table of Contents
- Inspect Your Plumbing For Issues
- Gather Necessary Tools And Materials
- Fix Leaks In Pipes And Fixtures
- Unclog Drains And Toilets
- Test Repairs For Effectiveness
- Clean Up And Maintain Your Plumbing
Quick Summary
| Key Point | Explanation |
|---|---|
| 1. Inspect plumbing regularly for issues | Regular inspections can identify leaks and damages early, saving costly repairs and preventing water damage in your home. |
| 2. Gather essential tools and materials | Preparing a dedicated toolkit with appropriate tools and materials ensures efficient plumbing repairs without interruption. |
| 3. Fix leaks promptly and correctly | Addressing leaks quickly prevents significant damage and maintains the integrity of your plumbing system while saving on future costs. |
| 4. Unclog drains effectively using plungers | Use a flanged plunger for best results on clogs and follow with a drain snake for deeper blockages when necessary. |
| 5. Perform thorough post-repair testing | After repairs, restore water pressure slowly and check for leaks and proper flow to confirm the effectiveness of your fixes. |
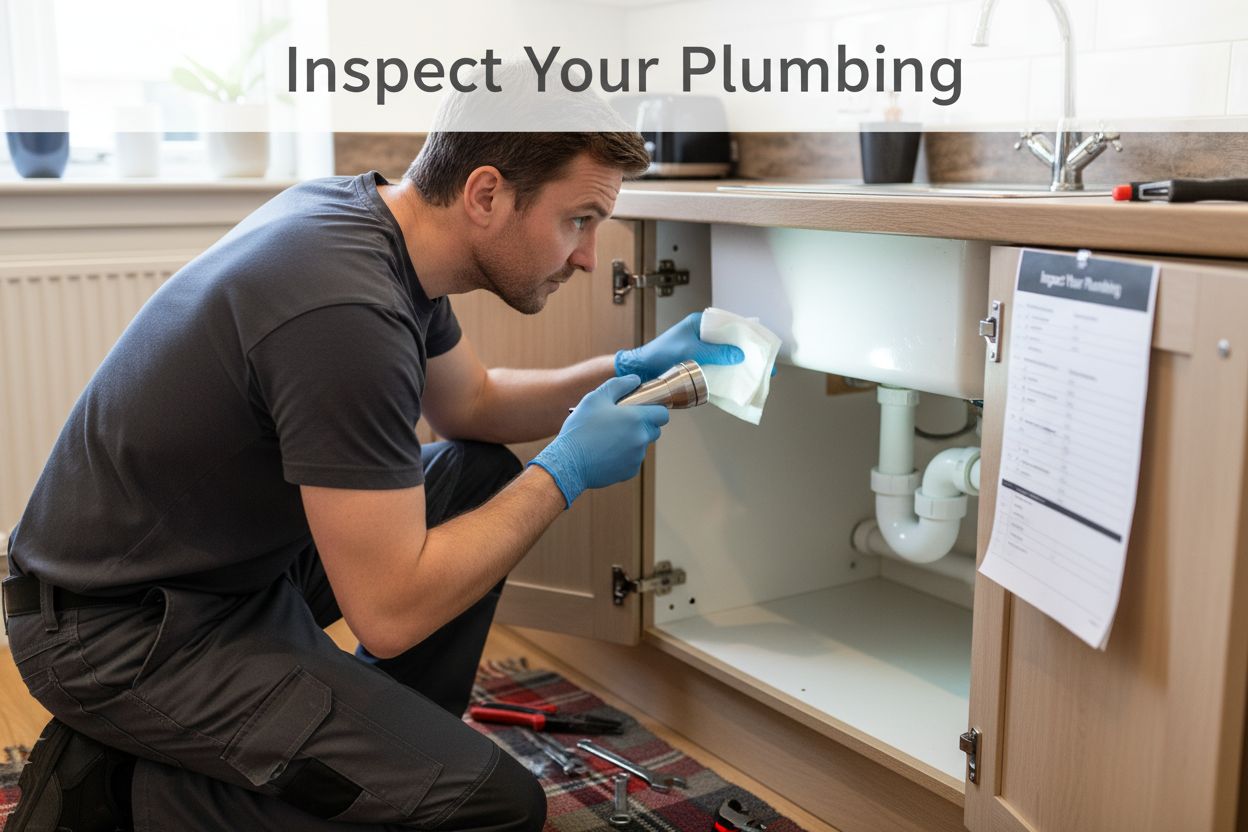
Inspect Your Plumbing for Issues
Understanding the state of your home’s plumbing system is crucial for preventing costly water damage and maintaining efficient household functionality. Simple plumbing repairs often start with a thorough inspection that allows homeowners to catch potential issues before they escalate into major problems.
Begin your inspection by checking visible pipes throughout your property, focusing on areas like under sinks, around toilets, in utility rooms, and near water heaters. Look carefully for signs of moisture, discolouration, or white crusty mineral deposits which might indicate slow leaks or developing pipe corrosion. Pay special attention to pipe joints and connections where water tends to accumulate or seep.
Carry a powerful flashlight and wear protective gloves during your inspection. You’ll want to examine pipe surfaces meticulously, checking for hairline cracks, rust spots, or subtle green and white stains that suggest water interaction with metal surfaces. Our guide on plumbing maintenance tips can provide additional insights into recognising early warning signs.
Utilise a moisture metre or simply press clean white paper towels against pipe surfaces to detect hidden moisture. Wet or discoloured patches could reveal potential leak locations that aren’t immediately visible. Remember that some pipes are concealed behind walls or under flooring, so watch for indirect indicators like unexplained damp spots, musty odours, or unusual wall discolouration.
Documenting your findings is crucial. Take clear photographs of any suspicious areas, measure and note the exact location of potential issues, and create a written log. This documentation will prove invaluable if you need professional assessment or want to track developing problems over time. For homeowners in Edinburgh’s variable climate, proactive plumbing inspections can save significant repair costs and prevent structural water damage.
Gather Necessary Tools and Materials
Preparing the right tools and materials is fundamental to successfully completing simple plumbing repairs in your Edinburgh home. Proper preparation prevents unnecessary interruptions and ensures you can address issues efficiently and confidently.
Your basic toolkit should include several essential items that will serve you across multiple repair scenarios. According to professional plumbing guidelines, critical tools include an adjustable spanner, pipe grips, plumber’s tape, a reliable hacksaw, and multiple screwdriver sizes. Consider investing in a dedicated plumbing toolkit that keeps these instruments organised and readily accessible.
Beyond tools, gathering appropriate materials is equally crucial. Purchase replacement washers, pipe sealant, and push-fit connectors beforehand. Select materials compatible with your existing plumbing system elements such as pipe diameter and material composition. For water-based repairs, always keep several clean rags, a bucket for catching potential water spillage, and protective gloves to maintain hygiene and safety.
Consider creating a dedicated storage container or toolbox specifically for plumbing repairs. This approach ensures all necessary equipment remains clean, dry, and easily transportable. Store items systematically to prevent searching during urgent repair moments. Your toolkit should also include a bright torch for examining hard-to-reach areas, measuring tape for precise assessments, and waterproof marking tools for noting potential repair locations.
Below is a table summarising key tools and materials for simple plumbing repairs, including their purpose and any relevant notes for Edinburgh homeowners.
| Tool/Material | Purpose | Notes |
|---|---|---|
| Adjustable spanner | Tightening or loosening various pipe fittings | Should fit a range of sizes |
| Pipe grips | Firmly holding or turning pipes and connectors | Essential for stubborn or slippery parts |
| Plumber’s tape (PTFE) | Sealing threaded joints to prevent leaks | Wrap clockwise, avoid excess |
| Reliable hacksaw | Cutting through piping where necessary | Check blade sharpness before use |
| Screwdrivers (various) | Removing screws from fixtures and tap assemblies | Flathead and Phillips required |
| Replacement washers | Fixing dripping taps and faulty valve seals | Purchase correct size for fixture |
| Pipe sealant | Providing watertight seals on compression fittings | Ensure compatibility with pipes |
| Push-fit connectors | Quick joining or repair of pipe sections | Select correct diameter/material |
| Bright torch | Illuminating pipework in dark or confined spaces | Keep batteries charged |
| Clean rags & bucket | Managing spills, cleaning pipes and work area | Use fresh cloths for absorbency |
Remember that while having comprehensive tools is important, knowing their proper application matters more. Take time to familiarise yourself with each tool’s specific function and practice basic techniques before attempting complex repairs. Investing in quality, durable tools will serve you better than purchasing multiple cheap alternatives that might fail during critical moments.
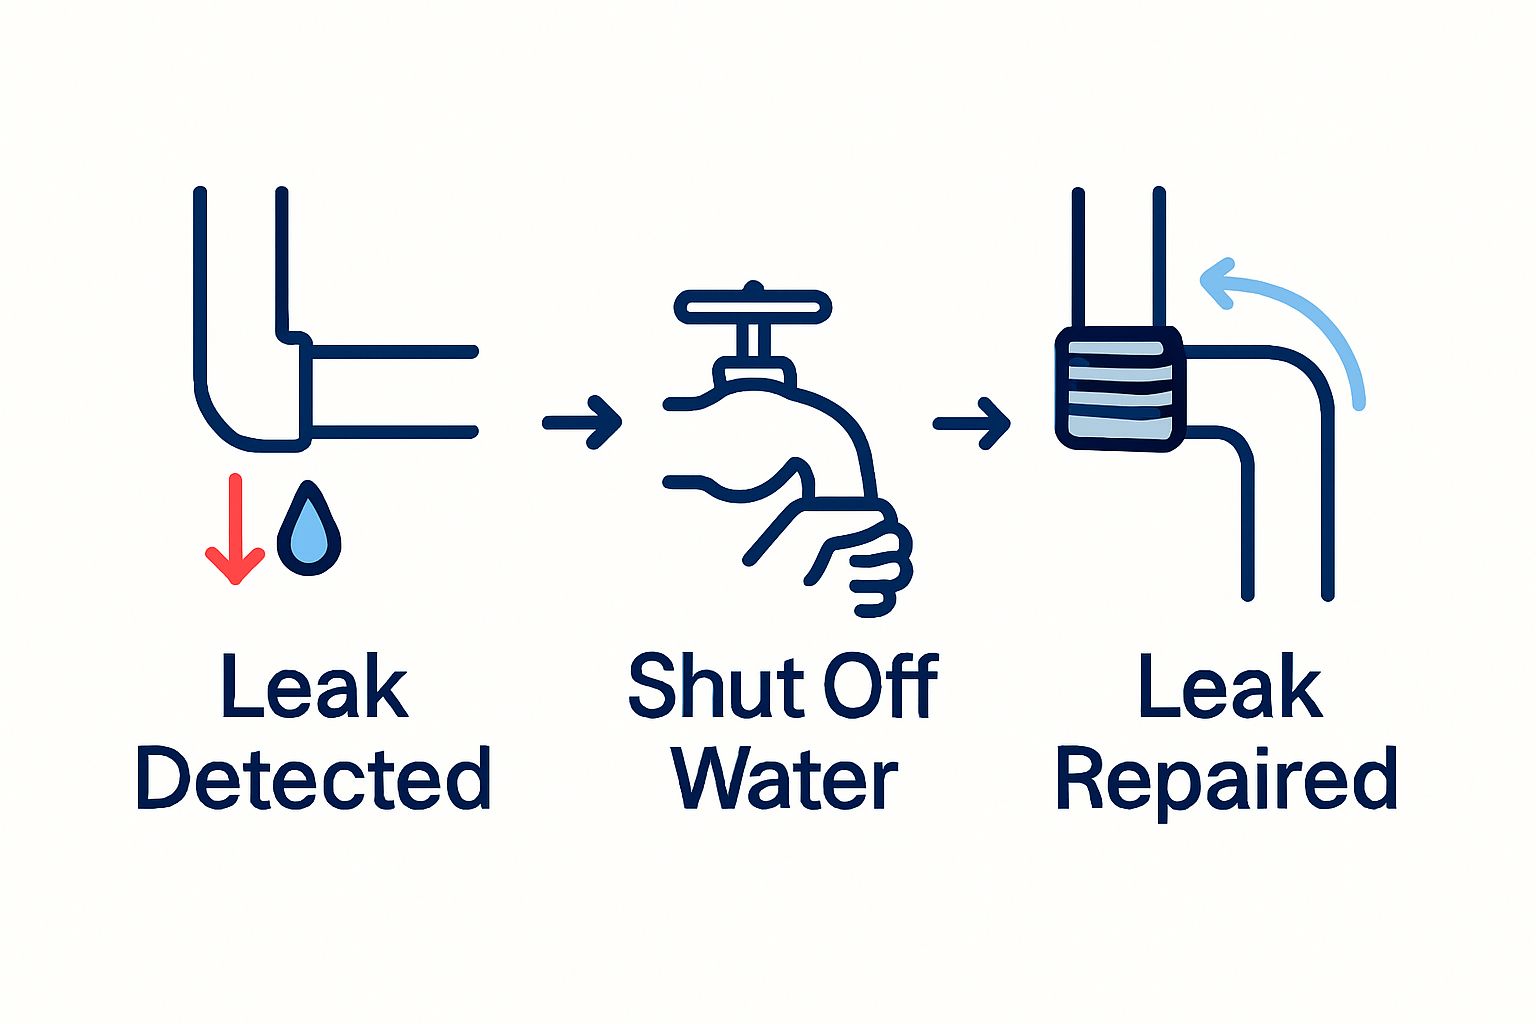
Fix Leaks in Pipes and Fixtures
Addressing leaks promptly is critical for preventing water damage and maintaining your home’s plumbing system integrity. Small leaks can rapidly escalate into significant problems if left unattended, potentially causing structural damage and increasing utility costs.
Start by identifying the precise location and nature of the leak. Learn more about leak detection techniques to help pinpoint the exact source. For pipe joint leaks, turn off the water supply before beginning repairs. Clean the affected area thoroughly using a dry cloth, ensuring the surface is completely free from moisture and debris. This preparation allows for better adhesion of repair materials and helps you assess the damage more accurately.
For minor leaks in pipe joints, apply plumber’s tape (also known as PTFE tape) around the threads in a clockwise direction. Wrap the tape tightly and smoothly, ensuring complete coverage without excessive bulging. When using push-fit connectors or compression fittings, check that rubber seals are intact and properly positioned. Gently tighten connections without over-torquing, which could damage the fitting or create additional stress points.
If you encounter more significant leaks or damage, temporary solutions like repair clamps or silicone tape can provide short-term relief while you arrange professional assistance.
These methods work well for small holes or cracks but are not permanent fixes. For leaking fixtures like taps or showerheads, often the issue stems from worn washers or seals. Carefully disassemble the fixture, replace the faulty components, and reassemble with care.
After completing repairs, slowly restore water pressure and carefully inspect the repaired area. Look for any signs of continued leakage, such as water droplets or moisture. Run water through the system and observe the repair site closely. A successful repair will show no signs of water escape, indicating you have effectively addressed the plumbing issue.
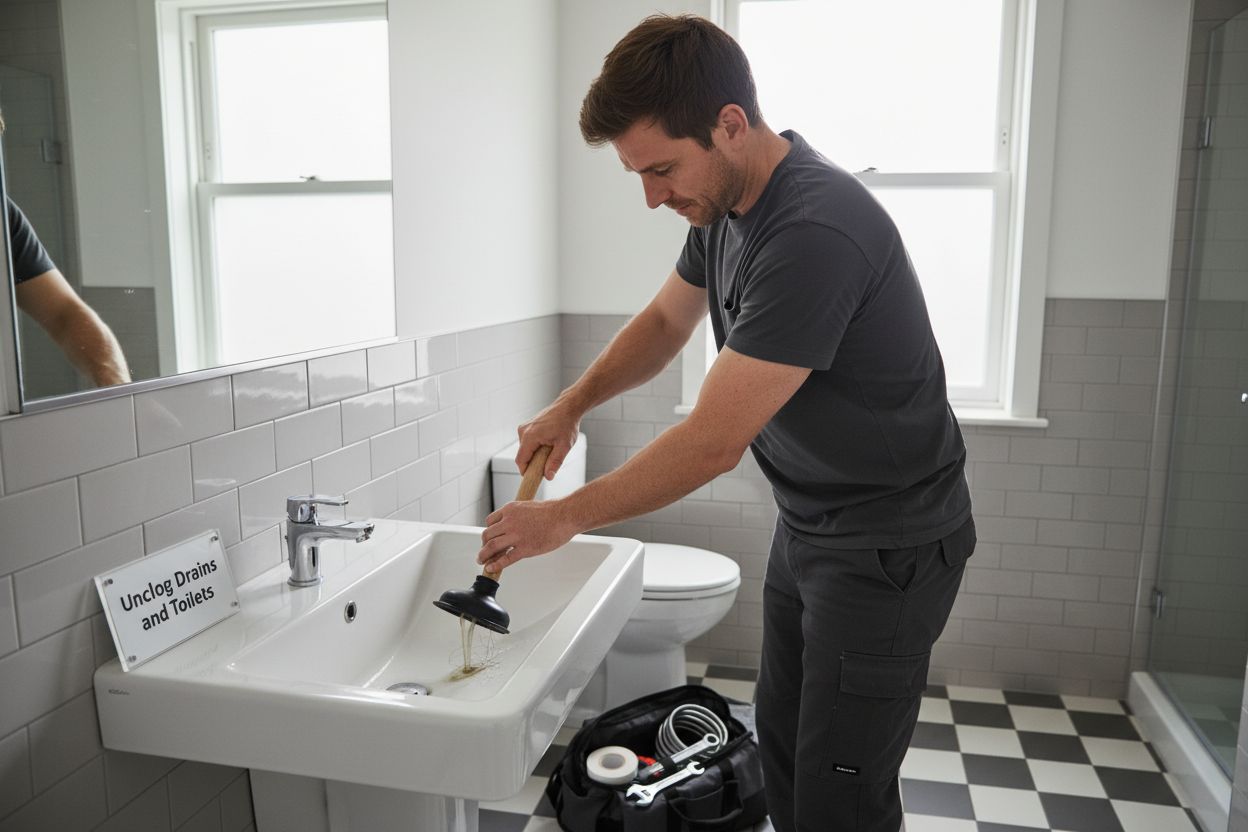
Unclog Drains and Toilets
Unclogging drains and toilets requires patience, the right techniques, and a systematic approach to resolve blockages effectively. Homeowners can tackle most minor clogs without calling a professional, saving time and money by understanding basic plumbing intervention strategies.
Begin with a plunger, which remains your first line of defence against most drain and toilet blockages. For sinks and toilets, use a flanged plunger that creates a better seal. Apply firm, consistent pressure with rhythmic plunging motions, maintaining a vertical angle to maximise suction. Our emergency plumbing guide recommends using quick, sharp plunges rather than slow, weak movements to dislodge typical obstructions.
When plunging proves ineffective, consider using a drain snake or auger. These flexible tools can navigate through pipe bends and reach deeper blockages. Insert the snake slowly, turning the handle to guide it through the pipe. Once you feel resistance, rotate the snake to break up or hook the obstruction. For bathroom sinks, remove the P-trap underneath to access and clear potential blockage points. Always have a bucket nearby to catch any water or debris that might emerge during this process.
Chemical drain cleaners should be a last resort, as they can damage pipe materials and create environmental hazards. Instead, create a natural cleaning solution using baking soda and white vinegar. Pour one cup of baking soda down the drain, followed by a cup of vinegar. Cover the drain and let the mixture sit for 15 minutes, then flush with hot water. This method helps break down organic matter and clear minor blockages without harsh chemicals.
After clearing the clog, run water at full pressure to ensure complete drainage. Listen for any unusual gurgling sounds and observe water flow speed. A successfully unclogged drain will allow water to pass quickly and smoothly, with no standing water or slow drainage.
The following table outlines troubleshooting steps for common issues during plumbing repairs, including typical symptoms, likely causes, and solutions as described in the guide.
| Issue | Symptoms | Likely Cause | Recommended Solution |
|---|---|---|---|
| Persistent leak | Ongoing dripping/moisture | Faulty joint, worn washer | Clean area, apply tape/replace washer |
| Stubborn drain clog | Water drains slowly or not at all | Organic blockages in pipes | Plunge, use drain snake, rinse with hot water |
| Leak after repair | Moisture returns near repair site | Incomplete seal or misalignment | Reapply plumber’s tape, check fitting |
| Sputtering water flow | Inconsistent or disrupted water flow | Air trapped, poor connection | Run at different pressures, tighten joints |
| Gurgling/drain noise | Unusual sounds during drainage | Partial clog remains | Repeat snake or plunging steps |
| Chemical odours | Harsh smell from pipework | Use of chemical drain cleaners | Use baking soda and vinegar methods |
 Repeat the process if necessary, but be cautious not to use excessive force that might damage your plumbing system.
Test Repairs for Effectiveness
Testing your plumbing repairs thoroughly ensures the integrity of your work and prevents potential future complications. A systematic approach to verification can save you significant time and expense by catching any remaining issues before they escalate.
Begin by slowly restoring water pressure to the repaired area. According to professional plumbing guidelines, multiple test cycles under normal operating conditions provide the most reliable assessment. For pipe and fixture repairs, watch carefully for any signs of water seepage, dripping, or unusual moisture around the repaired section. Use clean white paper towels or tissues to detect even the smallest moisture traces that might indicate an incomplete repair.
Focus on observing water flow characteristics during your tests. Run water at different pressures to simulate typical household usage. Check for smooth, consistent water flow without sputtering or irregular streaming. Listen closely for any unusual sounds like hissing, gurgling, or whistling, which could suggest underlying issues not immediately visible. Pay special attention to connections and joints, where leaks most commonly occur.
For drain and toilet repairs, perform comprehensive flushing tests. Flush multiple times in succession, watching water movement and drainage speed. A successful repair will demonstrate clear, quick water evacuation without backup or slow draining. If you notice any hesitation or partial blockage, you may need to repeat your unclogging process or consider professional intervention.
Document your testing process by taking brief videos or photographs of the repaired area during water flow. These records can serve as valuable references if you need to demonstrate the repair’s initial condition or seek professional advice. Remember that some repairs might require multiple testing cycles over several days to confirm complete resolution. Patient, thorough verification is key to maintaining your home’s plumbing system integrity.
Clean Up and Maintain Your Plumbing
Proper cleanup and ongoing maintenance are crucial steps in preserving your plumbing system’s longevity and preventing future issues. After completing repairs, a systematic approach to cleaning and maintenance will protect your investment and ensure optimal system performance.
Begin by thoroughly cleaning your work area, removing any debris, used materials, or excess sealants. Wipe down all surfaces with appropriate cleaning solutions, ensuring no residual chemicals might damage pipe surfaces or seals. Check our comprehensive maintenance guide for additional insights into long-term plumbing care. Dispose of used materials responsibly, separating recyclable items from general waste and ensuring chemical products are discarded according to local environmental regulations.
Establish a regular maintenance routine that includes periodic inspections of your plumbing system. Check visible pipes for signs of wear, potential corrosion, or minor leaks at least once every three months. Pay special attention to areas prone to moisture accumulation, such as under sinks, around toilet bases, and near water heaters. Use a bright torch to illuminate hard-to-see spaces, and keep a detailed log of your observations to track any developing issues.
Develop preventative habits that reduce strain on your plumbing system. Use drain strainers to catch hair and debris, avoid pouring grease or oil down kitchen sinks, and be mindful of what gets flushed down toilets. Periodically flush drains with hot water to help prevent buildup and maintain clear pipework. Consider using natural cleaning solutions like baking soda and vinegar monthly to keep pipes clean and reduce the risk of minor blockages.
Maintain a well-organized toolkit with cleaning and maintenance supplies readily accessible. Keep pipe tape, sealants, replacement washers, and cleaning materials in a dry, easily reachable location. This preparation allows you to address minor issues promptly before they escalate into more significant problems. Remember that consistent, proactive maintenance is far more cost-effective than reactive emergency repairs.
Stop Small Plumbing Problems Before They Become Big Expenses
Have you discovered signs of hidden leaks, stubborn clogs, or unreliable pipework in your home while following our step-by-step repair guide? These common issues not only risk water damage, higher bills, and lost peace of mind, but can also become large, costly emergencies if left untreated. Many homeowners in Edinburgh feel confident making smaller fixes, but some problems need the experience and resources of Gas Safe Registered professionals to ensure safety, compliance, and a permanent solution. For full reassurance that your home’s plumbing is truly protected and efficient, it pays to call in local experts.
Let our trusted team at Thermatek Heating & Plumbing provide lasting relief from leaks, drips, and other plumbing worries. Whether you need urgent repairs, full system inspections, or want to explore energy-saving upgrades, we are here to help you take the next step. Discover our affordable, reliable plumbing repair and maintenance solutions and request a free quote today. Protect your property, stop damage before it starts, and enjoy complete confidence in your plumbing. Act now to keep your Edinburgh home safe and stress-free.
Frequently Asked Questions
How can I start inspecting my plumbing for issues?
To inspect your plumbing for issues, begin by checking visible pipes in areas like under sinks and around toilets. Look for signs of moisture, discolouration, or mineral deposits that indicate potential leaks or corrosion.
What tools do I need for simple plumbing repairs in my home?
Essential tools for simple plumbing repairs include an adjustable spanner, pipe grips, plumber’s tape, and a reliable hacksaw. Gather these tools in a dedicated container to ensure you can efficiently address plumbing issues as they arise.
How do I fix leaks in pipes or fixtures?
To fix leaks, turn off the water supply and clean the affected area thoroughly. Apply plumber’s tape tightly around the joint, or replace worn washers to stop the leak and prevent further water damage.
What are effective methods to unclog drains and toilets at home?
Start with a flanged plunger for blockages, applying firm pressure to create a seal. If the clog persists, consider using a drain snake to clear deeper obstructions, and avoid chemical cleaners that might damage your plumbing.
How can I test my plumbing repairs to ensure they’re effective?
After making repairs, slowly restore water pressure and observe for signs of leaks or unusual sounds. Conduct multiple tests in various conditions, checking for consistent water flow and drainage to confirm the repair’s effectiveness.
What maintenance steps can I take to prolong the life of my plumbing system?
Establish a regular inspection routine every three months to check for wear and leaks in visible pipes. Additionally, maintain good habits like using drain strainers and avoiding flushing inappropriate items to better prevent future issues.
Recommended
- How To Choose A Plumber: Find The Perfect Fit For Your Needs - Thermatek Heating
- 7 Essential Plumbing Maintenance Tips For Homeowners - Thermatek Heating
- 7 Common Plumbing Emergencies Every Homeowner Should Know - Thermatek Heating
- Understanding Plumbing Leak Detection: Why It Matters - Thermatek Heating
- Understanding Common DIY Plumbing Mistakes For Homeowners - Legacy Plumbing & Drain - Emergency Plumbers Of Sacramento
- Essential Plumbing Maintenance Checklist for 2025 Tips - 8th Bend Plumbing Heating and Cooling

Do I Need a Powerflush? Understanding Your Heating System
Central heating keeps homes warm and comfortable year-round, but hidden inside the pipework trouble can quietly build up. It might sound harmless, yet debris and sludge can slash system efficiency by up to 15 percent and even double your energy bills over time. Most people think a new boiler is the answer, but a professional powerflush could bring your entire system back to life without the cost or hassle of major replacements.
Table of Contents
- What Is A Powerflush And When Is It Necessary?
- Why Powerflushing Is Important For Home Heating Systems
- How Powerflushing Works: The Process Explained
- Signs That Your System Might Need A Powerflush
- Understanding The Benefits And Costs Of Powerflushing
Quick Summary
| Takeaway | Explanation |
|---|---|
| Powerflushing maintains heating efficiency | Regular powerflushing removes sludge and debris, enhancing your system’s performance and preventing inefficiencies. |
| Watch for signs needing powerflush | Indicators include cold radiator bottoms, increased energy bills, and noisy boilers, signalling the need for immediate maintenance. |
| Powerflushing can save on energy costs | Investing in powerflushing can lead to energy bill reductions of up to 15%, delivering long-term savings. |
| Delay in powerflush leads to higher repair costs | Neglecting powerflush can result in costly breakdowns and increased wear on components, necessitating early intervention. |
| Professional powerflushing is essential | Skilled engineers use specialised equipment and cleaning solutions to ensure thorough system restoration and efficiency. |
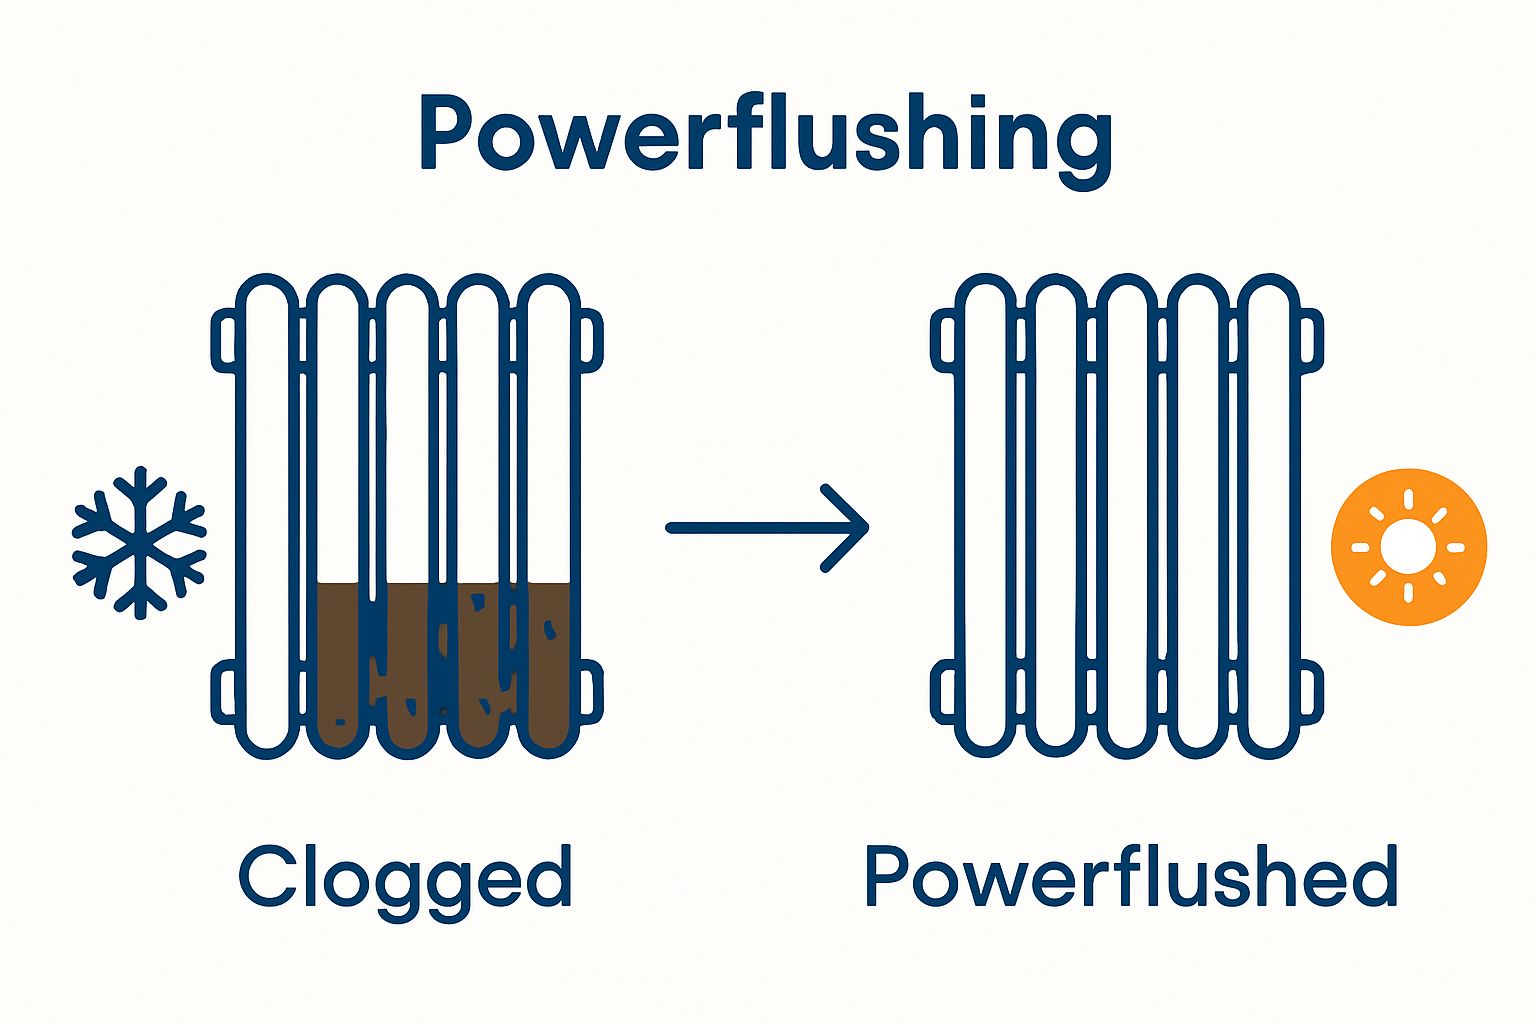
What is a Powerflush and When is it Necessary?
A powerflush represents a critical maintenance procedure for central heating systems designed to remove accumulated debris, sludge, and rust that naturally builds up inside radiators and pipework over time. Powerflush services in Edinburgh can dramatically improve your heating system’s efficiency and prevent potential long-term damage.
Understanding System Buildup
Central heating systems gradually accumulate sediment through natural corrosion processes. Metal components within pipes and radiators slowly deteriorate, creating magnetic and non-magnetic particles that circulate through your system. These particles can cause significant problems if left unchecked
 :
:
- Reduced heating efficiency
- Cold spots in radiators
- Increased energy consumption
- Potential damage to boiler components
Signs You Need a Powerflush
Recognising when a powerflush becomes necessary involves understanding specific warning signals from your heating system. According to Which? Home and Heating Experts, several indicators suggest your system might require professional intervention:
- Radiators that are cold at the bottom but warm at the top
- Noisy boiler or central heating pump
- Discoloured water when bleeding radiators
- Frequent breakdowns of heating equipment
- Significantly higher energy bills without apparent reason
Powerflushing involves using specialized equipment to forcefully circulate cleaning chemicals through your entire heating system.
Below is a table summarising key warning signs that indicate your heating system may require a powerflush, helping homeowners spot issues before costly breakdowns occur.
| Warning Sign | Description |
|---|---|
| Cold radiators at the bottom | Indicates sludge buildup blocking heat transfer |
| Noisy boiler or central heating pump | Suggests internal debris causing turbulence |
| Discoloured water when bleeding radiators | Reveals corrosion or rust contamination within the system |
| Frequent breakdowns of heating equipment | Accumulated debris placing strain on components |
| Significantly higher energy bills | Efficiency reduction leading to increased energy use |
By addressing system buildup proactively, homeowners can prevent costly repairs and maintain optimal heating performance throughout their property.
Why Powerflushing is Important for Home Heating Systems
Powerflushing plays a crucial role in maintaining the health and efficiency of central heating systems, preventing potential catastrophic failures and ensuring optimal performance. Understanding hydronic heating systems provides context for why regular maintenance becomes essential for long term system reliability.
The Hidden Dangers of System Debris
Over time, central heating systems accumulate a complex mixture of corrosion byproducts, sludge, and microscopic metal particles. These contaminants create significant risks to your heating infrastructure. According to research from the Energy Saving Trust, untreated system debris can lead to multiple performance and efficiency problems:
- Reduced heat transfer efficiency
- Increased energy consumption
- Accelerated component wear
- Potential complete system breakdown
Economic and Performance Implications
The economic impact of neglecting powerflush maintenance extends far beyond immediate repair costs. Heating systems compromised by internal debris work significantly harder to maintain desired temperatures, resulting in substantially higher energy expenditure. Professional assessments indicate that systems with moderate buildup can experience efficiency reductions of up to 15%, translating into increased annual heating expenses.
Moreover, accumulated debris creates additional strain on critical components like boiler pumps and heat exchangers. This extra mechanical stress dramatically shortens equipment lifespan, potentially necessitating expensive replacements years before their expected operational period. By investing in regular powerflushing, homeowners can protect their heating infrastructure, maintain system efficiency, and avoid unexpected and costly repair interventions.
Powerflushing represents a proactive maintenance strategy that safeguards your home’s heating performance, ensures consistent thermal comfort, and delivers substantial long-term financial benefits through improved system reliability and energy efficiency.
How Powerflushing Works: The Process Explained
Powerflushing represents a sophisticated cleaning technique designed to restore central heating systems to their optimal performance. How to flush heating systems in Edinburgh homes provides insight into the localized approach professionals use to address system contamination.
The Technical Mechanics of Powerflushing
The powerflush process involves a series of precisely engineered steps that systematically remove accumulated debris from your heating infrastructure.
This table outlines the typical steps involved in the professional powerflushing process, clarifying the technical approach for restoring system efficiency.
| Step | Description |
|---|---|
| High-pressure water circulation | Forces debris through and out of the system |
| Introduction of chemical cleaning agents | Breaks down sludge, corrosion, and mineral deposits |
| Magnetic filtration | Captures and removes metallic contaminants |
| Comprehensive system flushing | Removes loosened debris and cleaning solution from the system |
| Neutralisation | Balances pH and ensures safety for ongoing system operation |
- High-pressure water circulation through the entire heating network
- Introduction of specialized chemical cleaning agents
- Magnetic filtration to capture metallic contaminants
- Comprehensive system flushing and neutralization
Comprehensive Cleaning and Treatment
Professional engineers employ advanced machinery specifically designed to generate substantial water pressure and volume. This equipment connects directly to your heating system, creating a powerful cleaning mechanism that dislodges years of accumulated sludge, rust, and corrosion byproducts. The cleaning solution used during powerflushing contains carefully formulated chemicals that break down mineral deposits and prevent future corrosion.
The process involves multiple directional water flows that ensure thorough cleaning of every radiator, pipe, and system component. Technicians monitor water color and clarity throughout the procedure, which serves as a real-time indicator of debris removal progress. Magnetic filters integrated into the process capture metallic particles, preventing their recirculation and potential damage to critical heating infrastructure.
By systematically removing contaminants, powerflushing restores your heating system’s efficiency, reduces energy consumption, and extends the operational lifespan of expensive components like boilers and heat exchangers.
Signs That Your System Might Need a Powerflush
Detecting early warning signs of heating system deterioration can prevent costly repairs and extend your infrastructure’s operational lifespan. What is power flushing and its importance offers additional context for understanding these critical indicators.
Performance Degradation Indicators
Heating systems communicate their health through subtle yet significant performance changes. According to British Heating Research Council, homeowners should pay close attention to several key performance signals:
- Radiators that are cold at the bottom but warm at the top
- Significantly increased heating times
- Inconsistent heating across different rooms
- Unusual noises from boiler or radiators
- Reduced overall heating efficiency
Physical Evidence of System Contamination
Visual and tactile indicators provide direct evidence of internal system deterioration. Discoloured water when bleeding radiators represents a critical warning sign of excessive internal corrosion. Professional heating engineers recognize these symptoms as clear indications that accumulated debris has reached problematic levels.
Economic considerations also play a crucial role in identifying powerflush necessity. Systems experiencing substantial debris buildup work significantly harder to maintain desired temperatures, resulting in dramatically increased energy consumption. Homeowners might notice unexplained spikes in heating bills despite unchanged usage patterns, which often signals underlying system inefficiencies requiring professional intervention.

By recognizing these warning signs early, property owners can proactively address potential heating system complications, preventing more extensive and expensive damage while maintaining optimal thermal comfort and energy efficiency.
Understanding the Benefits and Costs of Powerflushing
Powerflushing represents a strategic investment in your heating system’s long-term performance and efficiency. Complete hot water cylinder maintenance provides additional context for understanding comprehensive heating system care.
Long-Term Financial Benefits
While initial powerflush costs might seem substantial, the long-term financial advantages are significant. According to Energy Saving Trust research, professional powerflush treatments can deliver measurable economic benefits:
- Potential energy bill reductions of up to 15%
- Extended heating system lifespan
- Reduced risk of expensive component replacements
- Lower maintenance and repair costs
- Improved overall system efficiency
Cost Considerations and Investment Analysis
The average powerflush cost typically ranges between £300 and £750, depending on system complexity and property size. Professional heating engineers evaluate multiple factors when determining precise pricing, including:
- Total number of radiators
- System age and current condition
- Accessibility of heating infrastructure
- Potential complexity of debris removal
- Required specialized cleaning equipment
The economic rationale extends beyond immediate expense. By preventing potential boiler breakdowns and reducing energy consumption, powerflushing offers a compelling return on investment.
The following table breaks down the main financial and performance benefits of powerflushing as described in the article, aiding homeowners in evaluating its return on investment.
| Benefit | Explanation |
|---|---|
| Energy bill reduction (up to 15%) | Improved efficiency means less energy needed for heating |
| Extended system lifespan | Reduced strain on components delays need for replacements |
| Lower repair and maintenance costs | Prevents breakdowns linked to sludge and debris |
| Improved heating efficiency | Restores optimal heat transfer and system performance |
| Reduced risk of expensive failures | Proactive cleaning minimises likelihood of major component damage |
Ultimately, powerflushing represents a proactive maintenance strategy that balances immediate investment against substantial long-term financial and performance benefits for your home’s heating infrastructure.
Restore Your Heating Efficiency and Comfort – Expert Help Is Here
Is your heating system suffering from cold spots, rising energy bills, or noisy radiators? If your home is showing signs mentioned in our article, such as discoloured water from the radiators or uneven heating, a professional powerflush could be the solution your system urgently needs. At Thermatek Heating, our experienced Gas Safe Registered engineers bring advanced skills and proven results to every powerflush we carry out. This is your opportunity to reclaim reliable warmth, reduce costly repairs, and make your home energy bills more manageable.
Do not let unresolved sludge or corrosion put your comfort and investment at risk. Act now to protect your heating system and enjoy peace of mind throughout the colder months. Visit Thermatek Heating to arrange your powerflush or get a free, no-obligation quote today. Take the next step towards efficient, worry-free heating.
Frequently Asked Questions
Do I need a powerflush for my heating system?
Yes, you may need a powerflush if you notice cold spots in your radiators, unusual noises from your boiler, or discoloured water when bleeding your radiators. To determine if a powerflush is necessary, check for these indicators and consider having a professional assess your system’s condition.
How often should I consider a powerflush?
It is generally recommended to consider a powerflush every 5 to 10 years, depending on your system’s condition and performance. Regularly monitor for signs of buildup or inefficiency to decide the best timing for a powerflush.
What are the signs that my heating system needs a powerflush?
Look for signs such as cold radiators at the bottom, increased heating times, or higher energy bills without a change in usage. If you notice these symptoms, schedule a professional evaluation to discuss the possibility of a powerflush.
How does the powerflush process work?
The powerflush process involves using high-pressure water and specialised cleaning agents to remove sludge and debris from your heating system. To understand the procedure better, consult with a professional who can explain the steps and equipment used during a powerflush.
Will a powerflush improve my heating efficiency?
Yes, a powerflush can significantly improve your heating system’s efficiency by removing debris that hinders heat transfer. To maximise your heating performance, consider scheduling a powerflush when you observe any indicators of system issues.
What is the average cost of a powerflush?
The average cost of a powerflush typically ranges from £300 to £750, depending on the size and complexity of your heating system. To get an accurate estimate, contact a professional for a tailored assessment based on your specific system needs.
Recommended
- What Is Power Flushing? Understanding Its Importance - Thermatek Heating
- How To Flush Heating System In Edinburgh Homes - Thermatek Heating
- Understanding Central Heating Upgrades For Homeowners - Thermatek Heating
- Understanding How Often To Service Your Boiler - Thermatek Heating

How to Maintain Radiators for Efficient Heating in 2025
Radiators work hard behind the scenes, keeping your home cosy during the coldest months. It might surprise you to learn that bleeding radiators can improve heating efficiency by up to 15 percent and reduce your energy bills. Most people worry about complex repairs, but radiator maintenance is often much simpler than it seems and knowing the right steps can make a world of difference.
Table of Contents
- Step 1: Gather Necessary Tools And Materials
- Step 2: Turn Off Heating And Allow Radiators To Cool
- Step 3: Bleed Radiators To Remove Air Trapped Inside
- Step 4: Check For Leaks And Repair Any Issues
- Step 5: Clean Radiators And Remove Dust Buildup
- Step 6: Test Radiator Performance And Adjust Settings
Quick Summary
| Key Point | Explanation |
|---|---|
| 1. Gather essential tools for maintenance | Collect tools like a radiator bleed key, digital thermometer, and screwdrivers to prepare for radiator upkeep. |
| 2. Turn off heating before maintenance | Switch off your heating system and allow radiators to cool for 30-45 minutes to ensure safe working conditions. |
| 3. Bleed radiators to release trapped air | Performing a systematic bleeding process removes air pockets, enhancing heating efficiency and reducing energy costs. |
| 4. Check for leaks during inspection | Regularly inspect for moisture and rust around valves and connections to prevent damage and maintain system performance. |
| 5. Test performance after maintenance | Restart heating and monitor for even heat distribution, unusual sounds, and proper temperature to ensure effective radiator function. |
Step 1: Gather Necessary Tools and Materials
Preparing to maintain your radiators requires strategic planning and the right equipment. Professional heating maintenance demands precision and careful preparation, ensuring you can address potential issues efficiently and safely. Before diving into the technical aspects of radiator upkeep, collecting the appropriate tools and materials will set the foundation for a successful maintenance process.
Essential Tools for Radiator Maintenance
Your toolkit will be crucial in navigating the maintenance journey. You will need specific instruments that enable thorough inspection and potential repairs. A comprehensive radiator maintenance toolkit typically includes:
- Adjustable radiator bleed key
- Digital thermometer
- Protective work gloves
- Large towel or absorbent cloth
- Bucket or container for water collection
- Flathead and Phillips head screwdrivers
- Adjustable wrench
These tools provide the fundamental equipment necessary to diagnose and address potential radiator performance issues. Each instrument serves a specific purpose in the maintenance workflow, enabling homeowners to perform comprehensive checks and minor repairs.
Beyond physical tools, safety preparation is equally critical. Ensure you have appropriate protective clothing, including sturdy work gloves and clothing you do not mind getting potentially dirty. Work in a well-ventilated area with adequate lighting, which allows for precise examination of your radiator’s condition.
Before commencing any maintenance, turn off your central heating system. This precautionary step prevents potential scalding and allows radiator components to cool down sufficiently. Waiting approximately 30 minutes ensures safe working temperatures and minimises risk of accidental burns or steam-related injuries.
Additionally, have some clean cloths or paper towels available for wiping surfaces and managing any water spillage during the maintenance process. A small container or bucket positioned strategically can catch any water released during bleeding or cleaning procedures, maintaining a tidy workspace.
By methodically gathering these tools and preparing your workspace, you establish a solid foundation for effective radiator maintenance.
Below is a table summarising the essential tools and materials required for effective radiator maintenance, along with their main purposes.
| Tool/Material | Purpose |
|---|---|
| Adjustable radiator bleed key | Releases trapped air from radiators |
| Digital thermometer | Measures radiator surface temperature |
| Protective work gloves | Ensures safety when handling hot or dirty parts |
| Large towel or absorbent cloth | Catches drips and protects flooring |
| Bucket or container | Collects water released during bleeding |
| Flathead/Phillips screwdriver | Removes or tightens radiator fittings |
| Adjustable wrench | Tightens valves and connections |
| Clean cloths/paper towels | Wipes surfaces and manages spills |
Step 2: Turn Off Heating and Allow Radiators to Cool
Safety and systematic preparation are paramount when maintaining radiators, making the cooling process a critical preliminary step. Turning off the heating system and allowing radiators to cool completely prevents potential scalding risks and creates a stable environment for thorough inspection and maintenance. Read more about common radiator problems and safety considerations.
Systematic Heating System Shutdown
Begin by locating your central heating control panel or thermostat. Most modern systems have a clear shutdown mechanism, typically involving pressing a specific button or switching the system to an “off” position. For older systems, you might need to manually turn off the boiler using its dedicated power switch. Ensure you understand your specific heating system’s shutdown protocol to avoid unnecessary complications.
Once the heating is switched off, patience becomes your most important tool. Radiators retain significant heat even after the system is deactivated, and rushing the cooling process can lead to potential injuries. Allow approximately 30 to 45 minutes for complete cooling. During this waiting period, avoid touching radiator surfaces directly and keep children and pets away from the area.
Verifying Safe Working Temperature
To confirm the radiators have reached a safe working temperature, conduct a careful temperature check. Use the back of your hand to test the radiator surface gently. The metal should feel only slightly warm or at room temperature. If the surface still feels hot to the touch, continue waiting and recheck periodically.
While waiting for cooling, use this time to prepare your workspace. Lay out your previously gathered tools, position your collection bucket, and spread protective cloths or towels around the work area. This preparation ensures a smooth transition into the next maintenance steps.
Additional precautions include ensuring proper ventilation in the room. Open windows slightly to help dissipate residual heat and create a comfortable working environment. Remember that different radiator sizes and materials might cool at slightly varying rates, so exercise consistent caution throughout the process.
By methodically turning off the heating and allowing radiators to cool completely, you establish a safe foundation for thorough maintenance. This deliberate approach minimises risks and sets the stage for effective radiator care.
Step 3: Bleed Radiators to Remove Air Trapped Inside
Removing trapped air from radiators is a crucial maintenance step that significantly improves heating efficiency and system performance. Air pockets within radiator systems can drastically reduce heat distribution, causing uneven warming and increased energy consumption. Learn more about balancing heating systems for optimal comfort.
Understanding Air Trapped in Radiators
Air accumulation occurs naturally in heating systems over time, creating barriers that prevent hot water from circulating effectively. These trapped air bubbles create cold spots in radiators, reducing their heating capacity and making your system work harder to maintain desired temperatures. The bleeding process releases these air pockets, restoring full functionality to your heating infrastructure.
Step-by-Step Bleeding Process
Begin by positioning your prepared towel or cloth beneath the radiator bleed valve to catch any water that might escape during the process. The bleed valve is typically located at the top side of the radiator and looks like a small square or hexagonal nut. Insert your radiator bleed key into this valve, ensuring a secure fit.
**Key Bleeding Techniques
![]() **
**
- Rotate the bleed key counterclockwise very slowly
- Listen for a hissing sound indicating air escaping
- Keep the valve slightly open until water starts to emerge
- Close the valve immediately once water flows consistently
As you bleed each radiator, pay attention to the water’s appearance. Initially, the water might look cloudy or contain small air bubbles. This is normal. Once the water runs clear and flows steadily without sputtering, you have successfully removed the trapped air.
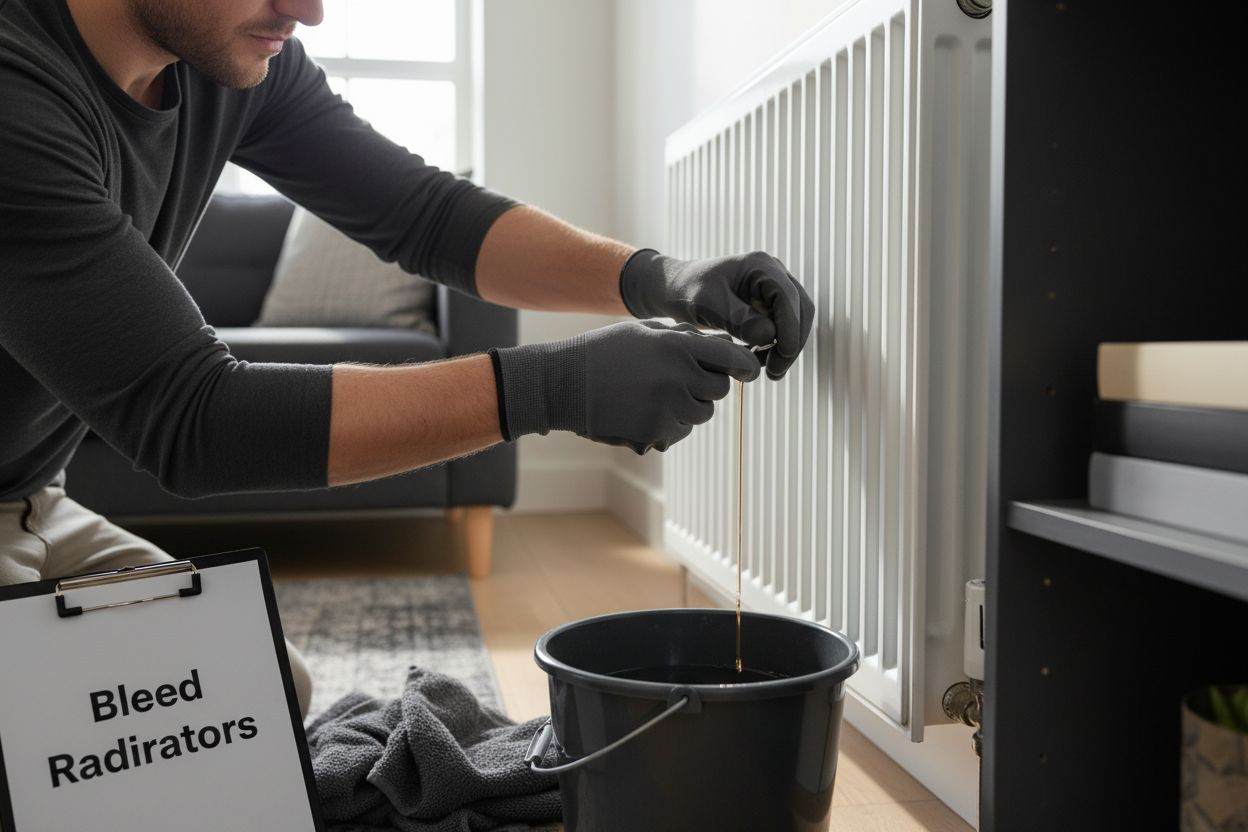
Work systematically through your home, starting from the lowest floor and moving upwards. This approach ensures comprehensive air removal and prevents reintroducing air into already bled radiators. Take your time and be patient, as rushing can lead to incomplete air removal or potential system damage.
After completing the bleeding process, monitor your radiators over the next few days. Properly bled radiators should heat evenly and reach their full temperature quickly. If you notice continued cold spots or inconsistent heating, you might need to repeat the process or consult a professional heating engineer.
Remember that bleeding radiators is not just a maintenance task but an opportunity to improve your home’s heating efficiency and reduce unnecessary energy consumption.
Step 4: Check for Leaks and Repair Any Issues
Detecting and addressing leaks in your radiator system is a critical maintenance step that prevents potential long-term damage and ensures optimal heating performance. Learn more about comprehensive leak detection techniques.
Visual and Tactile Leak Inspection
Begin your inspection by carefully examining each radiator and connecting pipework for signs of moisture or corrosion. Warning signs include:
- Visible water droplets or wet patches around connections
- Rust-colored stains near pipe joints
- White calcium deposits suggesting long-term water seepage
- Unexplained damp areas on walls adjacent to radiators
Use a dry cloth to wipe around all connections, paying special attention to valve areas and pipe junctions. Subtle dampness might not be immediately apparent, so take your time and perform a thorough examination. Press gently around connections to check for any movement or potential weak points that could indicate developing structural issues.
Addressing Minor Leaks
For small leaks around valve connections, you might be able to resolve the issue using basic tools. Tighten valve nuts carefully using an adjustable wrench, applying gentle and consistent pressure. Avoid over-tightening, which could damage threading or create additional stress points. If tightening does not resolve the leak, you may need to replace the valve or seek professional assistance.
Some leaks result from worn valve packings or seals. In such cases, you can often replace these components without removing the entire radiator. Purchase replacement packings that match your specific radiator model, ensuring a precise fit. Apply PTFE tape to thread connections to create a more robust seal and prevent future leakage.
Pay particular attention to radiator valves, as they are common sources of potential leaks. Thermostatic and manual valves can develop wear over time, compromising their sealing capability. Inspect the valve body and spindle for signs of corrosion or damage that might prevent proper closure.
If you discover significant leaks, extensive corrosion, or feel uncertain about performing repairs, contact a professional heating engineer. Some issues require specialized knowledge and tools to address safely and effectively. Document any discovered problems with photographs, which can help professionals diagnose the issue more quickly during a follow-up inspection.
Remember that proactive leak detection and timely repairs can prevent costly water damage, reduce energy waste, and extend the overall lifespan of your heating system.
Step 5: Clean Radiators and Remove Dust Buildup
Dust and debris accumulation can significantly impair radiator performance, reducing heating efficiency and potentially compromising indoor air quality. Explore comprehensive heating system maintenance strategies to complement your cleaning efforts.
Comprehensive Cleaning Preparation
Gather specialized cleaning tools before beginning: a vacuum cleaner with a soft brush attachment, microfiber cloths, an extendable radiator brush, and a mild cleaning solution. Protective measures are crucial. Wear old clothing and consider using protective gloves to prevent dust contact with skin and minimize potential allergic reactions.
Methodical Dust Removal Technique
Start by turning off your heating system completely to prevent dust circulation. Begin with the vacuum cleaner, using its soft brush attachment to gently remove loose dust from the radiator’s exterior surfaces. Move methodically from top to bottom, ensuring you capture dust particles without scratching the radiator’s finish.
Pay particular attention to the spaces between radiator fins and panels, where dust tends to accumulate most densely. An extendable radiator brush can reach these challenging areas, allowing thorough cleaning without requiring uncomfortable physical contortions. Move the brush horizontally and vertically, dislodging trapped dust particles systematically.
Advanced Cleaning Considerations
For stubborn dust and grime, prepare a mild cleaning solution using warm water and a small amount of gentle detergent. Dampen a microfiber cloth slightly – remember, moisture should be minimal to prevent potential rusting or water damage. Wipe the radiator’s external surfaces carefully, avoiding electrical connections or valve mechanisms.
If your radiators have complex designs or hard-to-reach areas, consider using compressed air in short, controlled bursts to dislodge accumulated dust. Hold the can approximately 15 centimetres away from the surface and spray in short intervals to prevent moisture buildup.
Be particularly cautious with older radiators, which might have more delicate paintwork or vulnerable connections. Gentle cleaning techniques prevent inadvertent damage while maintaining the radiator’s structural integrity. After cleaning, use a dry microfiber cloth to remove any remaining moisture and prevent potential oxidation.
Once you complete the cleaning process, step back and inspect your work. A properly cleaned radiator should appear uniform in colour, free from visible dust accumulations, and ready to provide efficient heating. Regular maintenance like this can improve your heating system’s performance and potentially extend its operational lifespan.
Step 6: Test Radiator Performance and Adjust Settings
After completing comprehensive maintenance, testing your radiator system’s performance becomes crucial in ensuring optimal heating efficiency. This final evaluation step confirms the effectiveness of your previous maintenance efforts and identifies any remaining potential issues. Learn more about balancing heating systems for maximum comfort.
Systematic Performance Verification
Restart your central heating system and observe the radiators carefully during the initial warm-up cycle. Key performance indicators include:
- Consistent and uniform heat distribution across all radiators
- Rapid and even warming from bottom to top
- No unusual noises like banging, whistling, or gurgling
- Absence of cold spots or uneven temperature zones
Use a digital thermometer to measure temperature variations across different radiator sections. A well-functioning radiator should demonstrate a gradual, uniform temperature increase within approximately 10 to 15 minutes after system activation.
Detailed Temperature and Pressure Assessment
Carefully monitor each radiator’s temperature progression, paying special attention to valve functionality and heat distribution. Touch different sections of each radiator to verify consistent warming. The bottom of the radiator should heat first, gradually moving upwards, which indicates proper water circulation and absence of trapped air.
Check your system’s pressure gauge, typically located on the boiler. Normal pressure ranges typically fall between 1 and 1.5 bar when the system is cold. Significant deviations might suggest underlying issues such as water leakage or air accumulation that require further investigation.
If you detect temperature inconsistencies or persistent cold spots, you might need to repeat the bleeding process or adjust individual radiator valves. Some radiators feature thermostatic valves allowing precise temperature control, enabling you to balance heat distribution across different rooms.
Listen carefully during the initial heating cycle for any unusual sounds. Persistent knocking or banging might indicate potential issues with water pressure, air pockets, or pipe alignment. While some minor sounds are normal, consistent or loud noises warrant professional inspection.
Document your observations, noting any areas of concern or unexpected performance characteristics. This documentation can prove invaluable if you need to consult a professional heating engineer or track your system’s long-term performance.
Remember that thorough testing transforms routine maintenance into a proactive approach to home heating management, potentially preventing more significant issues and ensuring consistent, efficient warmth throughout your living space.
The following table provides an overview of each main maintenance step, with an estimated time frame and the key outcome you should expect.
| Step | Estimated Time | Key Outcome |
|---|---|---|
| Gather necessary tools and materials | 10–15 minutes | Preparation for safe and effective maintenance |
| Turn off heating and allow to cool | 30–45 minutes | Safe working temperature for radiator handling |
| Bleed radiators | 10–20 minutes each | Removal of trapped air, improved heat distribution |
| Check for leaks and repair | 15–30 minutes | Identification & fixing of minor leaks or weak points |
| Clean radiators and remove dust | 20–30 minutes | Dust-free radiators, better efficiency |
| Test radiator performance | 15–20 minutes | Even heat, no unusual noises, balanced system |
Keep Your Radiators Efficient and Your Home Warm with Thermatek
Tired of uneven heating, cold spots, and the worry of hidden leaks that disrupt your comfort? The article has highlighted the need for precise radiator maintenance using steps like bleeding air, checking for leaks, and regular cleaning. But sometimes even diligent DIY effort cannot cover every complex issue or guarantee lasting results, especially when you want to ensure safety and efficiency across your whole system.
Why settle for uncertainty when you can rely on proven professionals? At Thermatek Heating, our Gas Safe Registered engineers specialise in central heating performance and long-term reliability. We offer services such as comprehensive leak detection and expert heating system balancing to maximise comfort and energy savings. Book an inspection or maintenance visit with Thermatek today to protect your home from costly faults and get peace of mind for each heating season. Visit https://thermatekheating.co.uk and request your free quote now.
Frequently Asked Questions
How do I gather the necessary tools for maintaining my radiators in 2025?
To maintain your radiators efficiently, ensure you have an adjustable radiator bleed key, a digital thermometer, protective gloves, and basic screwdrivers. Start by collecting these tools to set a solid foundation for your maintenance process.
What should I do before starting radiator maintenance?
Before commencing maintenance, turn off your central heating system and allow the radiators to cool for about 30 to 45 minutes. This ensures safety and prevents scalding while you prepare your workspace.
How do I bleed my radiators to remove trapped air?
To bleed your radiators, use a radiator bleed key to slowly turn the bleed valve counterclockwise until you hear a hissing sound of escaping air. Keep the valve open until water flows steadily, then close it immediately, ensuring to check all radiators systematically from the lowest to the highest floor.
What are the signs of leaks in my radiator system?
Look for visible water droplets, rust stains, or damp patches around your radiators and pipes. If you notice any of these signs, inspect and tighten connections or replace faulty components immediately to prevent further damage.
How often should I clean my radiators to ensure efficient heating?
Regular cleaning of your radiators should be done at least once a year to remove dust and debris that can obstruct heat flow. Schedule this cleaning to coincide with the start of the heating season for optimal performance.
How can I test the performance of my radiators after maintenance?
After maintenance, restart your heating system and observe each radiator for even heat distribution within 10 to 15 minutes. If you find any cold spots or unusual noises, perform additional checks or adjustments as needed.
Recommended
- 7 Common Radiator Problems And How To Fix Them - Thermatek Heating
- Master Balancing Heating Systems For Optimal Comfort - Thermatek Heating
- How To Use Heating Efficiently For Comfort And Savings - Thermatek Heating
- Understanding Hydronic Heating Systems: How They Work - Thermatek Heating
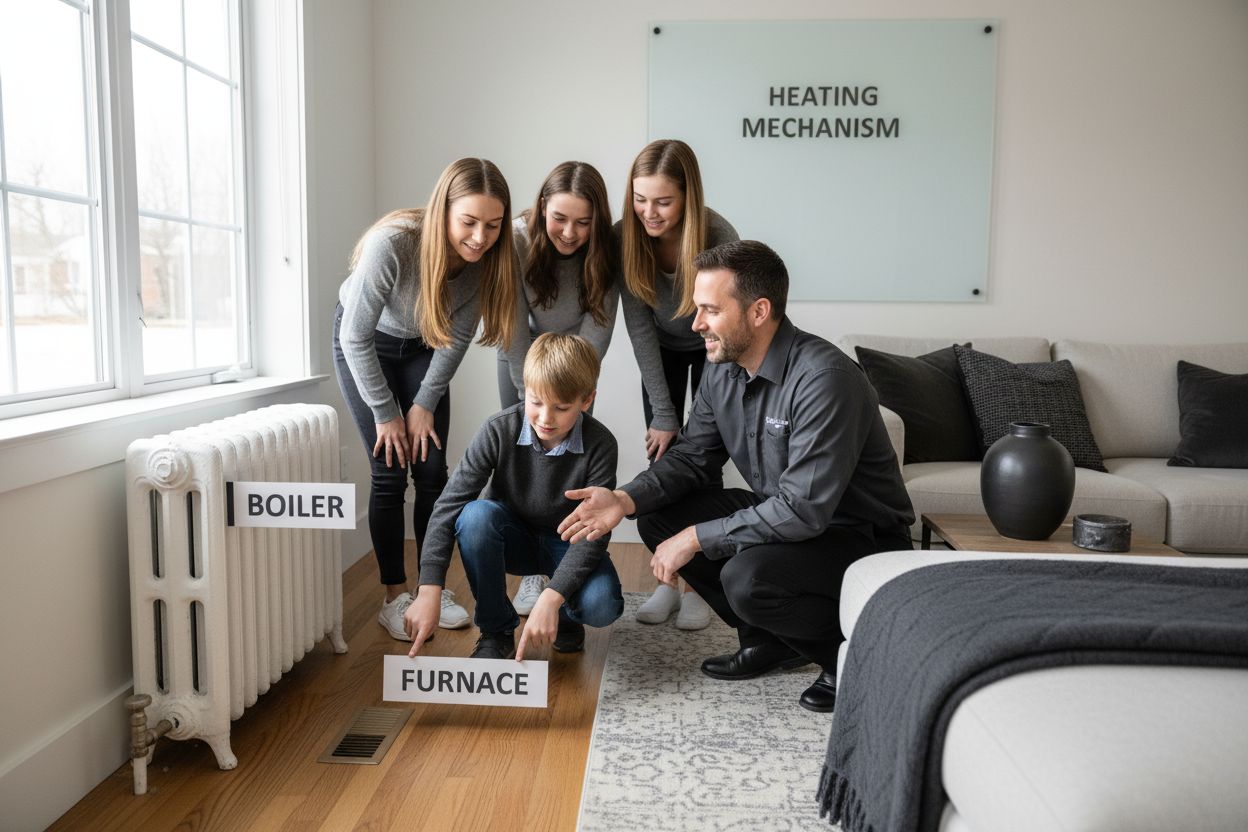
Understanding the Difference Between Boiler and Furnace
Boilers and furnaces are at the heart of every heated building, quietly battling cold British winters one degree at a time. Most people do not realise just how massive the difference is between the two. Boilers often deliver more consistent heat by using water that holds warmth far better than air. Yet while everyone talks about upfront costs and energy ratings, the secret lies in how your building was built. An old home with radiators and thick walls could turn a boiler into your best investment, while a modern flat with ducts may make a furnace the real winner.
Table of Contents
- What Are Boilers And Furnaces?
- Why It’s Important To Know The Difference
- How Boilers And Furnaces Generate Heat
- Key Features And Components Of Each System
- Choosing The Right Heating Solution For Your Needs
Quick Summary
| Takeaway | Explanation |
|---|---|
| Choose boilers for efficient heat distribution | Boilers offer consistent heating by using water, leading to lower energy consumption and stable temperatures. |
| Furnaces have lower installation costs | Furnaces are generally cheaper to install but may incur higher operational expenses over time. |
| Assess building infrastructure before choosing | Evaluate existing ductwork or piping to identify which heating system is more compatible with your property. |
| Consider long-term maintenance needs | Different systems require unique servicing approaches, which can affect overall costs and convenience. |
| Energy efficiency is key to cost savings | Opting for the right system influences energy bills significantly, impacting both immediate and long-term costs. |
What are Boilers and Furnaces?
Boilers and furnaces represent two fundamental heating systems used in residential and commercial buildings to generate and distribute warmth. While they share the primary goal of heating indoor spaces, these systems operate through distinctly different mechanisms. Understanding how heating systems work is crucial for homeowners seeking efficient temperature control.
Basic Heating Mechanism
A boiler is a heating system that uses water or steam to transfer heat throughout a building. It generates warmth by heating water in a central tank, then circulates this heated water through pipes connected to radiators, underfloor heating systems, or baseboard heaters. The water absorbs heat from a fuel source like natural gas, oil, or electricity and transfers that thermal energy directly into living spaces.
Key Operational Differences
In contrast, a furnace operates by heating air directly. Unlike boilers that use water as a heat transfer medium, furnaces warm air using a heat exchanger and then distribute this heated air through a network of ducts and vents. Furnaces typically run on natural gas, propane, oil, or electricity, with a blower fan pushing the warmed air into different rooms.
The primary distinctions between boilers and furnaces include:
- Heat Distribution: Boilers use water or steam, furnaces use forced air
- Installation Requirements: Different piping and ductwork configurations
- Heating Efficiency: Varies based on system design, fuel type, and maintenance
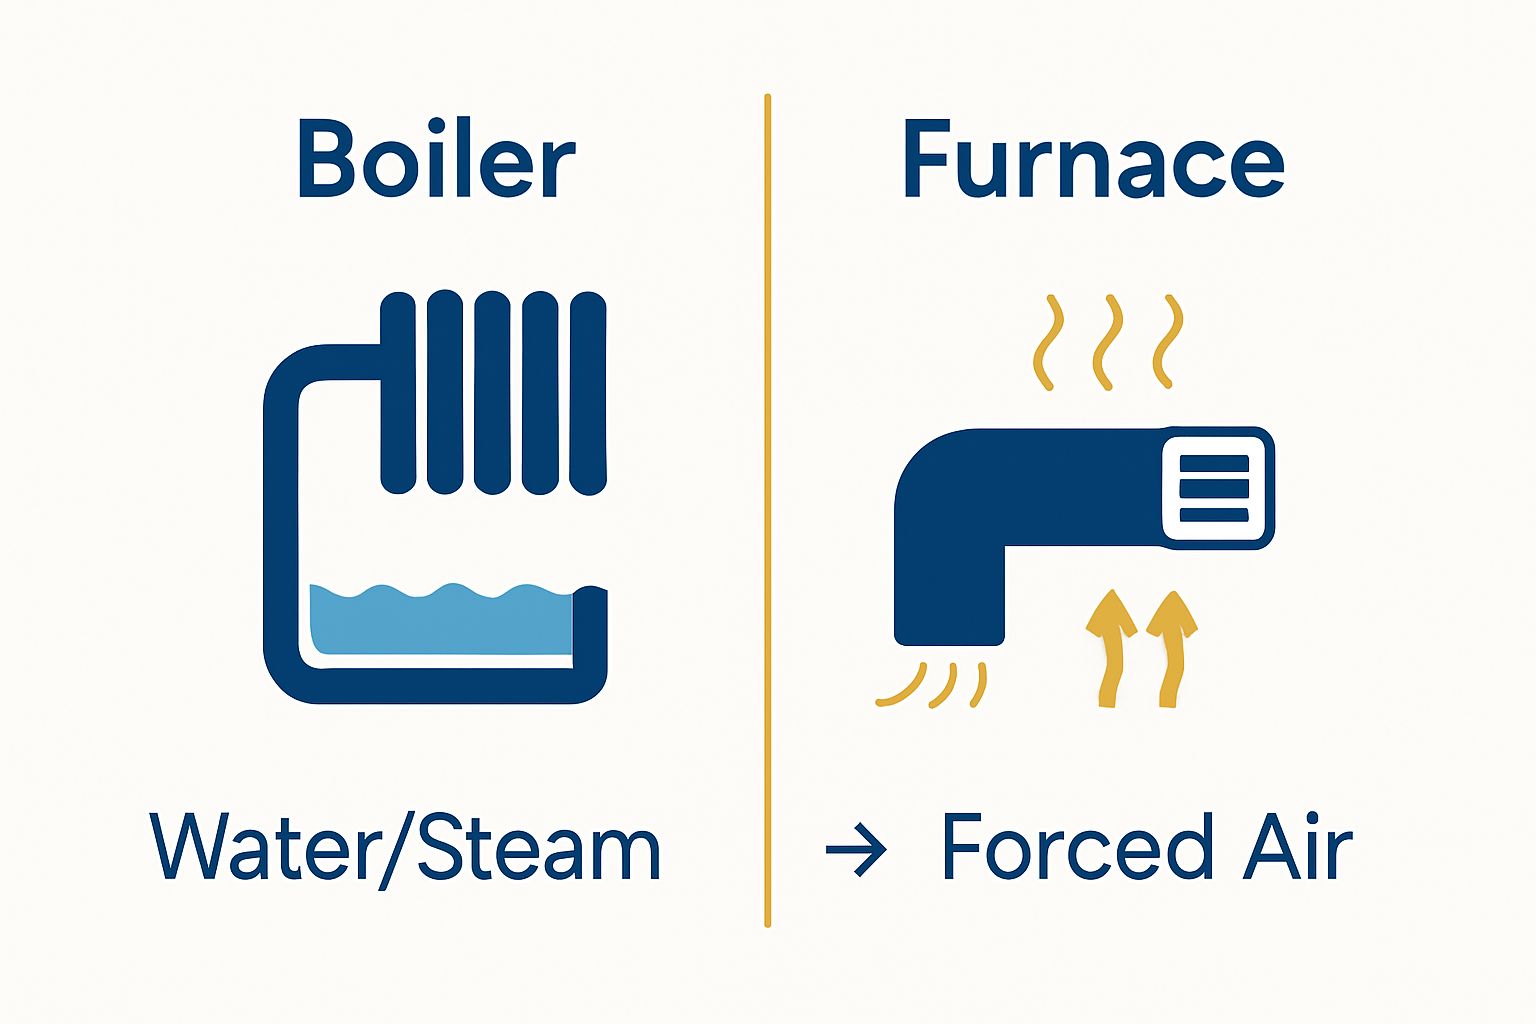
If you want to learn more about boiler heating systems, our comprehensive guide provides deeper insights into these complex heating technologies.
Why It’s Important to Know the Difference
Understanding the nuanced differences between boilers and furnaces is crucial for homeowners, property managers, and heating system professionals. Research from the National Renewable Energy Laboratory indicates that selecting the right heating system can significantly impact energy efficiency, installation costs, and long-term maintenance expenses.
Energy Efficiency Considerations
The choice between a boiler and a furnace directly influences your home’s energy consumption and thermal comfort. Boilers typically offer more consistent heat distribution, as water retains thermal energy more effectively than air. This means radiant heating systems can maintain more stable temperatures with potentially lower energy expenditure.
Furnaces, while efficient in their own right, may experience greater heat loss through ductwork and experience more temperature fluctuations during operation.
Financial and Installation Implications
Deciding between a boiler and furnace involves understanding substantial financial considerations. Installation costs vary significantly based on your existing infrastructure, with furnaces generally being less expensive to install but potentially higher in long-term operational expenses. Boilers require specialized piping systems and may involve more complex initial setup, but they often provide more uniform heating and can be more energy-efficient in certain building configurations.
The following table compares boilers and furnaces across core characteristics, providing a clear side-by-side overview for readers considering which heating system best suits their needs.
| Feature | Boiler | Furnace |
|---|---|---|
| Primary Heating Medium | Water or steam | Air |
| Distribution Mechanism | Pipes and radiators/underfloor/baseboard heaters | Ducts and vents |
| Typical Fuel Types | Natural gas, oil, electricity | Natural gas, oil, propane, electricity |
| Heat Consistency | More consistent, stable temperatures | Can have temperature fluctuations |
| Installation Complexity | Higher (specialised piping required) | Lower (uses existing/new ductwork) |
| Initial Installation Cost | Generally higher | Generally lower |
| Maintenance Needs | Specialist servicing required | Regular filter changes and servicing needed |
| Energy Efficiency Potential | Often higher (especially with condensing models) | Variable, can be lower due to duct losses |
Key factors to consider when comparing heating systems include:
- Initial Installation Cost: Furnaces typically have lower upfront expenses
- Energy Efficiency Ratings: Boilers often provide more consistent heat distribution
- Maintenance Requirements: Different systems demand unique servicing approaches
- Building Infrastructure: Existing ductwork or piping systems influence optimal choice
If you want to explore building regulations related to heating systems, our comprehensive guide offers detailed insights into making informed heating decisions for your property.
How Boilers and Furnaces Generate Heat
Heating systems transform energy into thermal warmth through complex yet distinct processes that determine their efficiency and performance. According to the Energy Saving Trust, understanding these mechanisms is crucial for homeowners seeking optimal temperature control and energy management.
Boiler Heat Generation Process
Boilers generate heat by burning fuel to warm water or create steam, which then circulates through a building’s heating infrastructure. The process begins when a fuel source such as natural gas, oil, or electricity heats water in a central tank. This heated water transfers thermal energy through pipes connected to radiators, underfloor heating systems, or baseboard heaters. Condensing boilers represent a more advanced technology, capturing additional heat from exhaust gases to improve overall system efficiency.
Furnace Heat Generation Mechanism
Furnaces operate differently by directly heating air using a heat exchanger. When the system activates, fuel burns in a combustion chamber, warming metal heat exchanger surfaces. A powerful blower fan then pushes this heated air through a network of ducts, distributing warmth throughout different rooms. The heat transfer process in furnaces is more immediate compared to boilers, with air being the primary medium for thermal distribution.
Key components involved in heat generation include:
- Fuel Source: Natural gas, oil, electricity, or propane
- Heat Exchanger: Converts fuel energy into thermal warmth
- Distribution Mechanism: Pipes for boilers, ducts for furnaces
- Control Systems: Thermostats and temperature regulators
Learn more about how boilers work in our detailed heating guide, which provides comprehensive insights into these essential home heating technologies.
Key Features and Components of Each System
According to the Health and Safety Executive, understanding the specific components of heating systems is crucial for proper maintenance and efficient operation. Each system possesses unique structural elements that define its functionality and performance characteristics.
Boiler System Components
Boilers represent complex heating systems with multiple intricate components. The primary elements include a combustion chamber where fuel burns, a heat exchanger that transfers thermal energy to water, and a circulating pump that moves heated water through pipes. Condensing boilers feature additional heat recovery mechanisms, capturing waste heat from exhaust gases to improve overall energy efficiency. Expansion tanks manage water volume changes, pressure relief valves ensure safe operation, and control systems like thermostats regulate temperature precisely.
Furnace System Architecture
Furnace systems differ significantly in their structural design. The core components include a heat exchanger which warms air directly, a blower motor that pushes heated air through ductwork, and an air filter that removes particulates. The combustion chamber burns fuel to generate initial heat, while electronic ignition systems provide reliable startup mechanisms. Modern furnaces incorporate advanced features like variable-speed blowers that adjust airflow for optimal comfort and energy consumption.
Critical components shared by both heating systems include:
This table outlines the principal system components found in both boilers and furnaces, highlighting their roles as discussed in the article.
| Component | Boiler System Function | Furnace System Function |
|---|---|---|
| Combustion Chamber | Burns fuel to heat water/produce steam | Burns fuel to generate heat for exchanger |
| Heat Exchanger | Transfers heat to water/steam | Warms air directly |
| Circulating Pump/Blower | Pumps water/steam through system | Blows heated air through ductwork |
| Distribution Infrastructure | Pipes/radiators/underfloor/baseboard heaters | Ducts and vents |
| Control System | Regulates temperature and flow (thermostats) | Regulates temperature and airflow (thermostats) |
| Safety Mechanisms | Pressure relief valves, expansion tanks | Automatic shutdowns, air filters |
- Fuel Input Mechanism: Controls fuel delivery and combustion
- Temperature Regulation: Thermostats and control boards
- Safety Features: Pressure relief and automatic shutdown systems
- Heat Transfer Elements: Specialized surfaces for thermal energy conversion
Explore our comprehensive guide on condensing boiler technology to understand the latest advances in heating system design and efficiency.
Choosing the Right Heating Solution for Your Needs
According to the Energy Saving Trust, selecting an appropriate heating system requires careful consideration of multiple factors beyond initial purchase price. Homeowners must evaluate their specific requirements to ensure optimal thermal comfort and energy efficiency.
Property-Specific Considerations
Building characteristics play a critical role in determining the most suitable heating system. Older properties with existing radiator infrastructure might benefit more from boiler installations, while newer constructions with comprehensive ductwork could be better suited to furnace systems. Factors such as insulation quality, room layout, ceiling height, and overall square footage significantly influence heating performance and energy consumption.
Economic and Performance Factors
Economic considerations extend beyond the initial installation cost. Long-term operational expenses, maintenance requirements, and energy efficiency ratings become paramount. Boilers typically offer more consistent heat distribution and potentially lower running costs in well-insulated properties, whereas furnaces might provide more affordable initial installation and faster heat generation. The local fuel infrastructure availability also impacts the most cost-effective solution, with natural gas, electricity, and alternative fuel options presenting different economic implications.
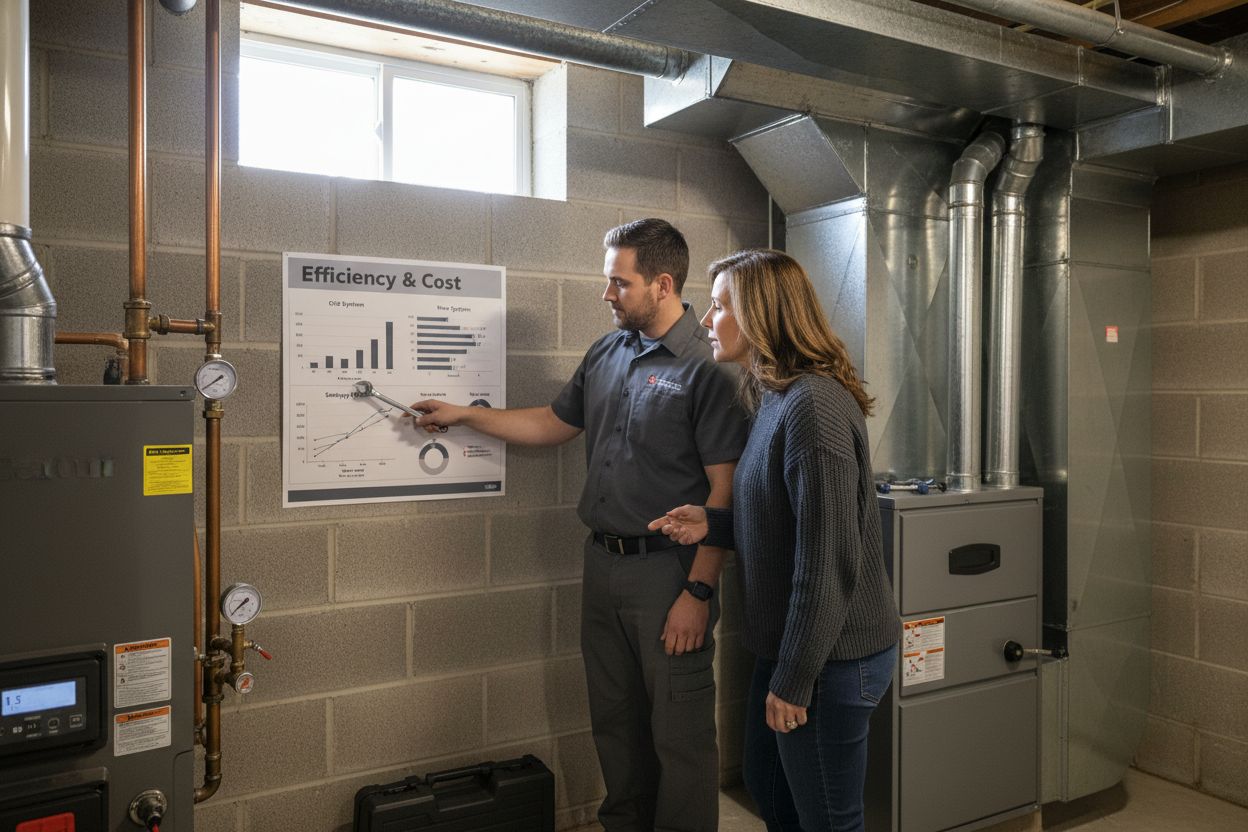
Key evaluation criteria for selecting your ideal heating system include:
- Existing Home Infrastructure: Compatibility with current piping or ductwork
- Climate Conditions: Heating requirements based on regional temperature variations
- Energy Efficiency Ratings: Long-term operational cost projections
- Maintenance Complexity: Anticipated servicing and repair expenses
Discover which heating system best suits your property, with our comprehensive guide designed to simplify your decision-making process.
Take the Uncertainty Out of Choosing Your Perfect Heating Solution
Are you feeling confused about the best way to heat your home after learning the differences between boilers and furnaces? Many Edinburgh property owners find themselves concerned about energy efficiency, future maintenance, and the long-term costs of heating their spaces. The pressure to make a cost-effective and reliable choice can feel overwhelming, especially when words like “condensing boiler,” “radiant heat,” and “forced air” start to blur together. You deserve clear answers and a solution designed for your needs.
Let Thermatek’s trusted heating experts guide you. Our team specialises in professional boiler replacements, repairs, and servicing, as well as advanced renewable energy upgrades for homes throughout Edinburgh and Midlothian. Every installation is handled by Gas Safe Registered engineers to ensure safety and full regulatory compliance. Why wait until a cold snap leaves you uncomfortable or facing higher bills? Request your free quote today and let us take the guesswork out of creating an energy-efficient home. Ready to discover which system matches your property? Learn more with Thermatek now.
Frequently Asked Questions
What is the main difference between a boiler and a furnace?
Boilers use water or steam to transfer heat, whereas furnaces heat air directly. This fundamental difference affects how each system distributes warmth throughout a building.
How do boilers and furnaces generate heat?
Boilers generate heat by burning fuel to warm water or create steam, which circulates through pipes. Furnaces heat air directly using a heat exchanger, with a blower fan distributing the heated air through ducts.
Which heating system is more energy-efficient?
Boilers are generally considered more energy-efficient than furnaces, as water retains heat better than air, leading to more consistent temperatures and potentially lower energy costs over time.
What factors should I consider when choosing between a boiler and a furnace?
Consider your property’s existing infrastructure, energy efficiency ratings, installation costs, maintenance requirements, and the climate conditions in your area when deciding between a boiler and a furnace.
Recommended
- Understanding How Does A Boiler Work For Heating - Thermatek Heating
- Understanding The Boiler Heating System For House - Thermatek Heating
- Understanding The Difference Between Combi And System Boilers - Thermatek Heating
- What Is A Condensing Boiler And Why It Matters - Thermatek Heating

Understanding Why Is My Radiator Cold: Key Insights
Radiators are the heart of most British homes in winter and almost every room relies on them to stay warm. But while you’d expect a modern system to run smoothly, almost 50 percent of all radiator problems are down to trapped air or hidden sludge. Most people think a cold radiator just needs a quick turn of the valve. The real culprit is usually a build-up deep inside your system that rarely gets noticed and could even double your heating bills if left unchecked.
Table of Contents
- The Basics Of Radiator Functionality
- Common Reasons For Cold Radiators
- The Importance Of Regular Maintenance
- Diagnosing Heating Issues In Different Properties
- Exploring Solutions And Improvements For Effective Heating
Quick Summary
| Takeaway | Explanation |
|---|---|
| Regular maintenance boosts heating efficiency | Routine checks can prevent costly repairs and ensure optimal operation of your heating system. |
| Air traps reduce radiator heating | Bleeding radiators to remove trapped air ensures proper hot water circulation and eliminates cold spots. |
| Sediment buildup harms radiator performance | Regular power flushing can remove sludge from the system, preventing overheating issues and uneven heat distribution. |
| Faulty valves cause heating inconsistencies | Inspecting and replacing malfunctioning radiator valves can improve temperature control and overall heating effectiveness. |
| Older properties need special attention | Architectural features in older homes often lead to unique heating challenges that require tailored solutions for optimal comfort. |
The Basics of Radiator Functionality
Understanding radiator functionality is crucial for maintaining an efficient home heating system. A radiator works as a heat exchanger, designed to transfer thermal energy from hot water into the surrounding room space, creating a comfortable indoor environment. Our comprehensive guide on hydronic heating systems provides additional insights into these intricate heating mechanisms.
Heat Transfer Mechanism
At its core, a radiator operates through a straightforward heat transfer process. Hot water circulated from the boiler flows through internal metal channels, warming the radiator’s metal surface. As the metal heats up, it radiates thermal energy into the surrounding air, effectively warming the room. According to research from the University of Kent, this heat transfer occurs through three primary mechanisms: conduction, convection, and radiation.
Key Components and Functionality
A typical radiator comprises several essential components that enable efficient heat distribution:
- Metal Body: Usually constructed from materials with high thermal conductivity like steel or aluminium
- Water Channels: Internal pathways allowing hot water to circulate and transfer heat
- Valves: Control the water flow and temperature within the radiator system
The efficiency of a radiator depends on multiple factors, including water temperature, surface area, and the thermal properties of its construction materials. When functioning correctly, radiators provide consistent and even heating throughout residential and commercial spaces.
This table outlines the key components of a typical radiator system and their roles in ensuring efficient heat distribution, as described in the article.
| Component | Description | Function in Radiator System |
|---|---|---|
| Metal Body | Steel or aluminium construction with high conductivity | Transfers heat from water to air |
| Water Channels | Internal pathways for hot water circulation | Move hot water from the boiler through the radiator |
| Valves | Mechanical or thermostatic controls | Regulate water flow and adjust temperature |
Common Reasons for Cold Radiators
When your radiator remains cold despite your heating system running, several underlying issues could be responsible. Understanding these potential problems helps homeowners diagnose and address heating system challenges effectively. Check out our comprehensive guide on radiator problems for more detailed troubleshooting insights.
Air and Blockage Complications
One primary reason for cold radiators is air trapped within the heating system. Air bubbles prevent hot water from circulating correctly, creating cold spots or entire radiators that fail to heat. According to British Gas research, trapped air can significantly reduce heating efficiency and increase energy consumption. Professional bleeding of radiators can help release these air pockets, restoring proper heat distribution.
Sludge and Sediment Accumulation
Over time, central heating systems accumulate magnetic and non-magnetic debris that can severely impact radiator performance. This sediment buildup, often referred to as “heating system sludge”, consists of:
- Rust particles from metal components
- Mineral deposits from water
- Corrosion byproducts
- Organic material breakdown
These contaminants gradually restrict water flow, creating uneven heating and potentially causing complete radiator failure. Regular system maintenance and power flushing can help prevent these issues and maintain optimal heating performance.
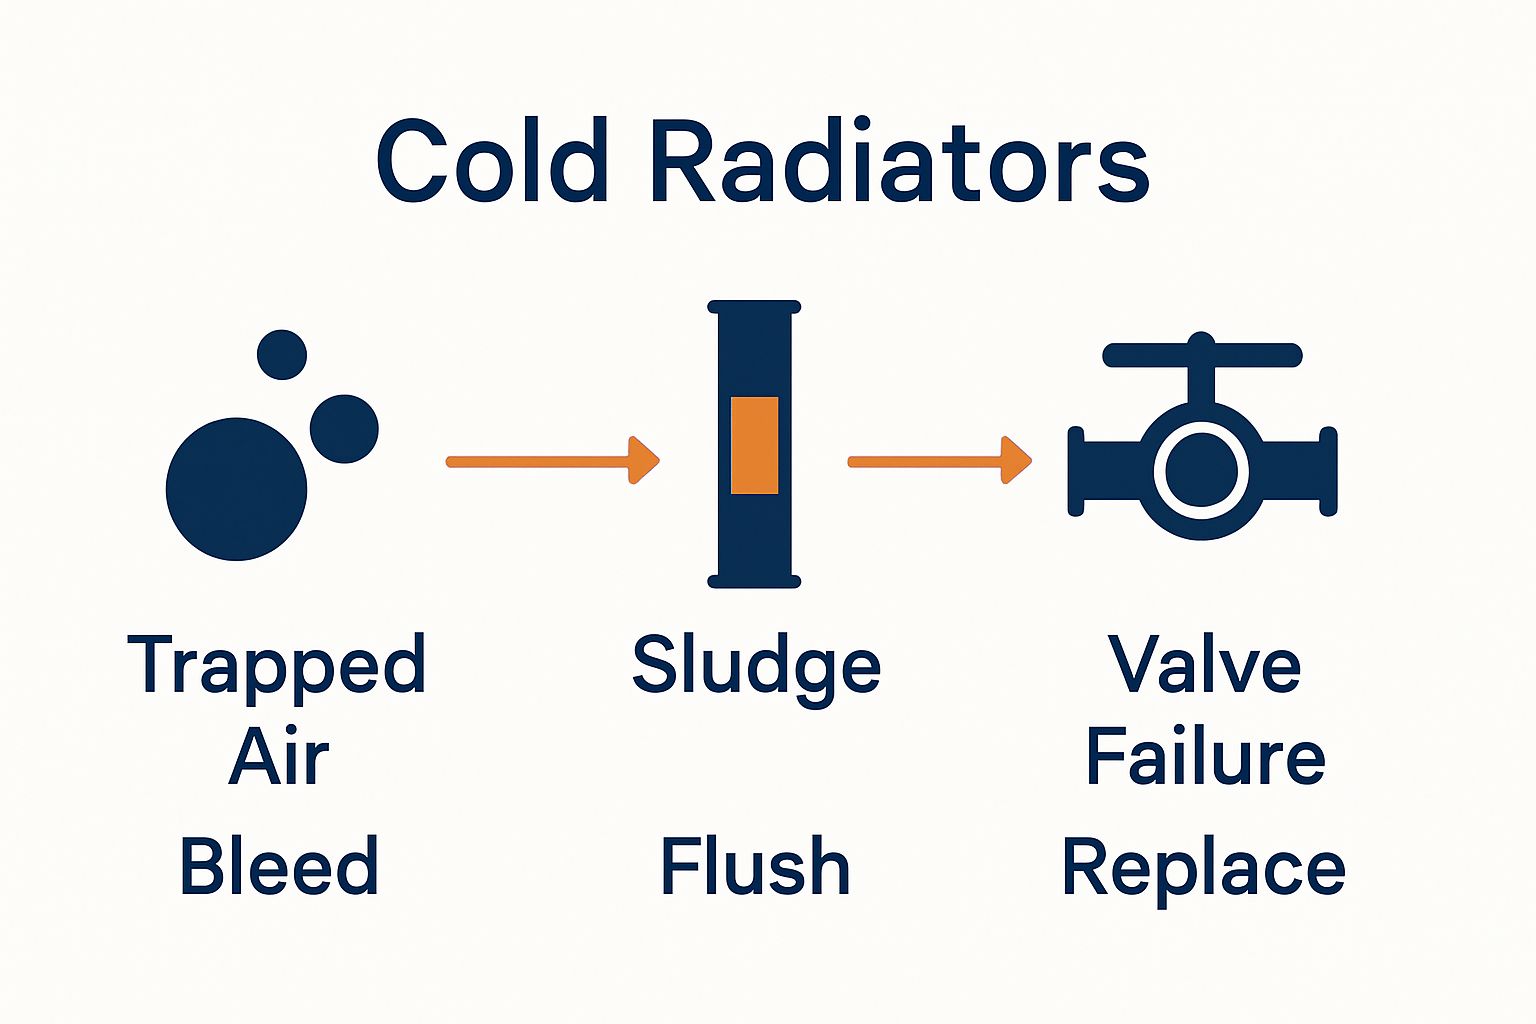
Valve and Pipework Malfunctions
Radiator valves play a crucial role in controlling water flow and temperature. Faulty thermostatic radiator valves (TRVs) or blocked pipework can prevent hot water from reaching specific radiators, resulting in cold surfaces. Mechanical failures, such as stuck valve pins or incorrect valve settings, can also contribute to heating inconsistencies. Professional inspection and potential valve replacement might be necessary to resolve these technical complications.
The following table compares the main causes of cold radiators described in the article, highlighting typical symptoms and recommended solutions for each issue.
| Cause | Typical Symptoms | Recommended Solution |
|---|---|---|
| Trapped Air | Cold spots, cool at top, uneven warmth | Bleed radiators to release air |
| Sludge & Sediment Build-up | Radiator feels cold or partially cold | Power flushing to remove debris |
| Faulty Valves | Radiator does not heat or is stuck cold | Inspect and replace valves as needed |
| Blocked Pipework | Radiator remains cold despite open valves | Clear blockages, professional system cleaning |
| Incorrect Valve Settings | Temperature inconsistencies, lack of control | Adjust or reset thermostatic settings |
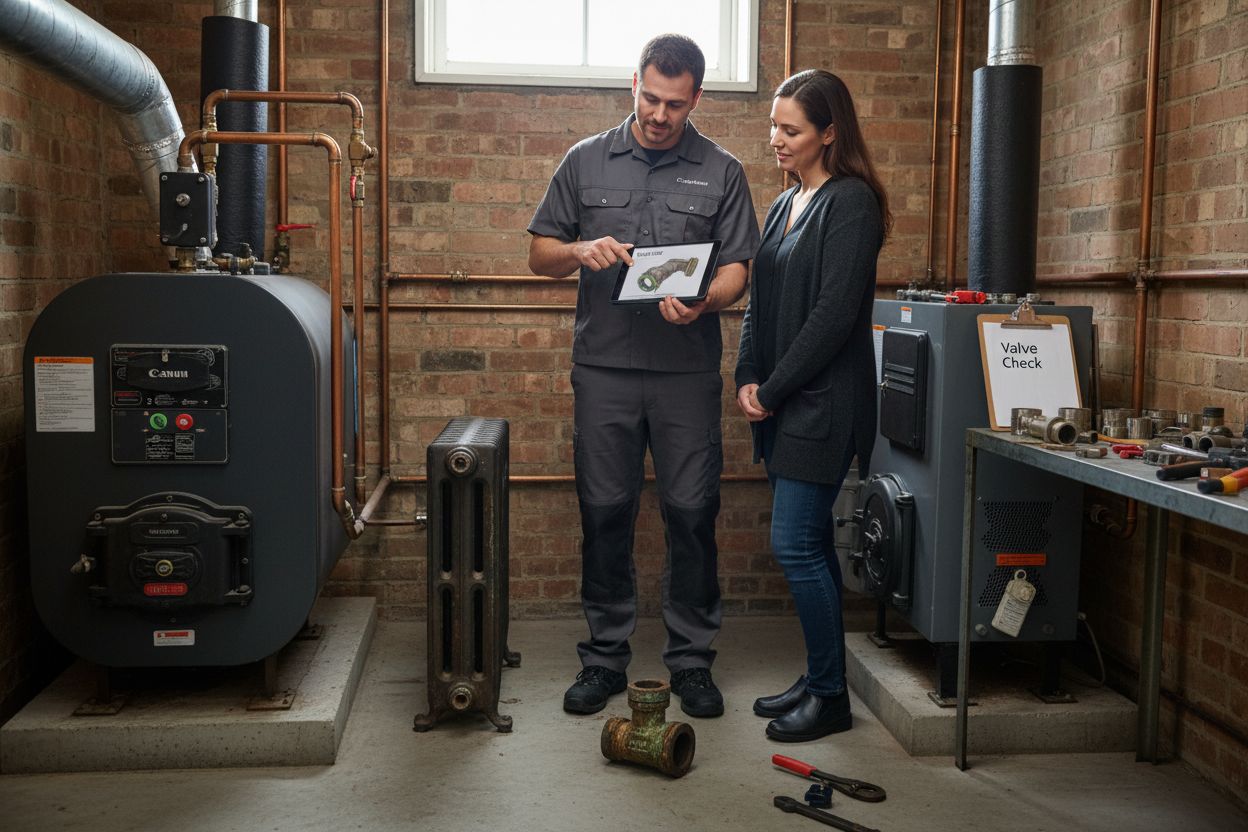
The Importance of Regular Maintenance
Maintaining your heating system is not merely a recommended practice but a critical aspect of ensuring long-term performance, efficiency, and safety. Learn more about our heating system maintenance services to understand comprehensive care strategies for your home heating infrastructure.
Preventative Care and System Longevity
Regular maintenance serves as a proactive approach to identifying potential issues before they escalate into costly repairs. According to Health and Safety Executive guidelines, systematic inspection and servicing can significantly reduce the risk of unexpected breakdowns and extend the operational lifespan of heating equipment. Routine checks help prevent minor problems from developing into major systemic failures.
Economic and Performance Benefits
Consistent maintenance offers multiple economic advantages for homeowners. A well-maintained heating system operates with enhanced efficiency, directly translating to reduced energy consumption and lower utility bills. The potential benefits include:
- Reduced energy wastage
- Lower monthly heating expenses
- Extended equipment lifespan
- Improved overall system performance
- Minimised risk of unexpected repair costs
Safety and Compliance Considerations
Beyond performance, regular maintenance plays a crucial role in ensuring household safety. Heating systems that are not properly serviced can develop dangerous faults, potentially leading to gas leaks, carbon monoxide risks, or electrical malfunctions. Professional maintenance involves comprehensive checks that go beyond surface-level inspections, including detailed assessments of electrical connections, gas pressure, combustion efficiency, and potential corrosion or wear in critical system components.
Diagnosing Heating Issues in Different Properties
Heating challenges can vary significantly depending on a property’s architectural design, age, and construction. Explore our guide to efficient heating solutions to understand the nuanced approaches required for different property types.
Property Age and Construction Variations
Older properties often present unique heating challenges compared to modern builds. According to research from the University of Kent, the structural characteristics of a building significantly impact heat distribution and radiator performance. Older homes with solid walls, limited insulation, and original pipework are more prone to heat loss and uneven temperature regulation. Victorian and Edwardian properties, in particular, may require specialised heating strategies to overcome inherent thermal inefficiencies.
Multi-Storey and Open-Plan Configurations
The layout of a property plays a crucial role in heating performance. Different property configurations present distinct challenges:
- Tall, multi-storey buildings experience heat stratification
- Open-plan spaces require more complex heating solutions
- Properties with high ceilings demand different heating approaches
- Converted spaces like lofts or extensions may have unique thermal characteristics
Insulation and Structural Considerations
Insulation quality dramatically influences a property’s heating efficiency. Poorly insulated spaces create significant thermal bridges, leading to cold spots and increased energy consumption. Modern properties typically feature better insulation standards, including double-glazed windows, cavity wall insulation, and improved roof treatments. Homeowners in older properties might need to invest in supplementary insulation solutions to address inherent heating challenges and improve overall system performance.
Exploring Solutions and Improvements for Effective Heating
Addressing cold radiators requires a strategic approach that combines diagnostic techniques, targeted interventions, and potential system upgrades. Discover our comprehensive energy efficient heating solutions to transform your home’s thermal performance.
Professional Diagnostic Techniques
Professional heating engineers employ sophisticated diagnostic methods to identify and resolve radiator performance issues. According to research from energy efficiency experts, comprehensive system assessments involve thermal imaging, pressure testing, and detailed visual inspections. Advanced diagnostic tools enable precise identification of blockages, air pockets, and potential mechanical failures that might prevent optimal heat distribution.
Targeted Intervention Strategies
Heating system improvements can be categorised into immediate and long-term solutions:
- Power flushing to remove accumulated system debris
- Bleeding radiators to eliminate trapped air
- Replacing faulty thermostatic valves
- Upgrading to modern, more efficient radiator designs
- Installing smart thermostatic controls
System-Wide Performance Enhancements
Beyond individual radiator repairs, homeowners can significantly improve overall heating efficiency through holistic system upgrades. This might involve reassessing the entire central heating infrastructure, including boiler performance, pipe insulation, and thermal transfer mechanisms. Upgrading to modern condensing boilers, installing intelligent zoning systems, and implementing comprehensive insulation strategies can dramatically reduce energy consumption while ensuring consistent, comfortable heating throughout the property.
Restore Consistent Warmth with Trusted Local Experts
Are you tired of facing cold radiators, unpredictable heat, or unexplained chilly spots in your home? This article has shown how issues like air blockage, sludge, faulty valves and insulation gaps can leave you uncomfortable and frustrated. When heating systems underperform, it can impact your comfort, raise your energy bills and increase stress about home safety. You deserve a reliable, energy-efficient solution from experienced professionals who truly understand the intricacies of modern heating.
Choose Thermatek Heating for expert care across Edinburgh and Midlothian. Our Gas Safe Registered engineers will thoroughly diagnose problems, whether you need routine maintenance, a power flush to clear sludge, or help with smart controls and system upgrades. Do not let unresolved radiator issues disrupt your peace of mind any longer. Visit Thermatek Heating today to request your free quote or speak with our team. Take action now to enjoy a warm and efficient home all year round.
Frequently Asked Questions
Why is my radiator cold when the heating is on?
A cold radiator could indicate trapped air or blockage in the system, preventing hot water from circulating effectively. Professional bleeding or system cleaning may be necessary to resolve the issue.
How can I tell if there is air in my radiator?
You may notice cold spots on the radiator or an uneven temperature. If the radiator feels cool at the top but warm at the bottom, it likely contains trapped air that needs to be bled out.
What causes sludge build-up in my heating system?
Sludge accumulation, consisting of rust, mineral deposits, and organic material, can restrict water flow in radiators. This often occurs in older systems and can be prevented by regular maintenance and power flushing.
How do I maintain my radiator for optimal performance?
Regular maintenance such as bleeding, power flushing, and checking for valve malfunctions can significantly improve radiator performance. A consistent servicing schedule is also advisable to prolong system life and efficiency.
Recommended
- 7 Common Radiator Problems And How To Fix Them - Thermatek Heating
- Master Balancing Heating Systems For Optimal Comfort - Thermatek Heating
- Understanding Hydronic Heating Systems: How They Work - Thermatek Heating
- How To Use Heating Efficiently For Comfort And Savings - Thermatek Heating
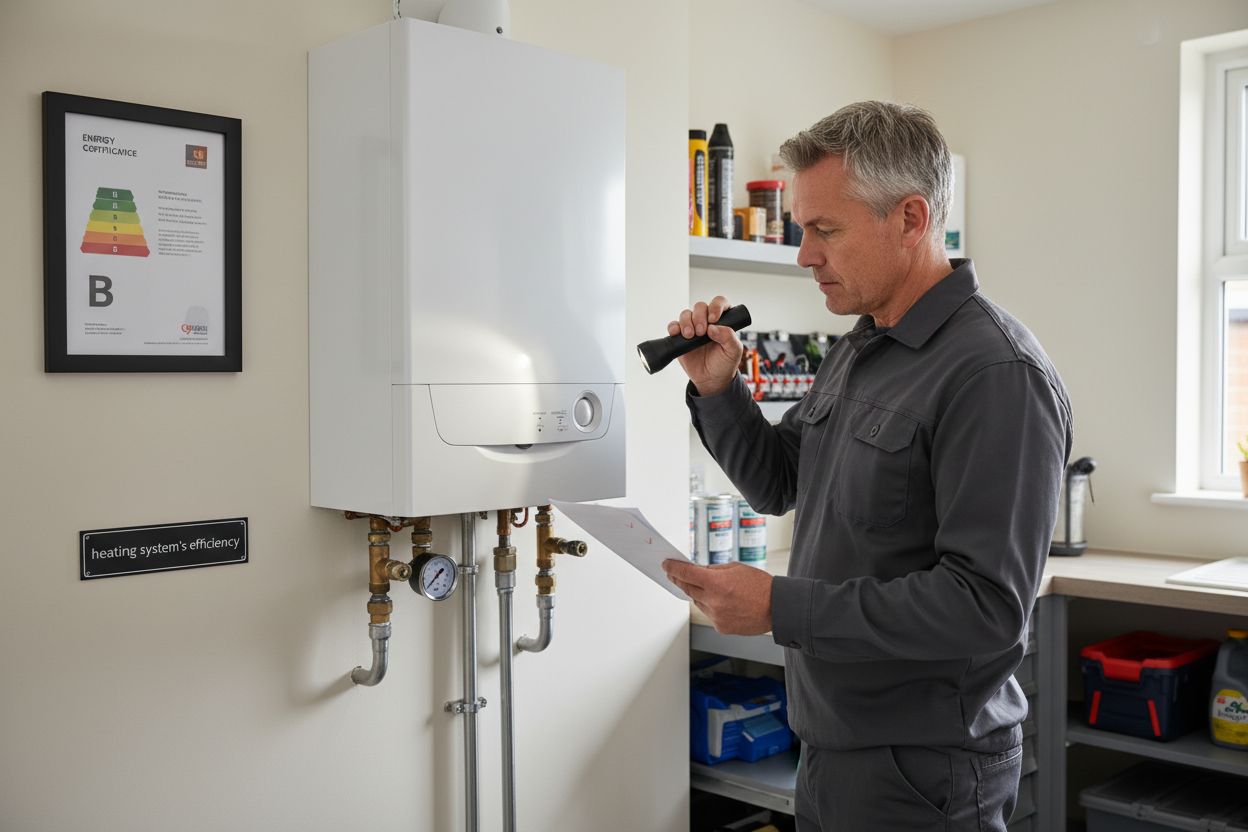
How to Use Heating Efficiently for Comfort and Savings
Heating your home can quietly drain your wallet, especially with inefficient systems hiding in plain sight. Oddly enough, older heating setups can run at much lower efficiency levels compared to modern alternatives, meaning lots of the energy you pay for disappears into thin air. Yet the biggest surprise is that the key to saving money and staying warm is often something as simple as a careful inspection before you touch the thermostat or invest in new tech.
Table of Contents
- Step 1: Assess Your Current Heating System’s Efficiency
- Step 2: Identify Areas For Insulation And Draught-Proofing
- Step 3: Set Your Thermostat For Optimal Comfort
- Step 4: Schedule Regular Maintenance Checks For Your Heating System
- Step 5: Invest In Smart Heating Technology And Renewable Solutions
Quick Summary
| Key Point | Explanation |
|---|---|
| 1. Assess heating system efficiency | Conduct thorough inspections and obtain an Energy Performance Certificate to identify inefficiencies. |
| 2. Implement insulation and draught-proofing | Focus on areas like lofts and windows to prevent heat loss and improve heating efficiency. |
| 3. Optimise thermostat settings | Program thermostats for lower temperatures during sleeping or when away to reduce energy usage. |
| 4. Schedule regular maintenance | Annual professional servicing extends heating system lifespan and ensures optimal performance. |
| 5. Invest in smart and renewable technologies | Explore advanced heating systems and renewable options for improved control and energy savings. |
Step 1: Assess your current heating system’s efficiency
Understanding your current heating system’s efficiency is the critical first step towards optimising home energy consumption and reducing utility expenses. Before implementing any improvements, you need a comprehensive snapshot of your existing heating infrastructure and its performance characteristics.
Start by conducting a thorough visual inspection of your heating system, focusing on key components like your boiler, radiators, and thermostat. Look for signs of wear, rust, or outdated technology that might indicate inefficient performance. Older heating systems typically operate at significantly lower efficiency levels, potentially wasting substantial energy and increasing monthly heating costs.
A critical tool in this assessment is the Energy Performance Certificate, which provides a detailed evaluation of your property’s energy efficiency. This document offers insights into your current system’s performance, potential heat loss areas, and recommended upgrades. Obtaining this certificate will give you an objective baseline for understanding your heating system’s current state.
Diagnostic Tools and Professional Assessment
While homeowners can perform initial inspections, professional assessment offers more nuanced insights. Consider scheduling a comprehensive heating system evaluation with qualified engineers who can use specialized diagnostic equipment to measure system performance. These professionals can identify hidden inefficiencies, potential heat loss points, and recommend targeted improvements.
Key diagnostic measurements typically include:
- Boiler efficiency percentage
- Heat distribution consistency
- Insulation quality
- Temperature regulation accuracy
Additionally, check out our guide on understanding energy efficient heating for more detailed insights into optimising your home’s thermal performance. Professional assessments can reveal opportunities for strategic upgrades that might not be immediately apparent during a basic inspection.
Verification of a successful assessment involves documenting current system performance, identifying specific inefficiency areas, and developing a clear improvement roadmap. By thoroughly understanding your existing heating infrastructure, you’ll be well-positioned to make informed decisions about potential upgrades and energy-saving strategies in subsequent steps of your heating efficiency journey.
Step 2: Identify areas for insulation and draught-proofing
Insulation and draught-proofing are fundamental strategies for maintaining home warmth while dramatically reducing energy consumption. These techniques create a thermal barrier that prevents heat loss, ensuring your heating system works more efficiently and your living spaces remain consistently comfortable.
Begin by conducting a comprehensive home heat loss assessment. Walk through each room systematically, feeling for cold spots near windows, doors, floors, and walls. Pay special attention to areas where different building materials meet, such as window frames, skirting boards, and ceiling corners. These junction points are often significant sources of undetected heat escape.
Targeted Insulation Strategies
Your home loses heat through multiple pathways, with key areas requiring focused attention. Loft spaces are prime candidates for heat retention improvements. Uninsulated lofts can lose approximately 25% of your home’s generated heat, making proper insulation a cost-effective intervention.
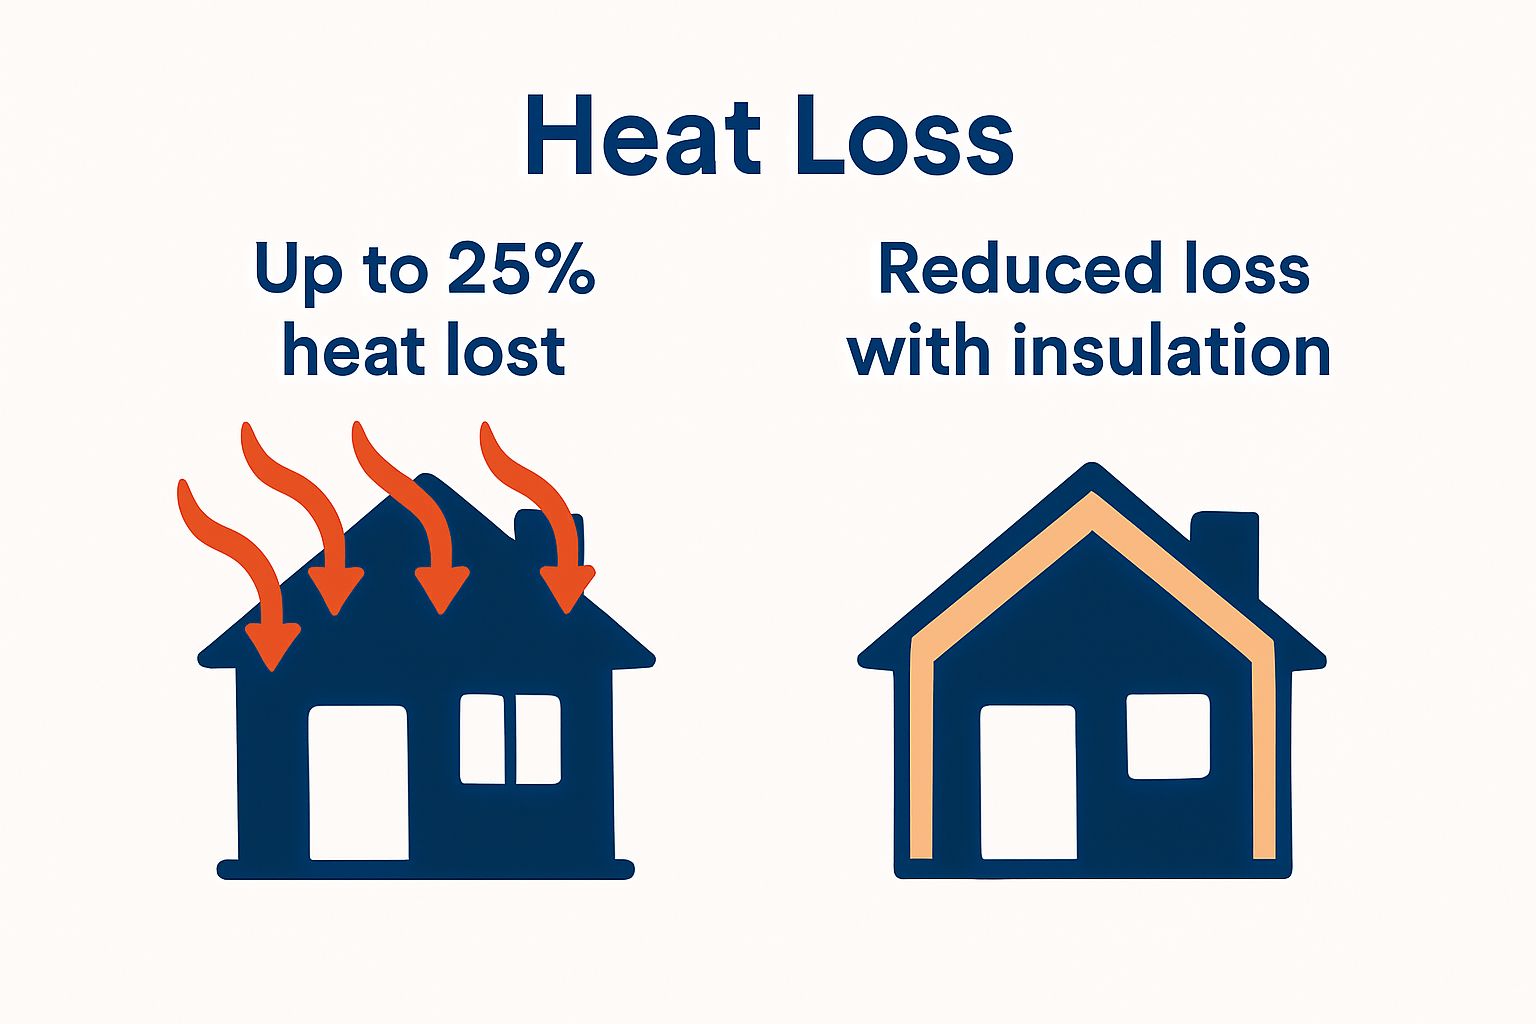 Consider installing mineral wool insulation or solid board systems that create an effective thermal barrier.
According to the Energy Saving Trust, comprehensive home insulation can save homeowners substantial amounts on annual heating expenses. Wall insulation represents another critical intervention, particularly for properties with solid or cavity walls. Cavity wall insulation involves filling the gap between external wall layers with thermal materials, dramatically reducing heat transmission.
Draught-proofing requires meticulous attention to potential air leakage points. Inspect window seals, external doors, letterboxes, and electrical fittings for small gaps that permit cold air infiltration. Professional-grade draught-exclusion products can seal these openings effectively:

- Self-adhesive foam strips for window and door frames
- Brush or rubber door seals
Verification involves monitoring your home’s thermal performance after implementing these strategies. A consistent indoor temperature with reduced heating system workload indicates successful insulation and draught-proofing. Consider using a thermal imaging camera or engaging a professional energy assessor to identify any remaining heat loss points, ensuring your efforts deliver maximum efficiency.
Remember that effective insulation is an investment. While initial costs might seem significant, the long-term energy savings and improved home comfort make this step crucial in your heating efficiency journey.
Below is a checklist to help you verify the effectiveness of insulation and draught-proofing efforts, ensuring your home maximises its heating efficiency.
| Checkpoint | Description | How to Verify |
|---|---|---|
| Temperature Consistency | Indoor temperature remains steady with less fluctuation | Monitor with a household thermometer |
| Reduced Heating Usage | Heating system runs less frequently to maintain comfort | Observe boiler or heating system cycles |
| Sealed Draughts | No noticeable cold air entering around windows or doors | Feel for draughts with your hand |
| Effective Loft Insulation | Loft area feels warmer, minimal heat escaping upwards | Inspect loft temperature and insulation |
| Walls Properly Insulated | Less cold coming from external walls | Compare internal wall surface temperatures |
| No Gaps in Doors/Frames | No visible light or gaps when doors and windows are closed | Visual inspection around frames and letterboxes |
| Lower Energy Bills | Heating-related energy usage decreases | Compare recent energy bills to previous winters |
Step 3: Set your thermostat for optimal comfort
Thermostat management is a crucial strategy for balancing home comfort with energy efficiency. Precise temperature control can significantly reduce energy consumption while maintaining a pleasant living environment. Modern heating systems offer sophisticated programming options that allow homeowners to create tailored temperature schedules matching their daily routines.
Start by understanding your home’s thermal characteristics and your personal comfort preferences. Most households find that 20-21 degrees Celsius represents an ideal daytime temperature for comfort and energy efficiency.
During nighttime or when the property is unoccupied, reducing temperature by 2-3 degrees can generate substantial energy savings without compromising overall warmth.
Smart Programming and Temperature Management
Programmable and smart thermostats revolutionise heating control by allowing granular temperature adjustments. These devices enable you to create multiple temperature zones throughout your home, ensuring different areas maintain appropriate warmth levels. For instance, living areas might require consistent warmth, while bedrooms can tolerate slightly lower temperatures during sleeping hours.
Learn more about understanding the best temperature for heating your home to refine your approach. Consider implementing a strategic heating schedule that aligns with your household’s daily activities. Program lower temperatures during work hours or overnight, and schedule gentle warming before family members return or wake up.
Key thermostat programming principles include:
- Setting lower temperatures when sleeping or away
- Creating gradual temperature transitions
- Avoiding extreme temperature fluctuations
Verification of successful thermostat management involves monitoring your energy bills and assessing personal comfort levels. A well-configured system should provide consistent warmth while demonstrating measurable reductions in energy consumption. Pay attention to how your body responds to temperature changes and be prepared to make incremental adjustments.
Remember that effective thermostat management is about finding a personalised balance between comfort and efficiency. Experiment with different settings, observe their impact, and don’t hesitate to make subtle modifications to suit your specific lifestyle and home environment.
Step 4: Schedule regular maintenance checks for your heating system
Regular maintenance is the cornerstone of a reliable, efficient heating system. Preventative care can significantly extend your heating infrastructure’s lifespan, reduce unexpected breakdowns, and maintain optimal energy performance. Professional maintenance checks serve as a comprehensive health assessment for your home’s thermal ecosystem.
Heating systems, like any complex machinery, require periodic professional evaluation. Annual servicing represents a critical investment in your home’s comfort and long-term energy efficiency. Qualified engineers can identify potential issues before they escalate into costly repairs, ensuring your system operates at peak performance throughout the year.
Professional Inspection and Maintenance Strategies
A thorough heating system maintenance involves more than a cursory glance. Certified technicians conduct detailed diagnostics, examining critical components such as boiler mechanisms, heat exchangers, electrical connections, and overall system calibration. They will clean internal components, check for potential wear and tear, and ensure all safety mechanisms function correctly.
Explore our comprehensive central heating maintenance tips to understand the depth of professional servicing. The inspection process typically includes:
- Checking combustion efficiency
- Examining electrical connections
- Cleaning key system components
- Verifying safety control mechanisms
- Assessing overall system performance
Beyond professional checks, homeowners can perform basic maintenance tasks. Regularly bleeding radiators, checking pressure levels, and keeping system areas clean contribute to overall heating efficiency. Watch for warning signs like unusual noises, inconsistent heating, or unexplained increases in energy consumption, which might indicate underlying system issues.
Verification of successful maintenance involves obtaining a detailed service report from your engineer. This document should outline system performance, any repairs completed, and recommendations for future care. Additionally, track your energy bills following maintenance - a well-serviced system typically demonstrates more consistent and efficient energy consumption.
Remember that maintenance is not just about preventing breakdowns but optimising your heating system’s performance. Consistent, professional care ensures your home remains warm, comfortable, and energy-efficient throughout the year.
Step 5: Invest in smart heating technology and renewable solutions
Transitioning towards smart heating technology and renewable energy solutions represents a transformative approach to home heating efficiency. Modern technological innovations offer unprecedented control, sustainability, and potential long-term cost savings. These advanced systems go beyond traditional heating methods, integrating intelligent monitoring, adaptive programming, and environmentally friendly energy generation.
Smart thermostats stand at the forefront of heating technology, providing granular control and unprecedented insights into energy consumption. These devices learn your household’s heating patterns, automatically adjusting temperature settings to maximise comfort and minimise waste. Machine learning algorithms analyse your specific usage, creating personalised heating schedules that adapt to your lifestyle while reducing unnecessary energy expenditure.
Exploring Renewable Heating Alternatives
Renewable heating technologies like air source heat pumps and solar thermal systems offer sustainable alternatives to conventional fossil fuel-based heating. Air source heat pumps extract thermal energy from external air, converting it into usable heating with remarkable efficiency. These systems can reduce carbon emissions and provide consistent home warmth while consuming significantly less electricity compared to traditional heating methods.
Discover more about sustainable heating systems to understand the broader landscape of renewable energy options. When considering renewable solutions, evaluate factors such as:
- Initial installation costs
- Long-term energy savings potential
- Compatibility with existing home infrastructure
- Environmental impact
- Potential government incentives
Implementing smart technology requires a strategic approach. Begin by conducting a comprehensive home energy assessment to determine the most suitable technological interventions. Professional consultations can help identify specific solutions tailored to your property’s unique characteristics, ensuring optimal performance and maximum return on investment.
Verification of successful smart technology implementation involves monitoring energy consumption patterns, tracking reduction in utility expenses, and assessing overall home comfort levels. Modern systems often provide detailed digital dashboards and smartphone applications, allowing real-time tracking of energy usage and system performance.
Remember that investing in smart heating technology is not just about immediate gains but creating a more sustainable, efficient home environment for the future. Embrace these innovations as a long-term strategy for improved comfort, reduced energy costs, and minimal environmental impact.
Ready to Transform Your Home Heating for Comfort and Savings?
If you are seeking efficient ways to stay warm without rising bills, you are not alone. Many homeowners struggle with outdated systems, lack of insulation, or uncertainty about smart heating choices. Our article has shown how small changes like improved insulation, regular maintenance, and investing in advanced technology can make a substantial difference. If you want peace of mind and lower costs, let trusted professionals turn these strategies into reality for your home.
Take the next step with a partner who understands both comfort and efficiency. At Thermatek Heating, our Gas Safe Registered engineers specialise in tailored solutions from smart thermostat installations to expert boiler servicing, renewable heating like air source heat pumps, and reliable insulation support. Do not let another winter pass with uncertainty. Visit https://thermatekheating.co.uk today for a free quote and experience how local expertise can maximise your home’s warmth and savings. Speak with us now and discover just how much better your heating can work for you.
Frequently Asked Questions
How can I assess the efficiency of my current heating system?
Understanding your heating system’s efficiency involves conducting a visual inspection of key components like the boiler and radiators, checking for signs of wear or rust. Obtaining an Energy Performance Certificate can also provide insights into your system’s performance and areas for improvement.
What are effective strategies for improving insulation and draught-proofing in my home?
Start by identifying cold spots in your home, particularly near windows and doors. Consider insulating loft spaces and cavity walls to reduce heat loss. For draught-proofing, check window seals and use self-adhesive foam strips or door seals to close any gaps that allow cold air in.
How should I set my thermostat for optimal heating efficiency?
Aim for an indoor temperature of 20-21 degrees Celsius during the day. Lower the temperature by 2-3 degrees at night or when the house is unoccupied. Consider using programmable or smart thermostats to create tailored heating schedules that align with your daily routine.
Why is regular maintenance important for my heating system?
Regular maintenance helps extend your heating system’s lifespan, prevents unexpected breakdowns, and ensures optimal energy performance. Annual professional servicing can identify potential issues early, allowing your system to operate efficiently year-round.
Recommended
- Understanding Energy Efficient Heating For Your Home - Thermatek Heating
- Understanding The Best Temperature For Heating Your Home - Thermatek Heating
- Understanding Sustainable Heating Systems Today - Thermatek Heating
- Which Heating System Is Best? Understanding Your Options - Thermatek Heating
- Essential Heating System Maintenance Guide for Homeowners - 8th Bend Plumbing Heating and Cooling
- Winter Saving Tips - Colley Refrigeration