
Essential Air Source Heat Pump Installation Guide
Preparing your home for an air source heat pump is not just about picking the right equipment, it demands a close look at what you already have. Many older properties with traditional systems discover that substantial upgrades are needed before installation even begins. Yet what surprises most homeowners is that even good equipment will underperform if your insulation or electrics are not up to scratch. The secret to efficient heating is often hidden in the basics, where a single overlooked detail can cut system efficiency by up to 30%.
Table of Contents
- Step 1: Assess Your Current Heating System
- Step 2: Choose The Right Air Source Heat Pump
- Step 3: Prepare The Installation Site
- Step 4: Install Indoor And Outdoor Units
- Step 5: Connect Electrical And Plumbing Systems
- Step 6: Test The System And Ensure Proper Functionality
Quick Summary
| Key Point | Explanation |
|---|---|
| 1. Conduct a comprehensive heating system assessment | Evaluate your existing heating setup to ensure it’s compatible with a new heat pump installation. Insulation and electrical capacity are critical factors. |
| 2. Select the right size and model of heat pump | Choose an air source heat pump that matches your property’s heating requirements and climate for optimal performance. Consult a professional for accurate calculations. |
| 3. Prepare the site for installation | Ensure the installation area is clear with proper ventilation and a sturdy foundation for both indoor and outdoor units to prevent future issues. |
| 4. Ensure electrical and plumbing connections are secure | Connect the heat pump’s electrical and plumbing systems professionally to avoid leaks and ensure safety; proper installation is vital for system efficiency. |
| 5. Test the system thoroughly after installation | Conduct comprehensive tests to verify performance and efficiency; ensuring all components function correctly is essential for reliable heating. |
Step 1: Assess Your Current Heating System
Before embarking on your air source heat pump installation, a comprehensive assessment of your existing heating system is crucial. This initial evaluation will determine your property’s readiness and highlight potential modifications needed for optimal heat pump performance.
Start by conducting a thorough examination of your current heating infrastructure. Look closely at your existing radiators, pipework, and central heating system. Older properties with traditional heating setups might require substantial upgrades to accommodate an air source heat pump effectively. Pay special attention to your home’s insulation levels, as heat pumps operate most efficiently in well-sealed environments with minimal heat loss.
Your assessment should include a detailed energy performance audit. Measure and record your property’s current heat loss characteristics by checking wall, roof, and floor insulation standards. Poorly insulated homes will struggle to maintain comfortable temperatures with heat pump technology, potentially reducing system efficiency by up to 30%. Professional energy assessors can provide precise measurements and recommend specific improvements.
Electrical infrastructure represents another critical evaluation point. Air source heat pumps demand significant electrical capacity, so inspect your property’s main electrical panel and wiring. Confirm that your current electrical system can support the new heat pump’s power requirements without overloading circuits. Learn more about heating system compatibility with our expert installation guidelines.
Key verification criteria for successful system assessment include:
- Confirmed adequate insulation levels
- Verified electrical system capacity
- Assessed radiator and pipework compatibility
- Measured current heating system performance
Consult a qualified heating engineer who can provide a professional evaluation and recommend specific modifications. Their expertise will help you understand whether your property is an ideal candidate for an air source heat pump installation and what preparatory work might be necessary.
A meticulous initial assessment sets the foundation for a successful heat pump implementation, ensuring optimal performance, energy efficiency, and long-term comfort in your home.
Below is a checklist table summarising key verification criteria for the initial system assessment, helping you confirm property suitability for a heat pump installation.
| Assessment Area | What to Check | Why It Matters |
|---|---|---|
| Insulation Levels | Walls, roof, and floors are well-insulated | Reduces heat loss, improves efficiency |
| Electrical System Capacity | Main panel and wiring can support heat pump | Prevents overload, ensures safe operation |
| Radiator & Pipework Compatibility | Existing infrastructure suitable for heat pumps | Avoids need for major upgrades |
| Heating System Performance | Current setup meets basic heating needs | Identifies necessary modifications |
Step 2: Choose the Right Air Source Heat Pump
Selecting the appropriate air source heat pump represents a critical decision that directly impacts your home’s energy efficiency, comfort, and long-term heating performance. This step requires careful consideration of multiple factors to ensure you invest in a system perfectly tailored to your specific property requirements.
Property size and heat requirements form the fundamental starting point for your selection. Heat pumps are not one-size-fits-all solutions. Carefully measure your total floor area and calculate the heating demand. Professional heating engineers use specialized calculations to determine the precise heat output needed, considering factors like room dimensions, insulation quality, window sizes, and local climate conditions. An undersized unit will struggle to maintain comfortable temperatures, while an oversized system wastes energy and increases operational costs.
Consider the climate performance characteristics of different heat pump models. Modern air source heat pumps come with varying efficiency ratings that indicate their performance across different temperature ranges. Look specifically for cold climate heat pump models if you live in regions experiencing significant temperature fluctuations. These units maintain high efficiency even when external temperatures drop, providing reliable heating during winter months.
Electrical compatibility represents another crucial selection criterion. Examine your property’s electrical infrastructure and confirm it can support the heat pump’s power requirements. Some advanced models demand three-phase electrical connections, which might necessitate additional electrical system upgrades. Explore our comprehensive heat pump installation guidance for detailed technical insights.
Key verification criteria for selecting the right air source heat pump include:
- Matched heating capacity to property size
- Appropriate climate performance rating
- Confirmed electrical system compatibility
- Energy efficiency certifications
- Manufacturer warranty coverage
Consult with professional heating engineers who can provide personalized recommendations based on a thorough assessment of your specific property characteristics. Their expertise ensures you select a heat pump system that delivers optimal performance, energy efficiency, and long-term reliability.
Step 3: Prepare the Installation Site
Preparing the installation site is a critical phase that sets the foundation for a successful air source heat pump implementation. This step involves creating an optimal environment for both the indoor and outdoor components of your heating system, ensuring maximum efficiency and longevity.
Outdoor unit placement requires meticulous planning and consideration. Select a location that provides sufficient clearance from walls, vegetation, and potential obstructions. The area should offer unimpeded airflow while protecting the unit from direct wind exposure and excessive debris accumulation. Typically, you’ll want a minimum of 30 centimetres of clear space around the unit, with particular attention to maintaining proper ventilation and accessibility for future maintenance.
Ground preparation becomes paramount for outdoor unit stability. Create a level, sturdy mounting surface using a concrete pad or robust mounting brackets. Ensure the foundation can withstand local weather conditions and provides adequate drainage to prevent water accumulation. If installing on an existing surface, verify its structural integrity and load-bearing capacity. Some installations might require professional ground levelling or specialized mounting solutions to guarantee optimal unit performance.
Indoor preparation involves equally important considerations. Assess your property’s interior layout to determine the most suitable location for the indoor heat pump unit and associated pipework. Check our expert installation recommendations for precise positioning guidelines. Potential mounting locations should offer unrestricted air circulation, proximity to electrical connections, and minimal interference with existing interior structures.
Key verification criteria for site preparation include:
- Clear outdoor unit placement with proper ventilation
- Level and stable mounting surface
- Adequate electrical connection proximity
- Minimal obstructions to airflow
- Accessible location for future maintenance
Consult a professional heating engineer who can conduct a comprehensive site assessment. Their expertise ensures your installation site meets all technical requirements, potentially preventing costly modifications or performance issues down the line. Thorough site preparation transforms a standard installation into an optimized heating solution tailored to your specific property characteristics.
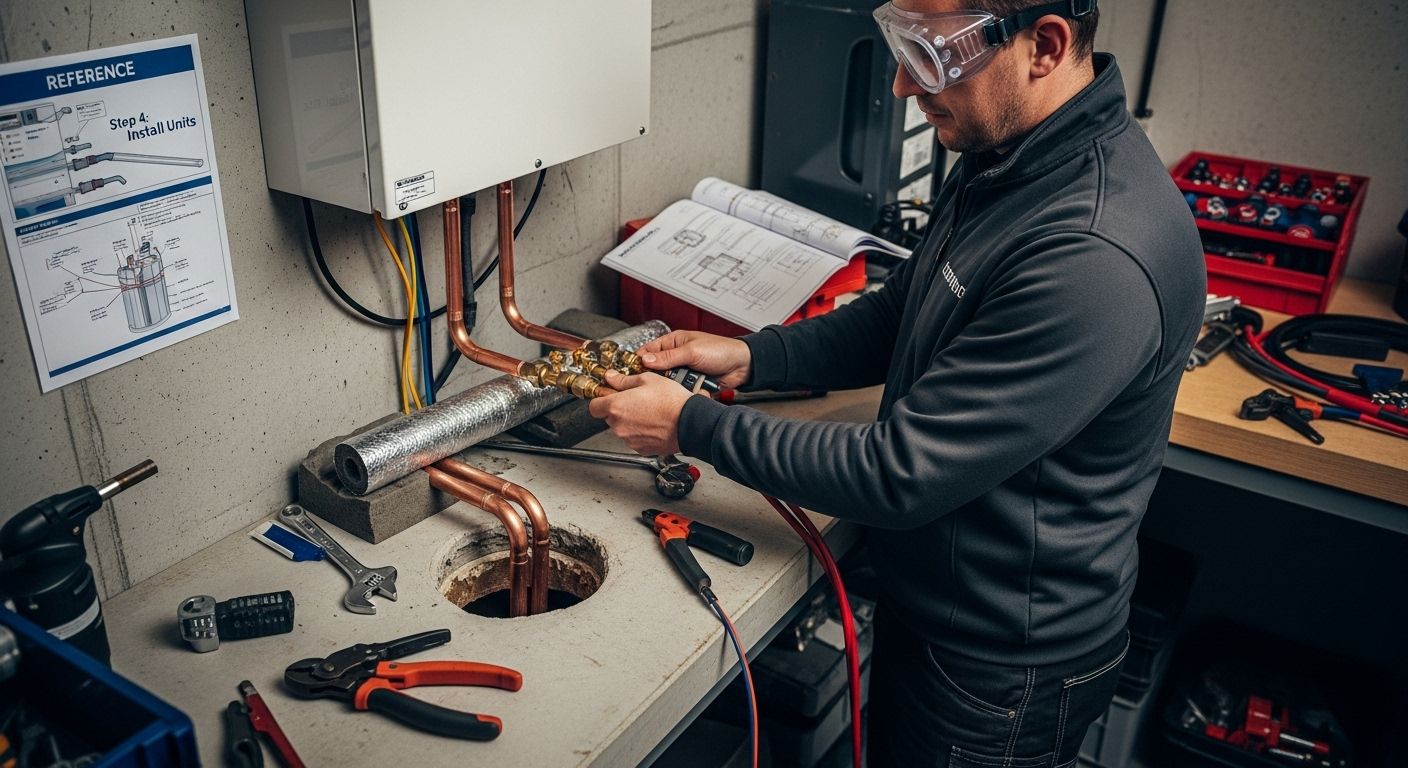
Step 4: Install Indoor and Outdoor Units
Installing the indoor and outdoor units of an air source heat pump requires precision, technical expertise, and careful attention to detail. This critical step transforms your preparation work into a functional heating system that will serve your home for years to come.
The outdoor unit installation demands absolute precision in positioning and mounting. Begin by securing the mounting bracket to the prepared surface, ensuring it remains perfectly level and capable of supporting the unit’s full weight. Use heavy-duty anchor bolts that can withstand local weather conditions and potential environmental stress. Position the unit to maintain recommended clearance from walls and potential obstructions, allowing optimal airflow and minimizing potential operational interference.
Indoor unit placement requires equally meticulous consideration. Select a location that provides unobstructed air circulation and convenient access for future maintenance. Wall-mounted units should be installed at an appropriate height, typically 2.3 to 2.5 metres above floor level, with clear space around the unit to ensure efficient air distribution. Proper mounting involves using robust wall brackets and ensuring perfect horizontal alignment to prevent condensation issues and maintain optimal system performance.
Connecting the indoor and outdoor units represents a complex technical process involving refrigerant line installation, electrical connections, and precise system calibration. Explore our professional installation guidelines for comprehensive insights into this intricate process. Specialized tools and expertise are required to create secure, leak-free connections between components, including proper insulation of refrigerant lines and precise routing to minimize potential energy losses.
Key verification criteria for unit installation include:
- Perfectly level outdoor unit mounting
- Secure wall brackets for indoor unit
- Correct refrigerant line routing
- Proper electrical connection
- Unobstructed airflow around both units
- Precise system alignment
Professional installation is strongly recommended, as improper setup can significantly compromise the heat pump’s efficiency, performance, and long-term reliability. Certified heating engineers possess the technical skills and specialized equipment necessary to ensure a flawless installation that maximizes your system’s potential and protects your investment.
Step 5: Connect Electrical and Plumbing Systems
Connecting the electrical and plumbing systems represents a critical phase in air source heat pump installation that demands precision, technical expertise, and strict adherence to safety protocols. This complex process bridges the gap between your carefully selected equipment and a fully functional heating system.
Electrical connection requires meticulous planning and professional-grade expertise. Begin by confirming that your property’s electrical infrastructure can support the heat pump’s power requirements. This typically involves a comprehensive assessment of your main electrical panel, ensuring sufficient amperage and appropriate circuit protection. Dedicated circuits are essential, as air source heat pumps draw substantial electrical current during operation. Professional electricians will install specialized breakers, verify proper grounding, and ensure all connections meet current building and electrical safety standards.
Plumbing connections demand equally careful consideration. The heat pump’s refrigerant lines and condensate drainage system must be installed with absolute precision to prevent potential leaks or performance issues. Proper insulation of refrigerant lines is crucial to maintain system efficiency and prevent energy loss. Pay special attention to line routing, ensuring minimal bends and maintaining manufacturer-recommended pipe lengths. Explore our detailed installation guidelines for comprehensive insights into technical connection requirements.
Conducting a thorough system pressure test becomes paramount at this stage. Professionally trained technicians will use specialized equipment to verify the integrity of all connections, checking for potential refrigerant leaks and ensuring optimal system pressure. This diagnostic process helps identify and resolve any potential issues before final commissioning.
Key verification criteria for electrical and plumbing connections include:
- Confirmed electrical panel capacity
- Dedicated circuit installation
- Proper grounding and circuit protection
- Leak-free refrigerant line connections
- Correct condensate drainage setup
- Successful pressure and integrity testing
While the temptation might exist to attempt a DIY installation, the complexity of electrical and plumbing connections strongly recommends professional intervention. Certified heating engineers possess the technical skills, specialized tools, and regulatory knowledge necessary to ensure a safe, efficient, and compliant heat pump installation that protects both your investment and your property.
Step 6: Test the System and Ensure Proper Functionality
Testing your newly installed air source heat pump is a critical final step that transforms your technical installation into a reliable, efficient heating system. This comprehensive evaluation ensures every component operates precisely as designed, protecting your investment and guaranteeing optimal performance.
Initial system startup requires methodical and careful approach. Begin by powering the system and observing its first operational cycle carefully. Listen for unusual sounds, monitor airflow from indoor units, and track temperature changes. Professional technicians will conduct a series of diagnostic tests to verify refrigerant charge, electrical connections, and overall system responsiveness. Pay close attention to how quickly the system reaches desired temperatures and the consistency of heat distribution throughout your property.
Performance verification involves multiple diagnostic procedures that go beyond simple operational checks. Technicians will measure system efficiency by comparing actual performance against manufacturer specifications. This includes assessing refrigerant pressures, checking electrical consumption, and evaluating heat output across different operational modes. Temperature differentials and system response times provide crucial insights into the heat pump’s functional integrity. Any variations from expected performance parameters might indicate installation issues requiring immediate adjustment.
Explore our comprehensive system testing guidelines for deeper understanding of technical verification processes. The goal is not just confirming basic functionality but ensuring your heat pump delivers maximum energy efficiency and consistent comfort.
Key verification criteria for system testing include:
- Consistent temperature achievement
- Quiet and smooth operational sounds
- Accurate refrigerant pressure readings
- Proper electrical consumption
- Balanced airflow across all zones
- No error codes or warning indicators
While comprehensive testing might seem complex, it represents the final quality assurance step that transforms your technical installation into a reliable heating solution. Professional engineers will provide detailed performance reports, documenting system capabilities and highlighting any potential future maintenance requirements. This meticulous approach guarantees your air source heat pump will deliver efficient, reliable heating for years to come.
Professional Heat Pump Installation in Edinburgh and Midlothian
Have you noticed how complex and demanding air source heat pump installation can be? From assessing your current system and checking insulation to managing technical electrical and plumbing work, every step is crucial. Worrying about system compatibility, energy loss due to poor insulation, or costly mistakes during installation can make the process feel overwhelming. The good news is, Thermatek Heating’s qualified Gas Safe Registered engineers are ready to ensure your investment leads to efficiency, reliability, and long-term comfort in your property.
Stop letting doubts or uncertainties hold you back from a more energy-efficient home. Visit Thermatek Heating to request a free quote or speak directly with our friendly team. Secure your installation with local professionals who prioritise your safety, energy bills, and comfort. Book your assessment now so you can enjoy the benefits of a properly installed heat pump system without the risk of hidden problems or future inefficiencies.
Frequently Asked Questions
What are the initial steps before installing an air source heat pump?
Before installation, assess your current heating system, including radiators, insulation, and electrical capacity. A professional evaluation will help determine your property’s readiness for a heat pump installation.
How do I select the right air source heat pump for my property?
When choosing an air source heat pump, consider your property’s size, heating requirements, and local climate conditions. It’s essential to match the heat output capacity to your heating demand to ensure efficiency.
What is involved in preparing the installation site for an air source heat pump?
Preparing the site involves selecting appropriate locations for both the indoor and outdoor units, ensuring there is sufficient clearance for airflow, and creating a stable, level mounting surface to support the outdoor unit.
Why is it important to test the air source heat pump system after installation?
Testing the system after installation ensures all components function correctly, verifies energy efficiency, and confirms that the system maintains the desired temperature across your property. Comprehensive testing helps identify any issues that may need addressing to optimize performance.